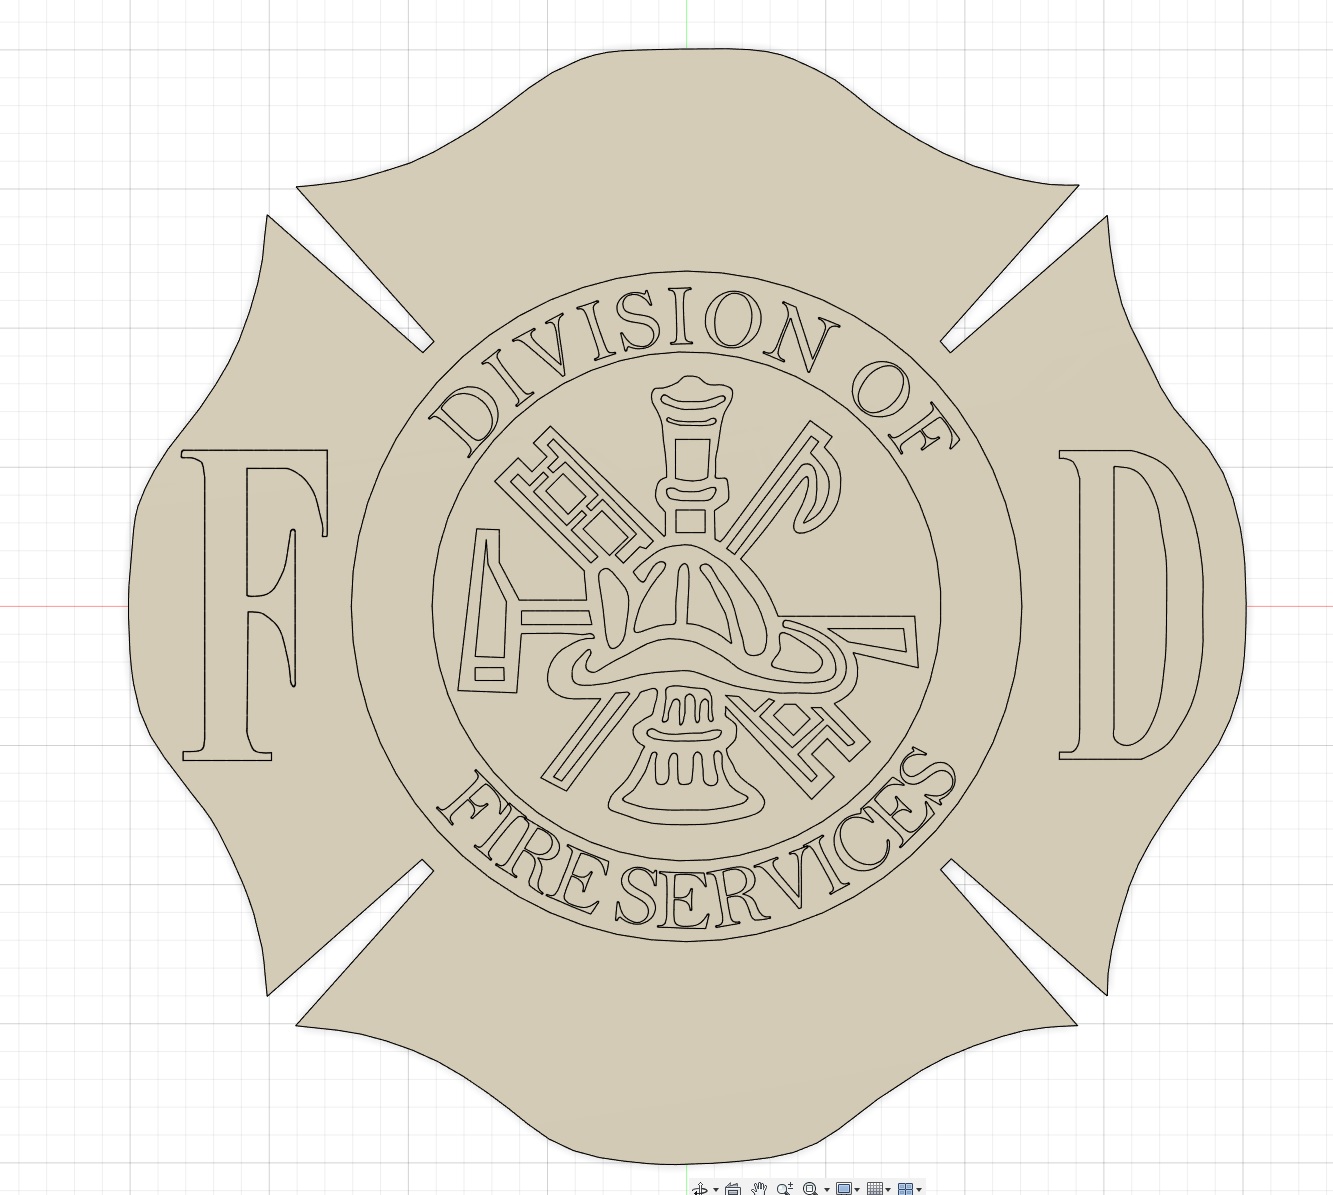
I am working on a large maltese cross project for my mancave and need some help. The cross body is about 45" in diameter, and the center crest and all the lettering will be mounted to some form of standoffs so that it hovers above the cross base. The finished project will have three total layers, with each layer hovering an inch or more above the one below to give it depth. My initial thought is to have 1/8 indexing holes that pass through the letters and the layers below. This will help ensure the letters and crest are indexed properly. My question is about how to attach the lettering to the layer below. With the 1/8 holes, and using some type of standoff spacer, I would think I may still have some movement in the lettering unless I use self-centering screws like a shoulder screw or countersunk. Ideally, I would like to have no visible screws, but not a deal breaker. Any thoughts or ideas on the best way to go about this? The pic below is the project in Fusion 360. I will probably use 16-gauge steel for this and cut on a Crossfire Pro.
Thanks.
When I make decorative wall pieces i like to use Rivnuts. I invert mine so they act as the stand offs. When I dont want exposed hardware I just tack weld studs to the back of the panels.

I do stand off signs quite often. I add hole to the drawing and put each piece in its own layer and copy the holes to the layer. So when I cut the pieces the holes are in line.
I use a small diameter pipe to make the spacers.
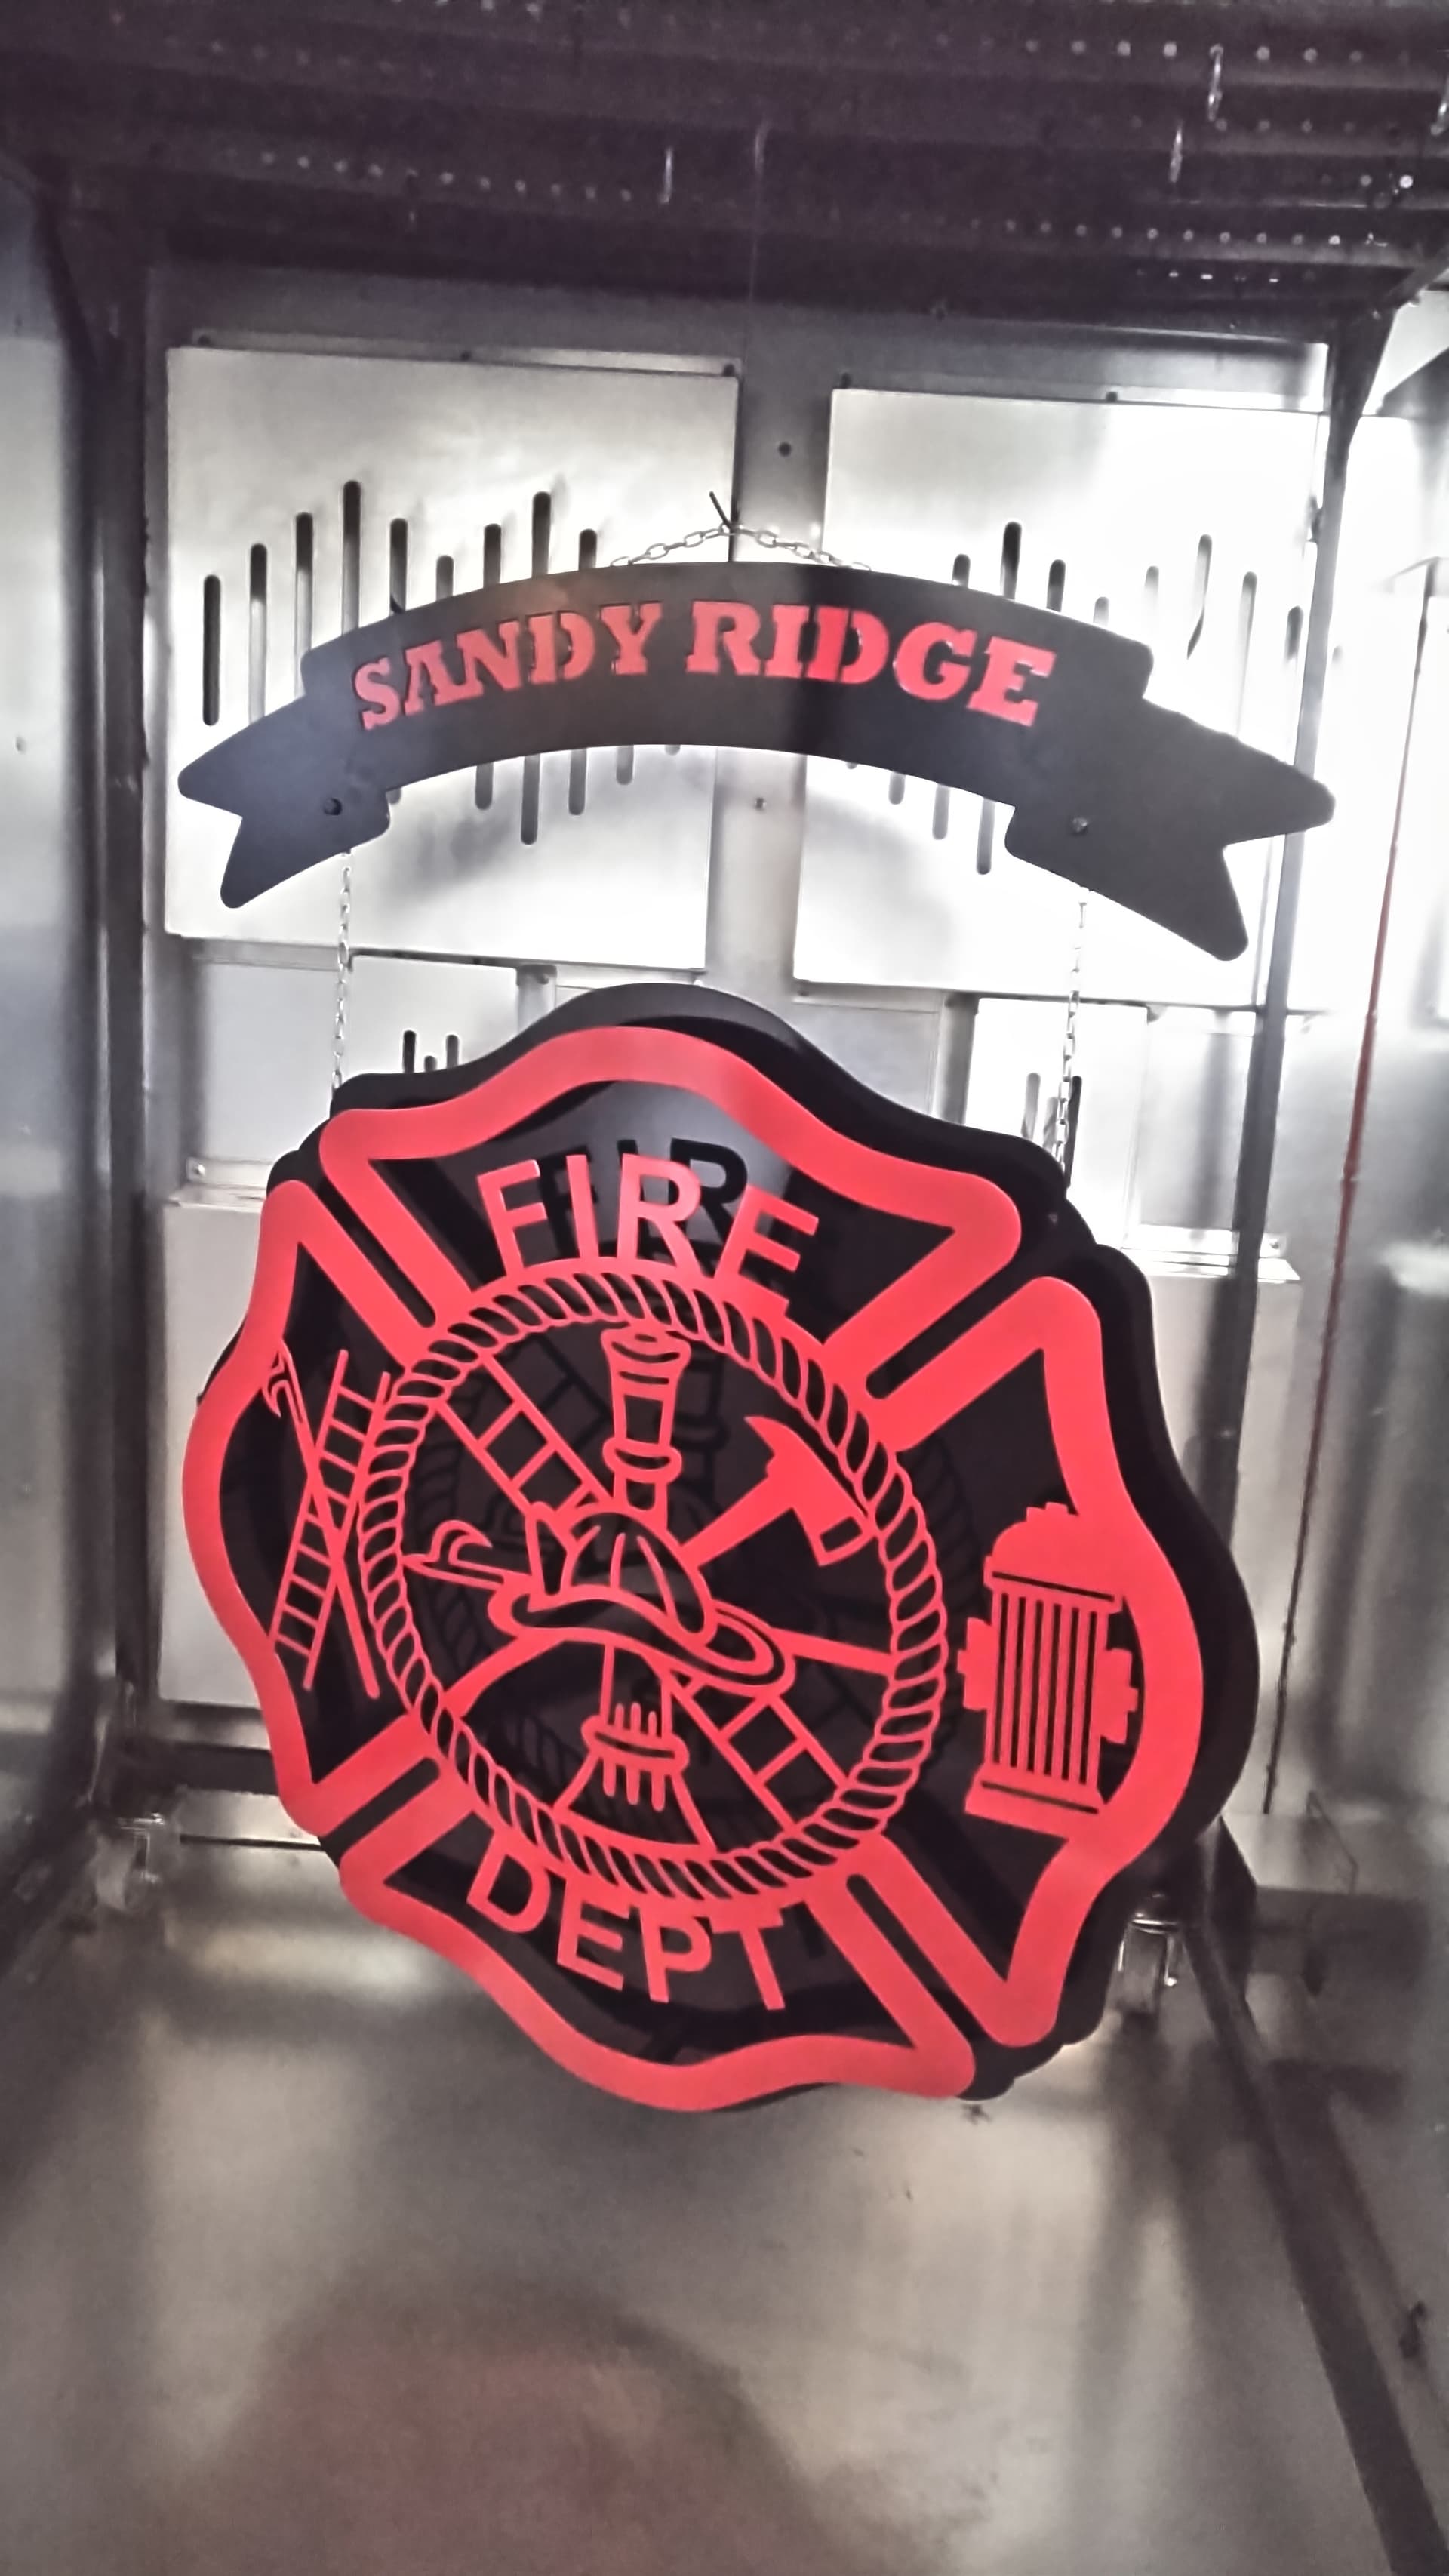
Here is one I did for the local firehouse it doesn’t have multiple layers though. I will include a picture as well of a project that does have several layer it just doesn’t have stand offs.
Thanks guys! So in my project, trying to go with the “hidden” look. With the multiple free floating letters and no visible holes, what would be the best way to ensure alignment of the letters when tacking a pipe or Rivnut to the back?
I add the holes I want to the drawing and just do a separate operation with each piece including the holes. That gives your alignment. I run the all thread all the way through. I tig weld to the front then sand down. I tig weld will generally give me full penetration so I can smooth the front…
Then I don’t weld the pipe in I use it to hide the all thread …
Give me just a few and I will update some more pictures that will give better details.

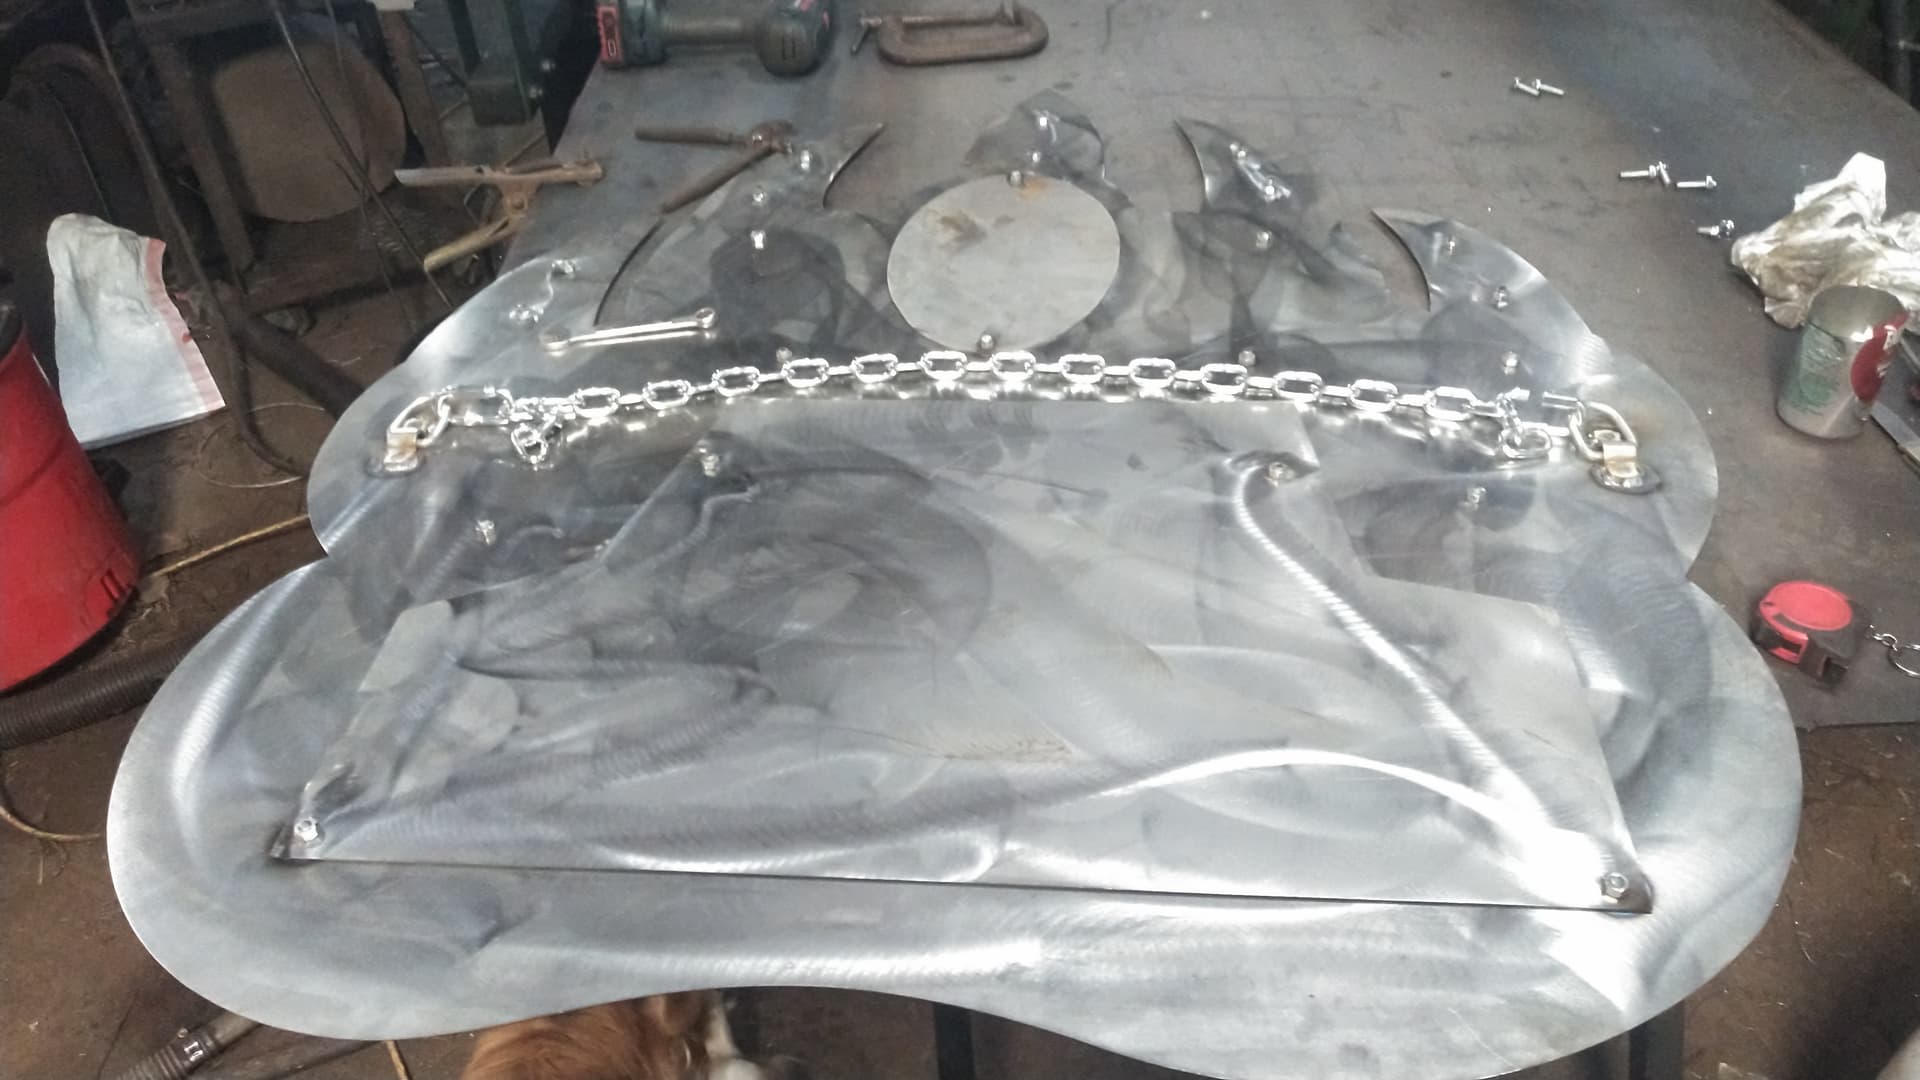
Need better pictures? I have a project ready to assemble I can grab a few pictures this afternoon…
There are several ways to skin a cat. This is the way I do it
Thank you! Exactly what I needed. I will give it a try.
I have not done it yet but I gather the supplies for doing a multi-layer sign using spacers and rivets. You can get cheap spacers make of ABS or expensive aluminum. Here are some ABS:

https://a.co/d/db09BdL
The above size would be adequate for 3/16" rivets. However, I find that rivets are not very reliable to break at the right point. Sometimes they break off inside the rivet (like they should) and other times they break off outside of the actual rivet. It could pose a problem cleaning up.
I like Daniel’s idea with the rivnuts. You would have a reliable, consistent look on the front of the sign. You could paint the machine screws/bolts the color of that layer of the sign, prior to installing.
Spicer Designs has good video on youtube doing a layered sign. I used his method recently and it worked out well.
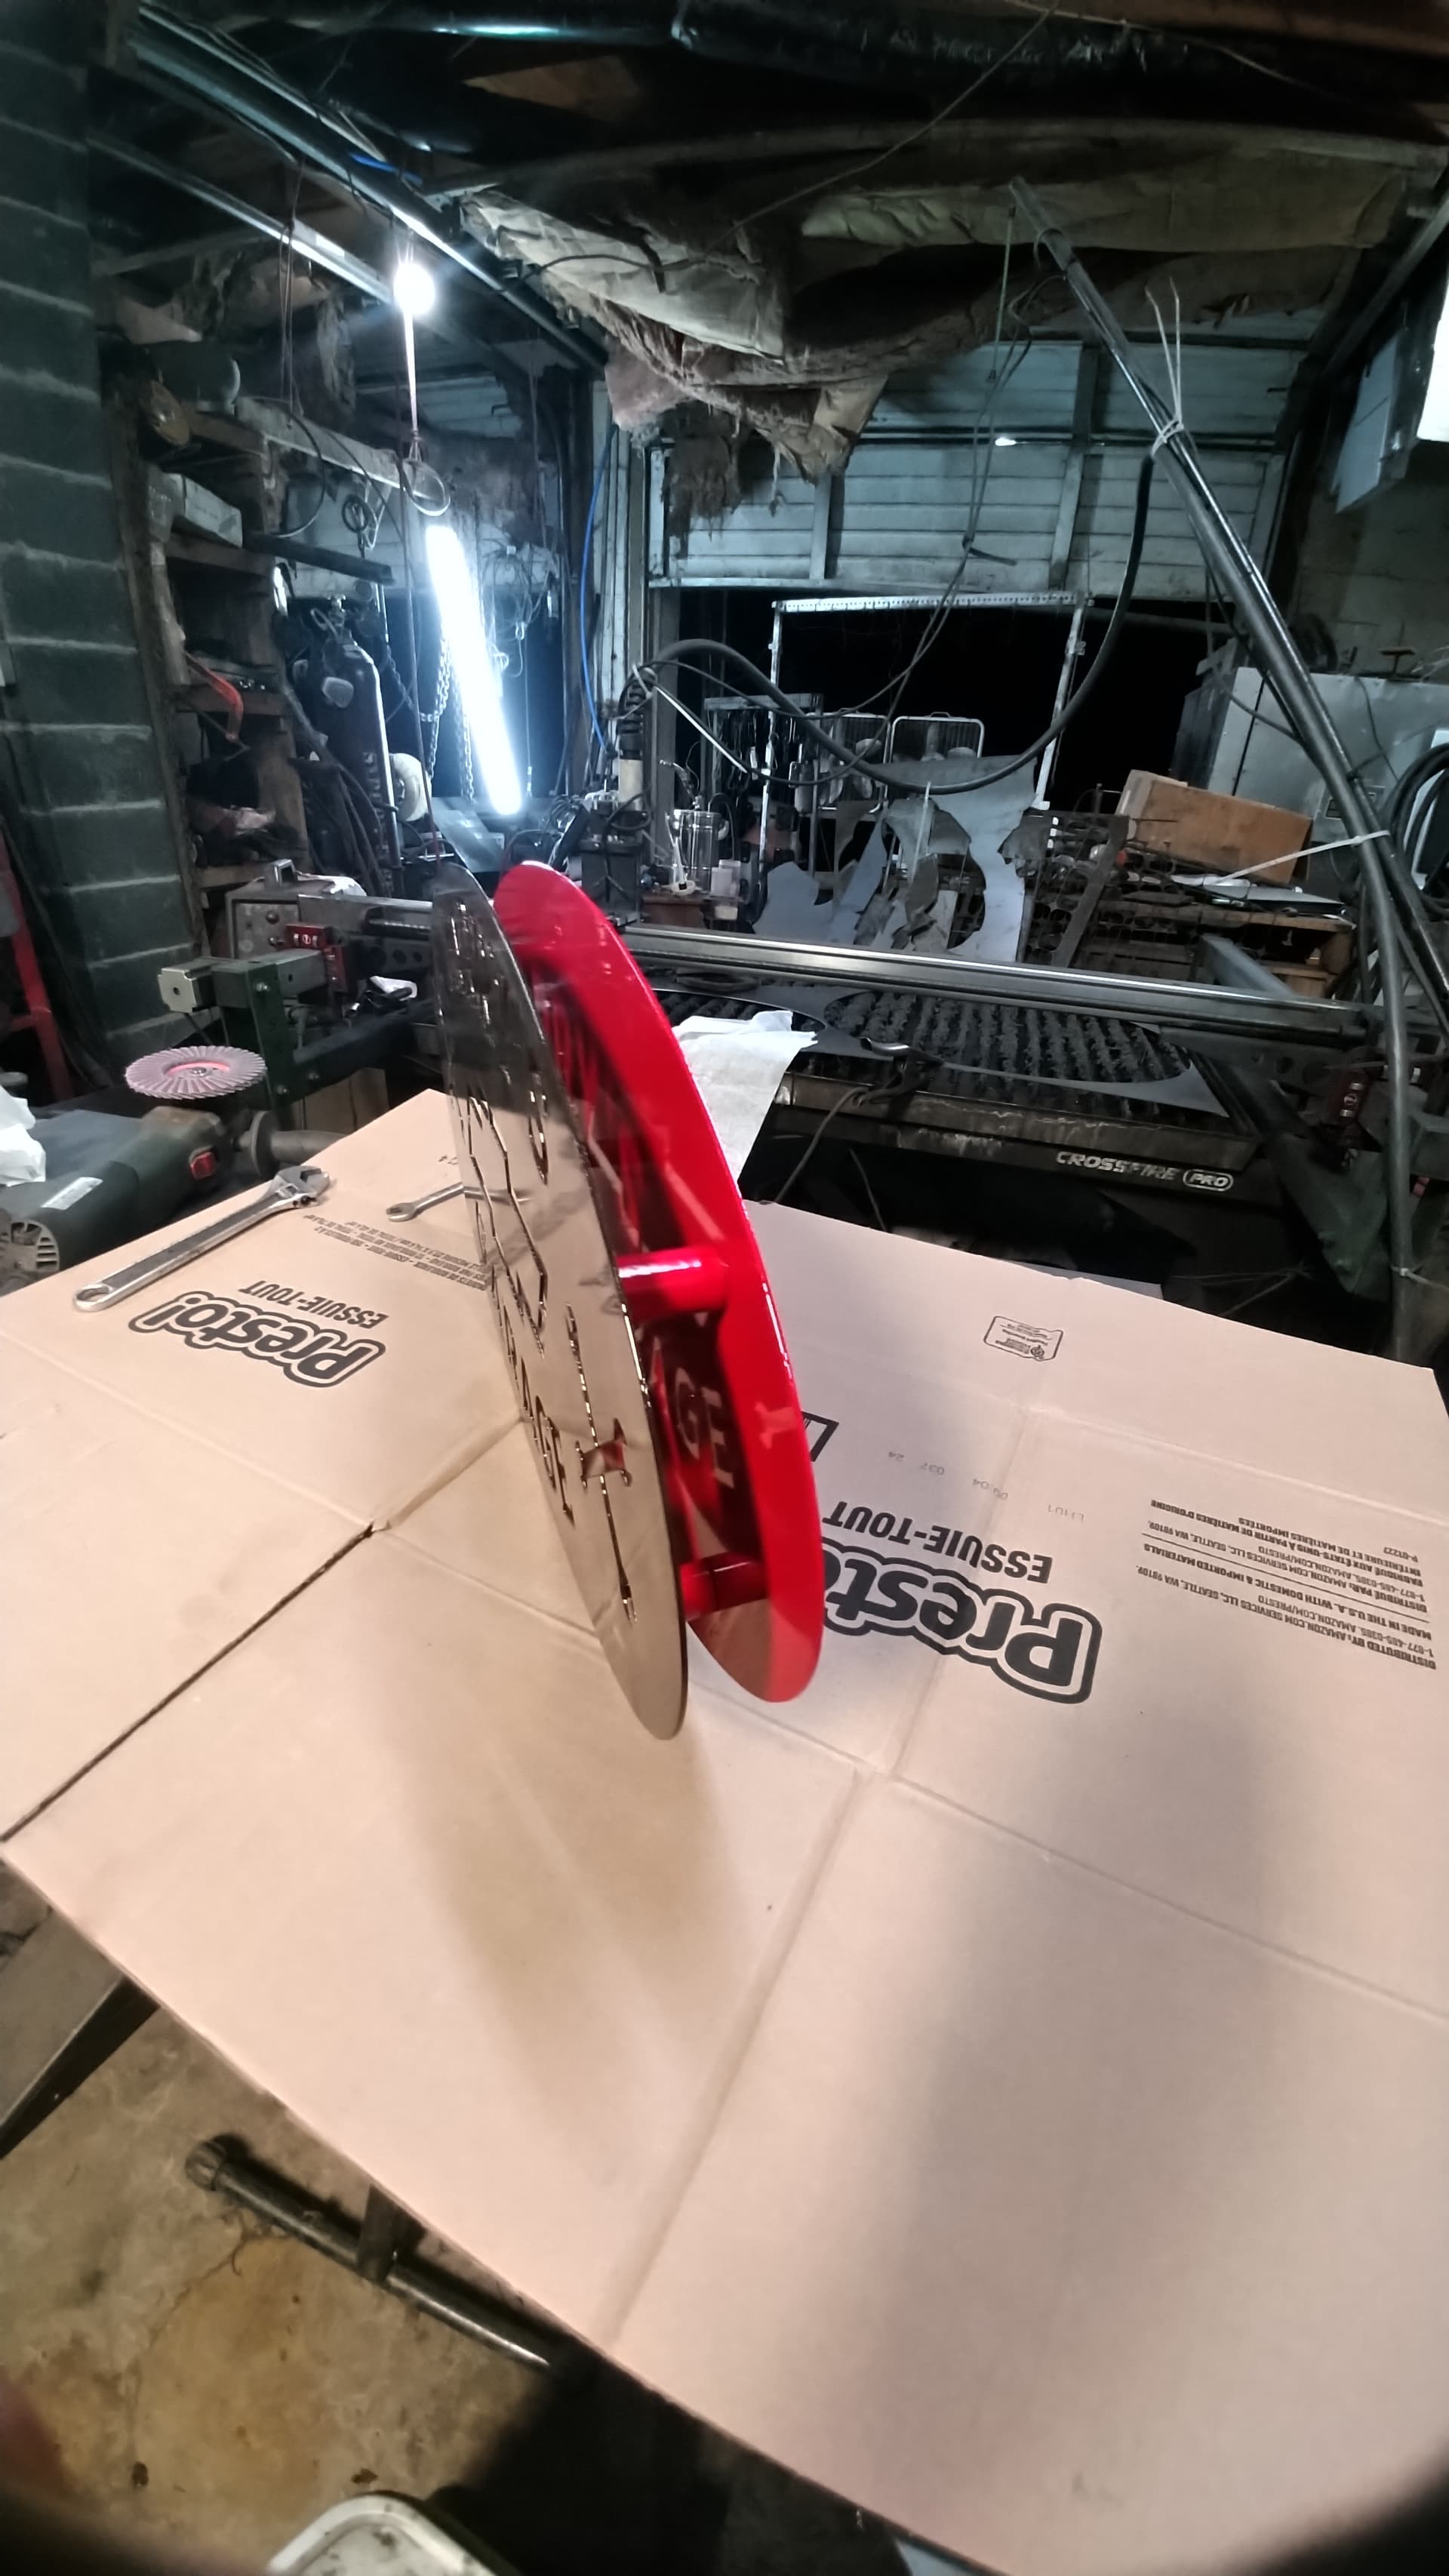
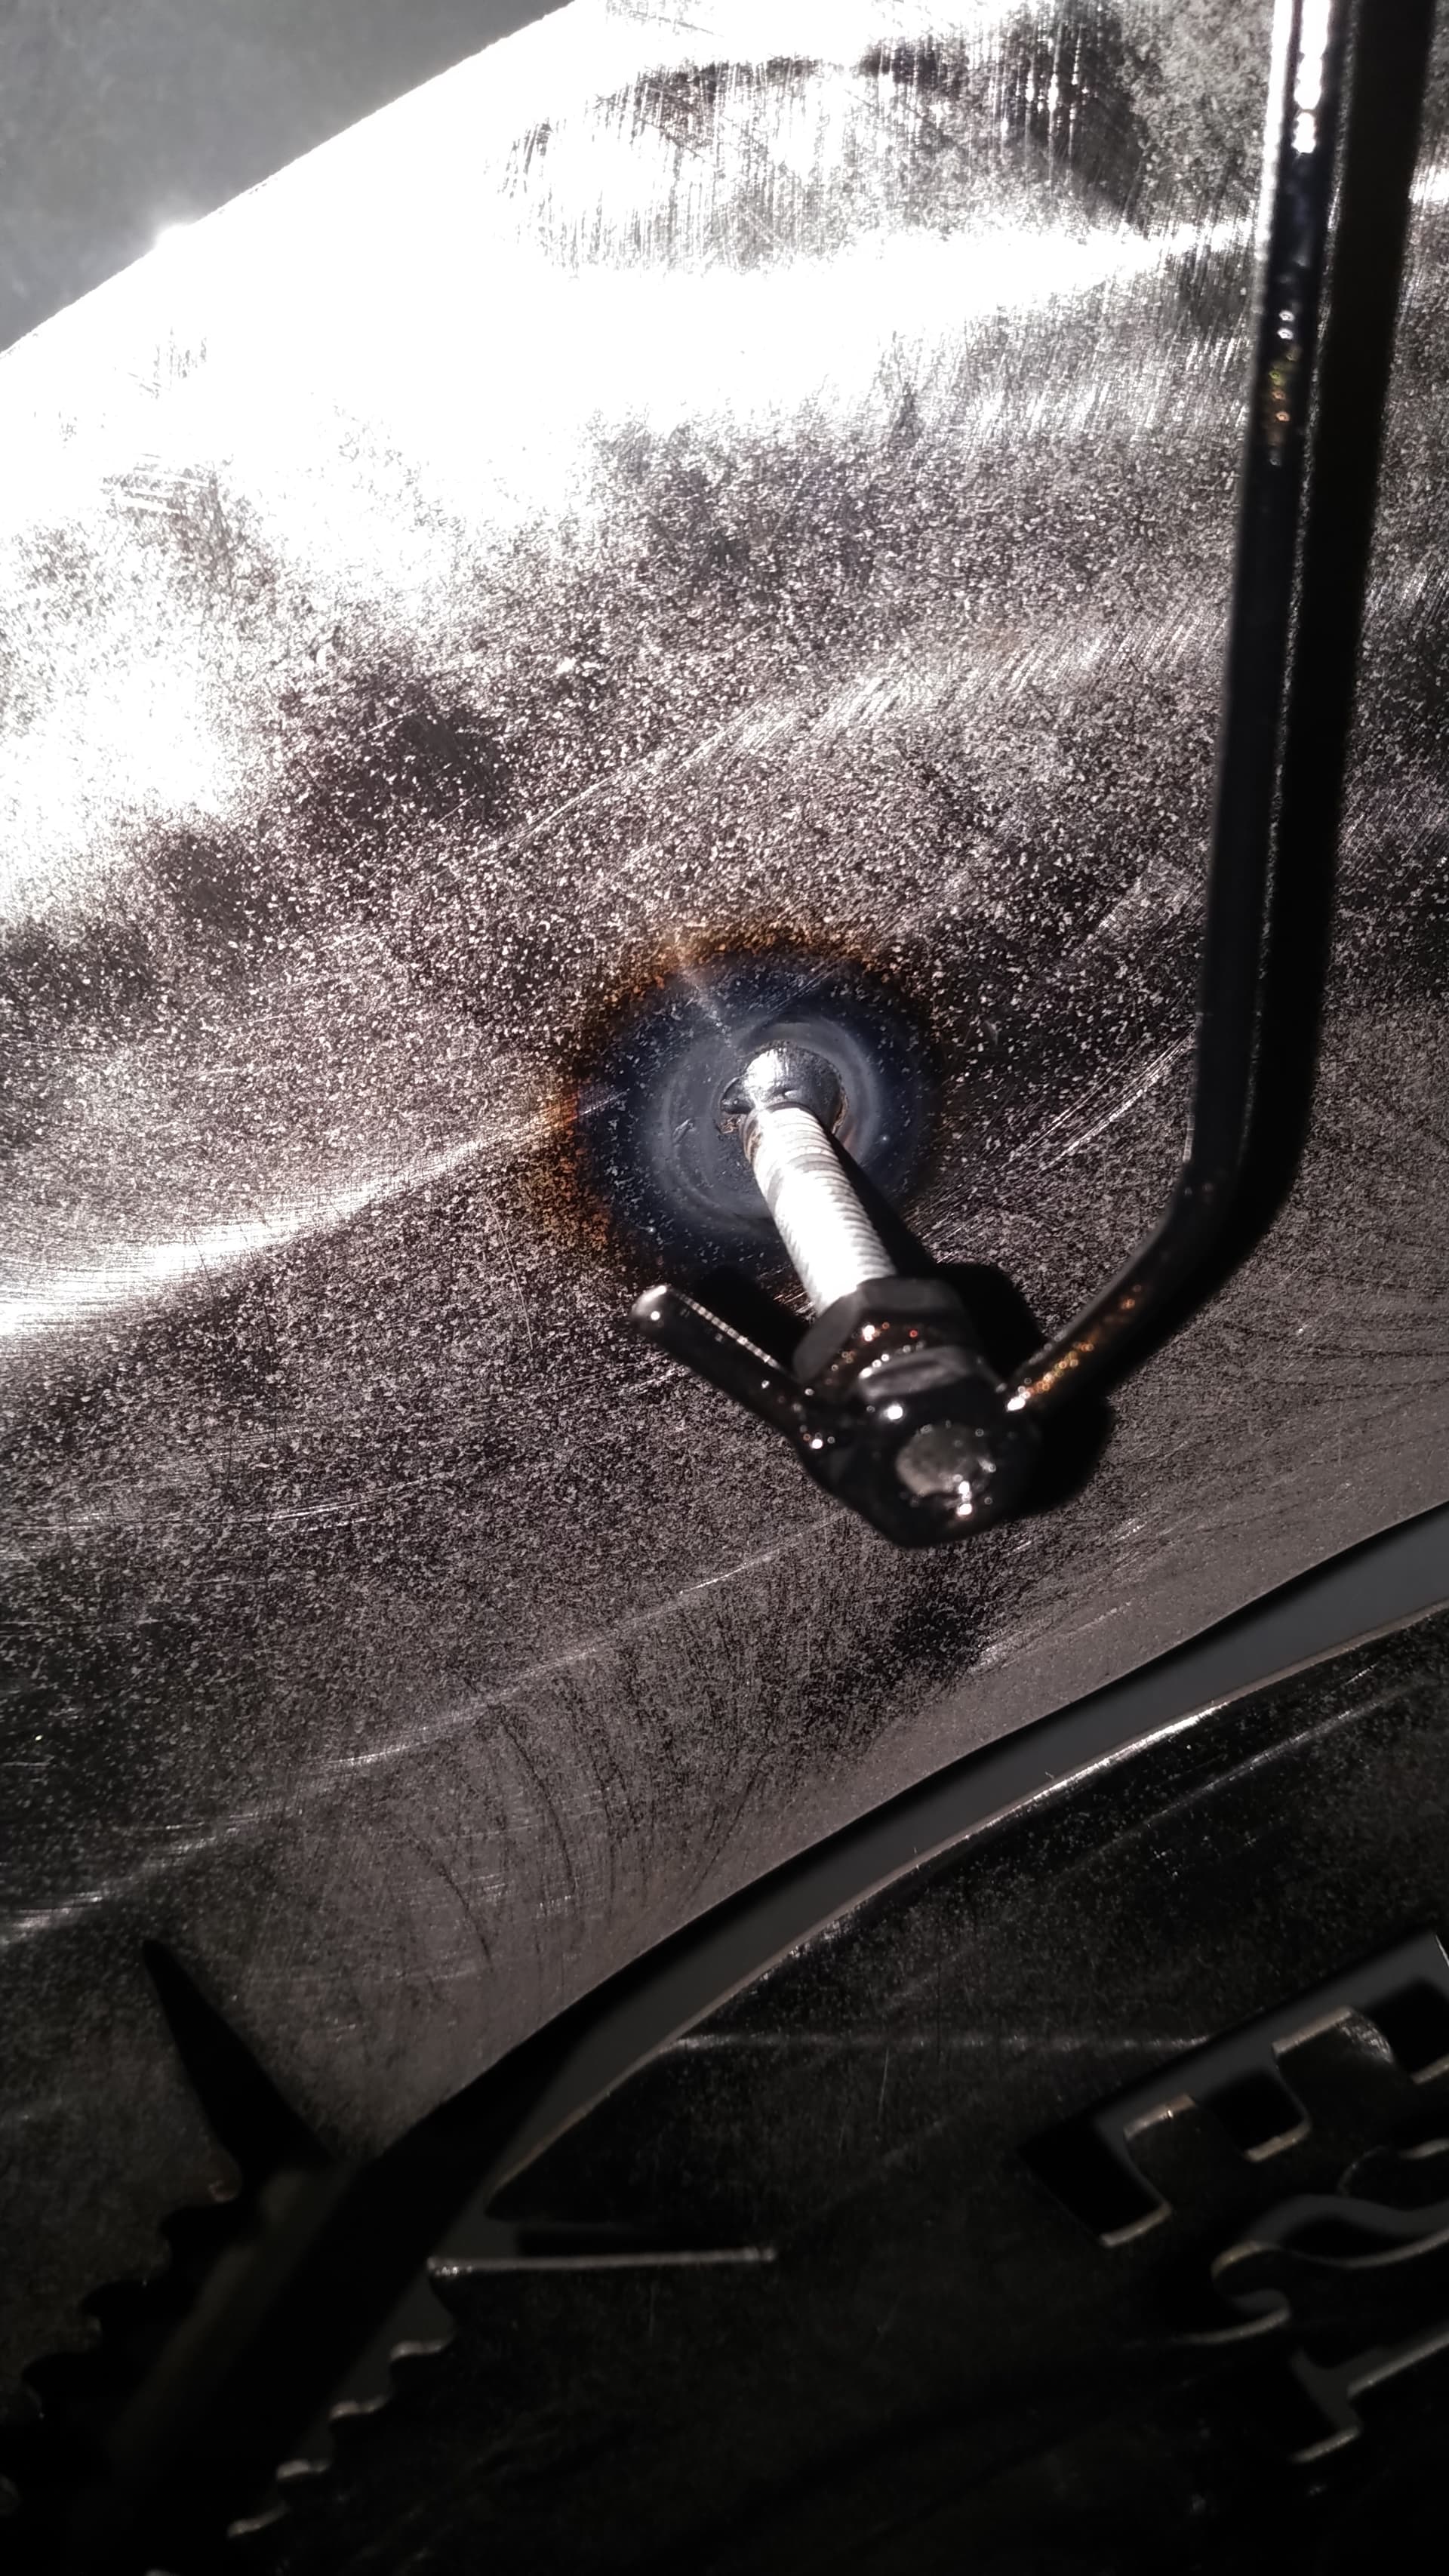
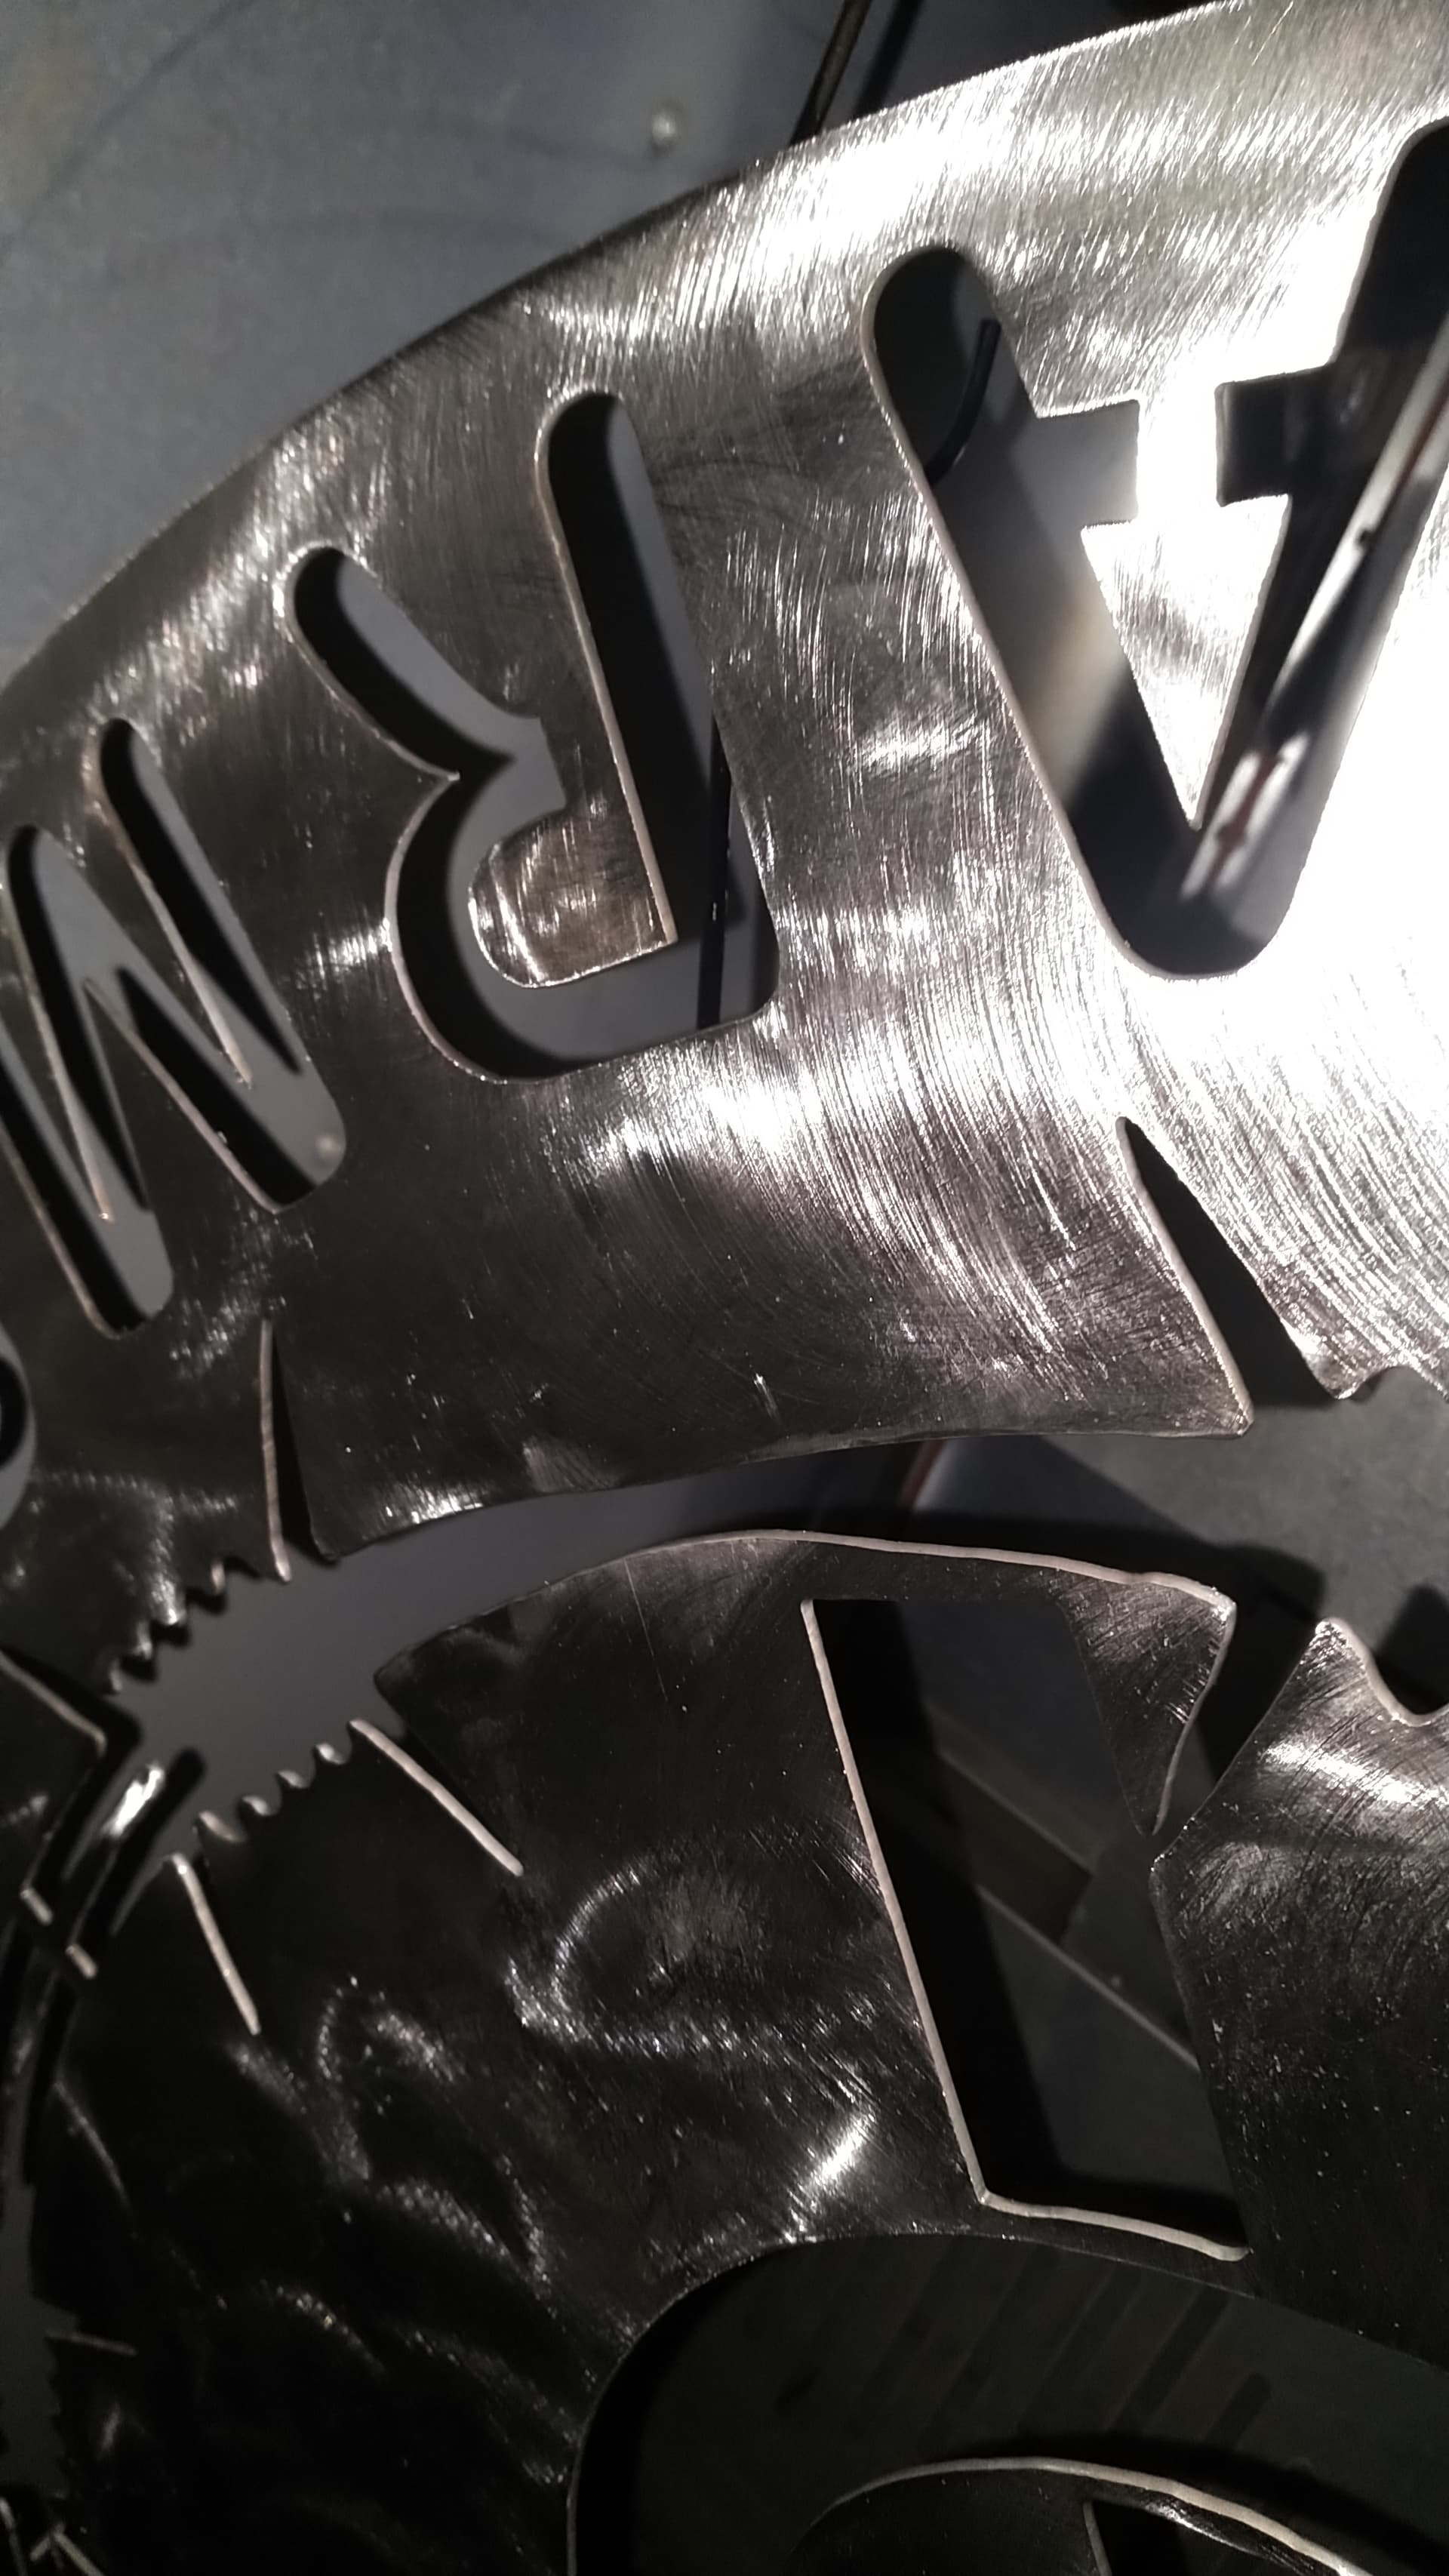
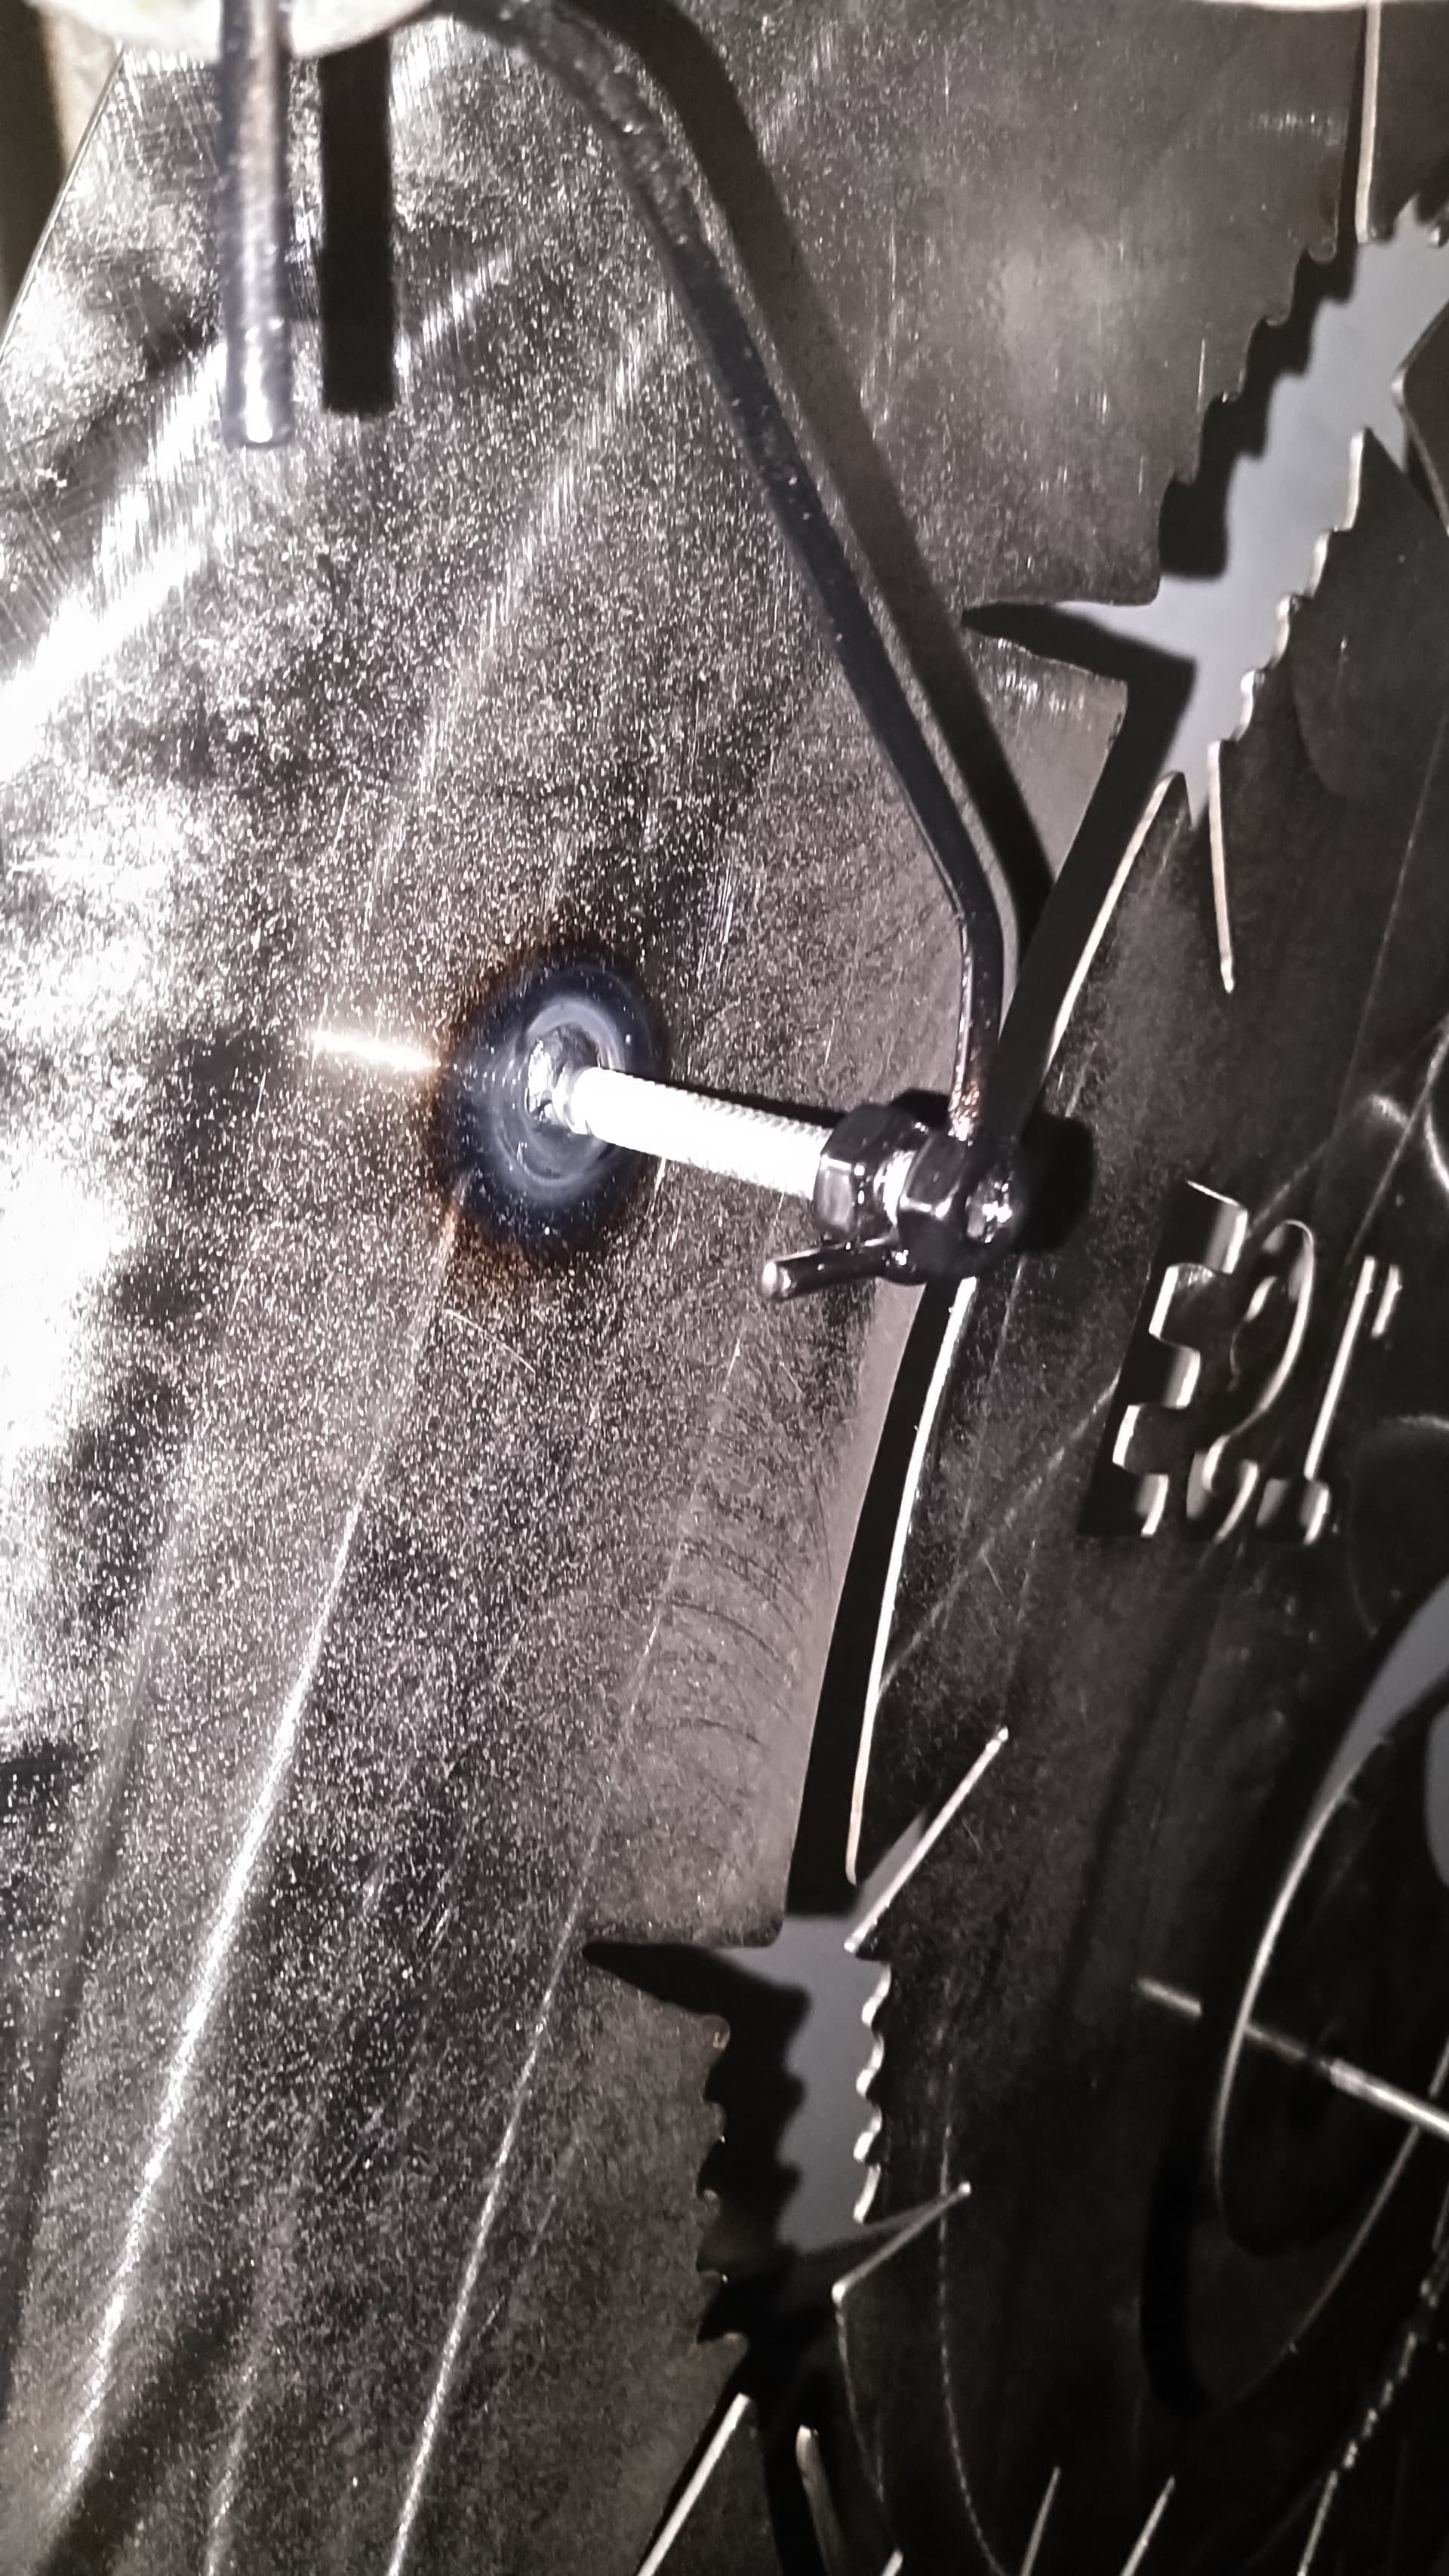
@RETFF here is some pictures I snapped today. The stud is just below the R in the one picture. You can see the weld has good penetration around the stud.
I usually have all thread sticking up about 1/4 . I fire up and flow it into a button making sure it fuses with the face of the sign . Home these pictures gives you some more insight.
Great info. Thank you.


Great design. Yep…you are going to continue to need some front lighting since the metal is opaque (impenetrable for light).
If you don’t want or don’t have the ability for front lighting you could experiment with glow in the dark paint. I have never used any.
Here is one example:
Or you may need to create a shadow box and put a lip on the front that hides some rope light or LED strips.
Or simply install a gallery light.
There are signs, and then there are signs. There are a few guys on here that really make some cool stuff!
Yours is one of them!
Thank you!
Good call on the lighting. The dark pic was just taken for effect, but to your point, I have a cool vintage chrome headlight from a 1930’s era fire truck that I plan on using as a gallery light.
Seems it’s the most accurate way.
It’S more work filling in the holes however