Gremlins and Troubleshooting

2568686779_preview_giphy

I had an issue with my XR where after some time it began getting an odd signal and wanting to bury the torch into the sheet.

This issue seemed to have the torch starting to dive into the sheet at about 45 minutes of cutting.

Today I pulled everything apart went
through every single connection and did a thorough visual inspection.

And I found this little gremlin.


(This is the USB isolator provided with the XR and a USB extension cable)

After this I hit every single connection with contact cleaner I taped a few connections together and zip tied a few others so all the connections were very tight, no wiggle at all.
I also used duct seal on any of the exposed metal connections on the THC loop. This was likely overkill but why not.

Anyhow I seem to be running smooth again.

Which is great because I have a bunch of quarter inch aluminum to cut and that’s a puckery enough task without The machine being flaky.

The point of this topic was

how do you think of troubleshooting ?

what does your troubleshooting mindset and workflow look like?

I’m curious how you guys begin to think through a problem and any of the conscious steps you take.

One of my main things I do being an HVAC technician for years is a thorough visual inspection. Really get in there with a flashlight and scrutinize all the connections and components.

I find a thorough visual inspection to be a great starting point.

8 Likes

That is nasty! I’ve never seen a USB connection breakdown like that and wouldn’t have ever thought of looking at it!

FWIW, Corrosion X is the BEST anticorrosive agent I have ever used. The most extreme example of its effectiveness I encountered is when I was updating a piece of electronics that was outdoors, near my man-made stream. I took the cover off and discovered that condensation had built up about 1/2 inch of water inside the case. The water was covering a portion of the PCB that had a WiFi radio on it - it was still working and, after draining out the water and putting the cover back on, is still working - 3 years later.

I use that now on every connection that ‘might’ be in a harsh environment.

3 Likes

My first thought is: “I need to sort this out…the guys on the forum are going to want to know everything about me including ‘what did you have for breakfast?’”

My second thought is: “Oh, no big deal, I still have my 3D Printer.”

Then I get busy and try to think about what could possibly cause the problem. At the same time I am checking all the things we always ask posters to verify: any alarms on the cutter, air pressure, laptop connection and battery life, consumables, work clamp.

Your situation was one of those super tough ones because you could not reliably reproduce it. 45 minutes into the cut suggests to me something that was heating up or a computer part failing. But if it was variable lengths of time between failure then I would think toward a connection that was loose or broken wire, in other words ‘electrical.’

I have been told having an electrical issue with your vehicle can be very expensive to fix because of the time to track it down. We had an old Lexus ES300 that suddenly started to have the electric door lock that would repeatedly keep locking the door every 2 or 3 seconds. Obviously it ran the battery down and I figured out that I could take the fuse out that controlled the door lock but I also lost power steering of something that was really necessary for driving (Bret would know). I contacted two different mechanics and neither wanted the job. They said ‘get rid of it.’

Well anyway, I am glad you figured it out. Once you figured it out it really is a very satisfying feeling, isn’t it?

Thanks for sharing.

2 Likes

I found the link to the product

I also noticed they have quite a few other products

2 Likes

That’s also what I was thinking

1 Like

I agree with the visual inspection as the best place to start with anything mechanical and with moving parts . I come from a machinist background we do a lot of reconditioning. Every repair job starts with a visual inspection. You can quickly mask a issue if you begin working on things without looking at it.

3 Likes

I would just post on here… My machine is not working right, what should I do?

Just kidding :crazy_face:

1 Like

Gonna be a book @TinWhisperer, will post tomorrow

3 Likes

To be fair, you should have given a description of your problem, stating that you found it and fixed it, then asked how the membership would go about troubleshooting to find the problem to see if yours was faster or lucky.

Could have been a fun interactive thread over a week to see what kind of Q&A you get – I.E. “Does the torch raise up and down manually without fail?” “If I do xxxx, did the problem move or go away?”

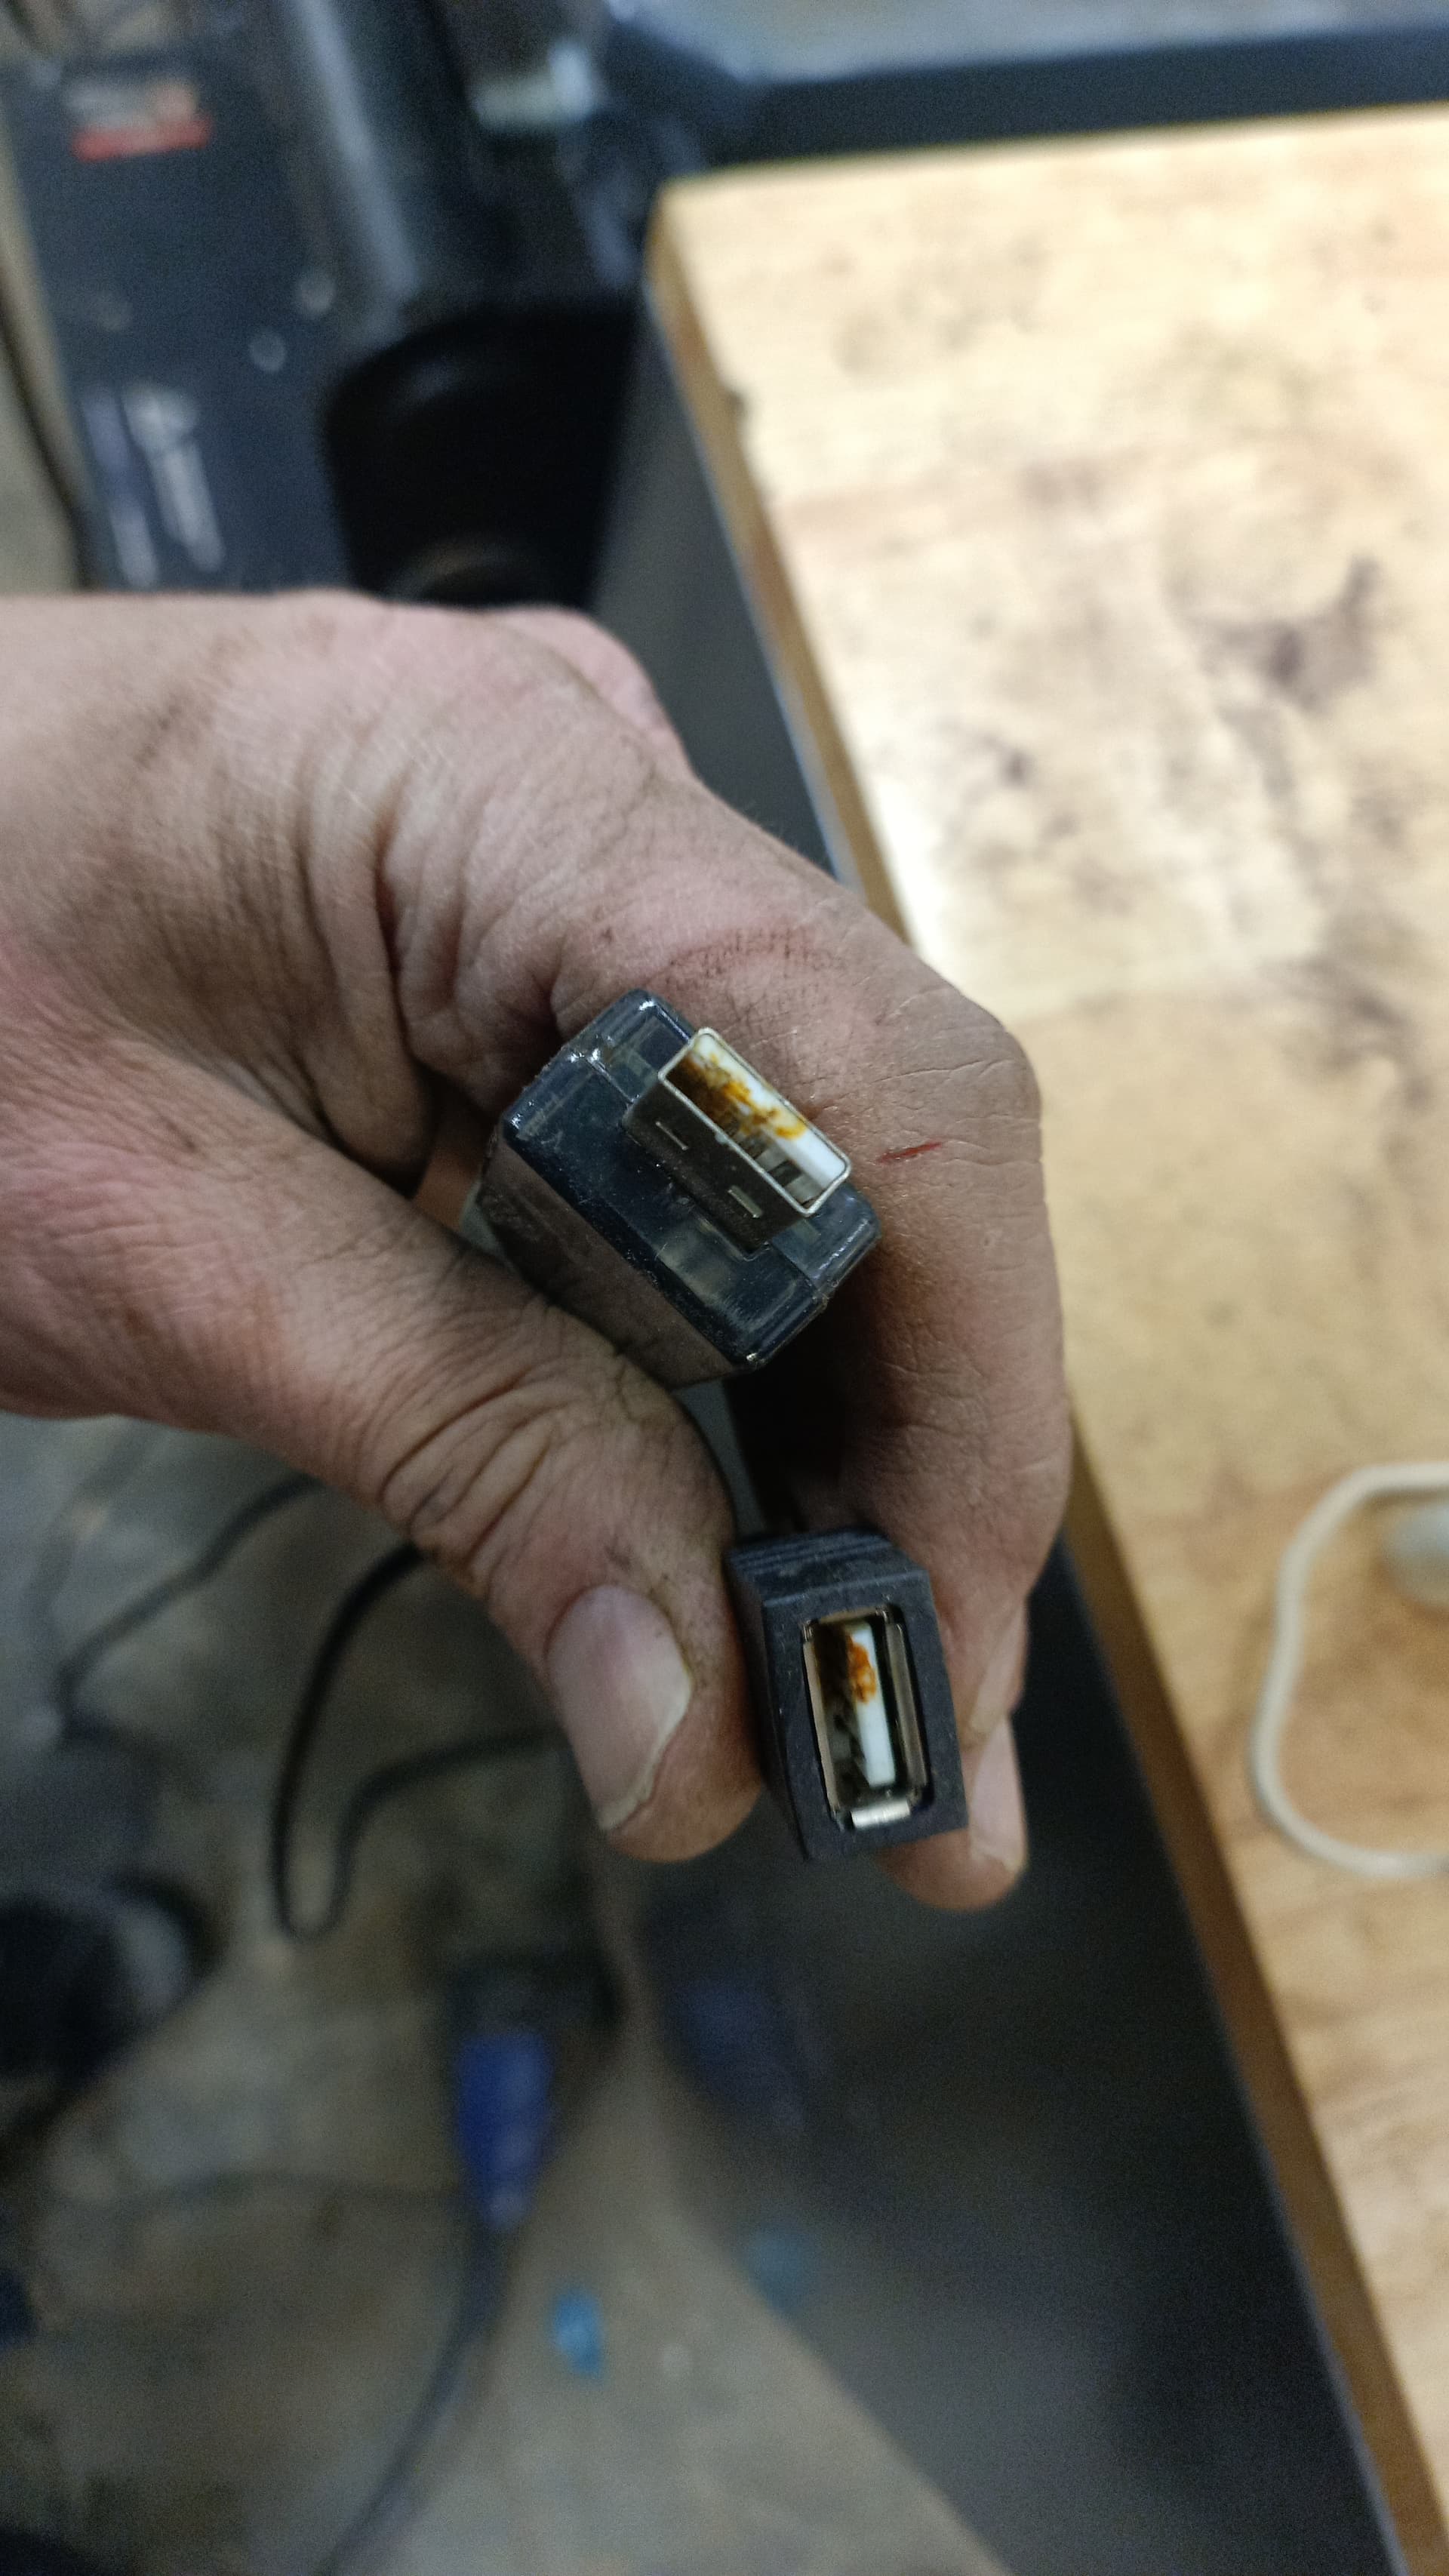
In this case we know that the problem rested in the bad USB cable connections, so it’s hard to go through the troubleshooting process in more detail knowing the destination.

Troubleshooting

  1. What happened?

  2. Can I duplicate the problem?

  3. Is there more than one component failure? Is the problem moving around?

  4. Have I replaced a component, maintained, or modified the unit very recently?

  5. Is it mechanical or electrical?

  • Was this an electrical signal or power failure

  • Was this a mechanical failure (motion item break or bad spot, structure failure)

  1. Is the problem located in a series of components that I can swap out with known good spares or identical components from the unit.

1 – Equipment operated in a manner that was not planned or intended.

2 – Can I repeat the problem by duplicating the task that was just done Y/N

Will the problem present if I run the unit in a different manner – in this case a different program Y/N

If I run the feature manually will it operate as normal presuming the error was during an automatic or programmed cycle Y/N

3 – Is the problem moving around as I try to duplicate? Are multiple items failing?

4 – Go back to what ever was done and very carefully examine all items that were done.

Correct cable connections and they are fully plugged in.

The correct cables to the correct items.

All fasteners are installed in the correct locations and are torqued correctly.

Was anything else damaged during the process?

Return to step 1

5 – Analyze the malfunction to determine the problem.

6 – If electrical, how many components are between the error and the source. I.E. The computer, to the cable, to the controller, to the cable, to the distribution hub, to the cable, to the extension, to the component.

  • I.E. starting at the problem – motor – Do a very careful inspection of the electrical connections and repair if needed and retest. Swap the cable for another compatible cable (Axis for Axis).

  • If the problem disappeared entirely after a cable switch, perform wiggle test of the original cable with the problem during operation to see if it comes back. Perform a very detailed inspection of the cable looking for damage in the form of cuts, abrasion, stress, pinched (zip ties) and at the connection ends for stress.

  • If the problem moved to the host control destination (X is controlling Z and Z is controlling X – X is now malfunctioning), the problem is upstream of Z (Z control system) Swap next upstream component if possible and re-test (move connections at the host, not at the destination motor and repeat testing).

  • If the problem stayed, the problem is with the motor. Do deeper inspection of the motor, bench test and resistance values, detailed scrutiny of any mechanical items past the motor – couplers, rollers…

I think this covers a general approach to a problem. When I am working on equipment, I will skip a step, or improvise If I suspect something.

4 Likes

Looks to me like your USB isolator arc over voltage limits have been exceeded, notice the metal on the USB connector shell looks like it was arcing to the jack mount which would be ground, question is how are your control system grounds connected to the metal of the table–any loops–ground clamp clean and tight ?

It could be. I did have my isolator in a very environmentally open space near the table. I can see bits of metal and water working its way in there.

My work clamp was tightly clamped to the material which was as clean as it could be aluminum.

I do have the chassis of the XR hooked to a grounding rod.

When I was having the issue it began to cut poorly spraying a lot of aluminum flakes and seemed to start arcing from the deflector to the sheet. When it’s running well this does not happen.

I’m going to keep my eye on it still. I was looking for a nominal voltage of 136 which fire control was doing an excellent job of maintaining until cutting out about two of those panels on a brand new nozzle then I would have to switch it to 135 to maintain a consistent height.

Thanks @KENSCNC I will check for ground loops again.