Fusion 360 Sharpie Tool Path

You could sketch exactly what you wanted drawn with the marker, project it to a second sketch, select/move the second sketch the exact offset. (Then delete the marker lines from the first sketch).

Edit: But for those of us with the Hobby/Free version of Fusion 360, you would need to run two separate g-code files (obviously, the marker would be first). You would then load the cut file second. The free version will not allow a tool change in a single set-up in CAM operation.

3 Likes

I drew up a spring loaded holder for a sharpie and 3D printed it. I’ll post the fusion file when I get home. I made it to fit the RazorWeld x45 machine torch, but could easily be modified to fit others.

4 Likes

Works with a regular diameter Sharpies.
plasma_pen_holder_v2 v3.f3d (2.9 MB)

7 Likes

very nice. i still recommend designing it to for in your torch holder instead of having an offset so you can easily use with a design using plasma cutter if that is your plan. If you just want to use the sharpie without using plasma cutter this is fine. when i made my goofy holder it was for more fun and playing around for few minutes. i always try coming up with all plasma cut designs because it makes it harder and more fun. Look up easy scriber and see how it attaches to hyperthem torch and has a spring. if you make one for standard sharpie…you have your first customer with me.

if you do know your offset with your current holder you just have to zero and move to offset and rezero moving from sharpie to plasma cutter which is just another step i didn’t want to deal with is why i like using torch holder better.

I suppose I should provide more info. I use it mostly to mark bends, but have made a few drawings on poster board. I use a pretty stiff spring in it, just stiff enough so it will work the IHS switch. The spring is only in there to make up for the cut height and material height changes, it has very little travel with a full length sharpie, but you can use a stubby and get full retraction. I make the program with THC off obviously. I mark the zero manually with the marker before I run the marker program, then I line up the torch tip on the dot when I make the actual cut. Has worked good for me. It will also work without the spring, but you have to set the retract height high enough.

2 Likes

what setting are you using for sharpie?
what setting are you using for easy scribe?
Would they be same or different?

Similar, I leave the cut height at .06 and set the pierce height to it also. The spring back is enough to draw at .06.

Thank you!

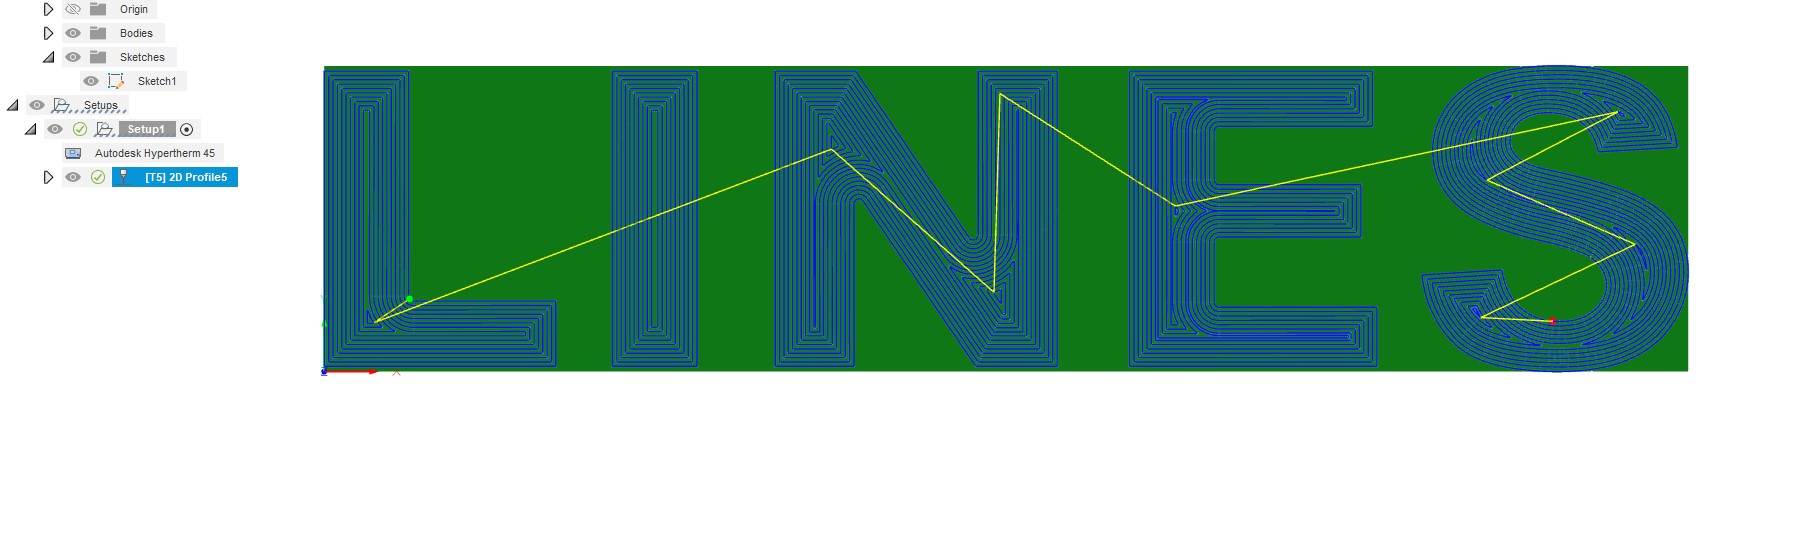
I got to play around with the easyscriber for my hypertherm and came across a really cool video on hatch lines. I’m putting it here because people using sharpies could also benefit with this cool way of filling stuff. I only spent an hour messing around but something I haven’t even seen before today.

I did see video using Inkscape which looked alot easier but had to try out the fusion way. I’ll have to mess with it another day.

Fusion 360 Toolpaths for EasyScriber Hatch Fill Patterns - YouTube


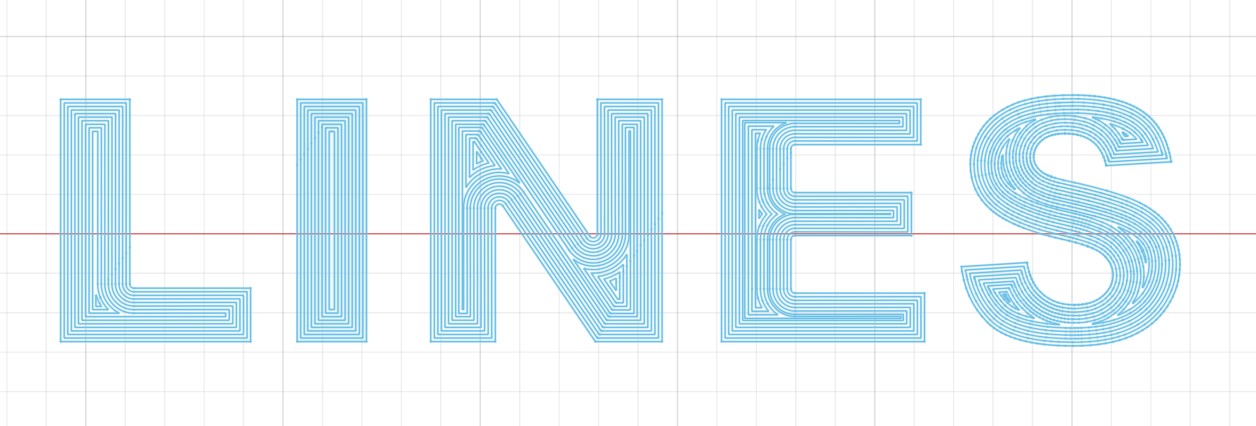
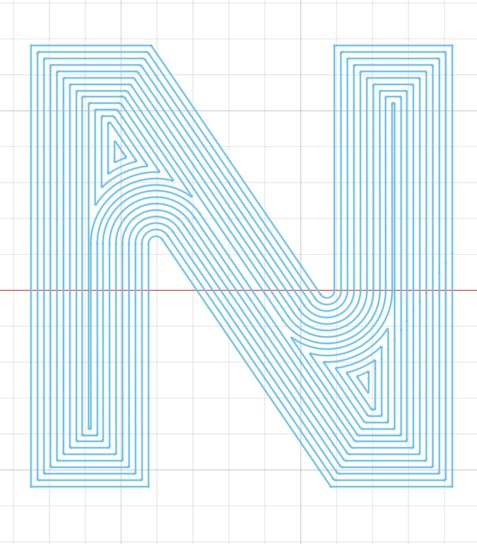
Had to go figure out…

2 Likes

Great find @DonP ! thank you for sharing this. Crazy this video is only a few days old.

You should play around with it and do a video on it. I believe this would be somewhat complicated for newer user. I did 0.125” end mill but you could do a bunch of different sizes if larger letters. Even getting cut path took me few minutes to figure out so I wasn’t selecting each line which would be painful. I ended up selecting sketch if that makes sense. I can do this later.

I would be interested to see you do something with your plasma cutter marking top if you have it setup.

1 Like

Easy way to get all hatch lines…

1 Like

How did you setup the end mill in Fusion?

Watch YouTube video a few posts above on it. I recently found out that Inkscape has a much easier way of doing it.

1 Like

After using inkscape, how to you post process it? Do you take it back into fusion?

Yes…take back to fusion after you get path.

Hey Don…thanks!

The selection of all those paths must be a bit a of work.

There are multiple ways to make it easy in fusion. If you want to
send me your dxf I can go quick video on best way. I did post above on one way that might work.

1 Like

If you’re in the cam environment (2D profile menu) and select the sketch from models in the browser bar for your contour selection it should automatically select all contours involved in that sketch.

2 Likes

Thanks.

Today I learned that posts must be more than 10 letters long…so I just could not just say “thanks” and had to add all the rest of the useless text. :slight_smile:

2 Likes