Slow it down more and have the lead in start in the center of the hole. Also make sure there isn’t any deflection in the workpiece.
I don’t use fusion so I can’t help you with those settings. But with sheetcam I spend almost no time post processing with the rules and settings I have.
I can get pretty good holes at .28 with my hypertherm and their fine cut consumables. For the razor weld you may need a machine torch to run a different nozzle.
I agree with everything @brownfox said. I too use sheet cam, and with small features like that I use what I think is called “overcut”. I also don’t use lead out. My understanding of the overcut aspect is that it continues the cut just a little past the intiatation of the start of the cut. I find this helps circle geometry and in general I never have incomplete cuts from the start and end of the cut not burning completely through.
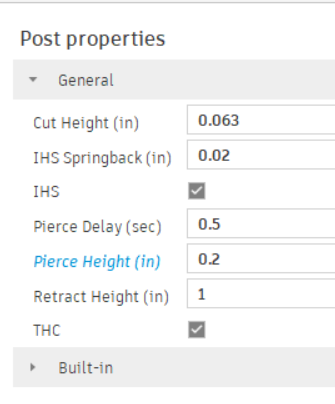
We run a Razorweld Cut45. I’ve had no issues with holes @ .25". I have recently started using Fusion (primarily SheetCam) for G-code. I would think your pierce height of .200" should be closer to .150". With 13ga material, I would also think the spring back should be set to 0.0". I would also remove the lead-in radius (set it to 0.) Hope this helps!
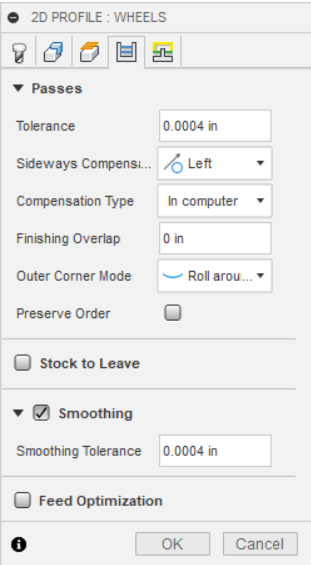
Thank you @DnKFab for the tips. Fusion has a “Finishing Overlap”… I’ll also play with that to see if it helps in this case. I used it in cases where the part does not fall out after the final outside cut …
Thank you @Simsworx great tips - I’ll try… Now I have a bunch of stuff to try, but I want to do it in a discipline way so I can learn from each adjustment. More worried about learning how to fish than just having success with one fish.
best way ive found is to draw yourself a test cut, in your case just do a line of 4-5 .25" holes.
have 1st hole set as your baseline (current settings) then each subsequent hole modify those settings either incrementally or have each hole have a different thing changed. after a run determine your best hole, use that as your baseline and then make 4 more changes. repeat til youre happy. thatll get you dialed in quickly\ and you can visualize what your changes are doing
oh and for the test cut, a little thing ive learned to do, your first pierce will always be longer than subsequent pierces. so before you start your run manually flick the torch on in firecontrol and turn it right back off, then with the post airflow running start your program. itll make all your pierces the same length.