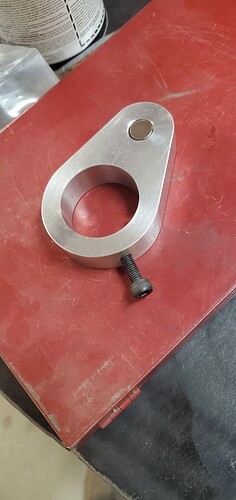
Do you know how to "Hurdy Gurdy"?

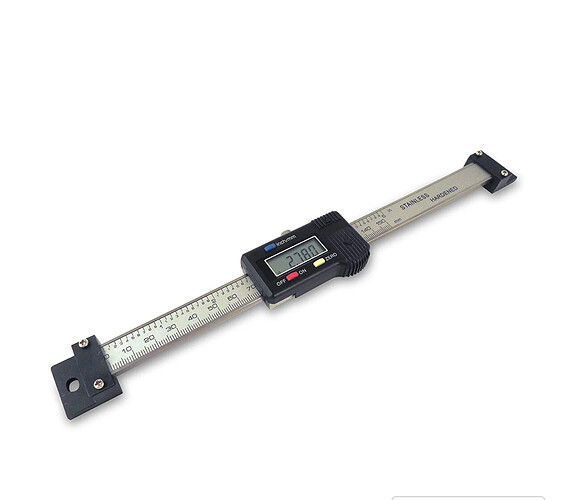
Well I finally did it, I got a DRO from Santa, so its time to install it.

I have watched so many videos on the subject, I feel as if I have done it already.

So off we go.

Here is the backside of the “new to me” lathe that is currently blocking the damn door.

(I have about 396,712 projects going on right now, all at the same time, and the shop/s are a friggin disaster area…and this is probably the least important job/project, but sometimes you just gotta “scratch that itch”)

So after “mocking it up” with clamps, and mounting a dial indicator on the carriage to check for “level’ness”

I drill it for 8-32 cap screws to attach it with.

After drilling, and upon further review…

Its a little too close to the end for my liking, but I figure its a pretty “light duty” job to hold that encoder(?) in place, and my only other option is to try and get ahold of Xi Wang Phuy in China, then ship it back, then wait…blah blah blah…

IMG_2971[1].JPG

IMG_2970[1].JPG

After tapping the holes I check it for “run out” and it’s off by about 15 thou.

IMG_2973[1].JPG

I am not sure if that is good enough or not, so I decide to try and “shim it up” to a more acceptable amount. (not knowing what that is of course, because for 185 bucks you do not get install instructions, even the ones written in "Ching’lish.

I originally decide to shim it, by grinding/sanding down the washers that I have behind the encoder.

Well that went over like a “fart in church”…The damn thing kept slipping and ending up on the floor.

IMG_2975[1].JPG

So then it hit me, my wife complains about me saving every damn little screw, nut, bolt and such.

Last year I “sacrificed” a set of feeler gauges for some project, and yes…I saved the remains, so its off to the “junk drawer”

IMG_2977[1].JPG

I couldn’t find the “exact” shim I needed, but I got it to within about 4 thou.

I am hoping that is “good nuff”

IMG_2984[1].JPG

So being the “hoarder” that I am, I have to cut it down and save the other half… [image]

Then drill it to fit the cap screw.

IMG_2980[1].JPG

For whatever reason, adding the shim got the same results as before adding the shim???

I have no idea why, but I had to take it off and on and switch it around about 5 times…But I finally got it.

~3.5 thou will have to work.
IMG_2985[1].JPG

2 Likes

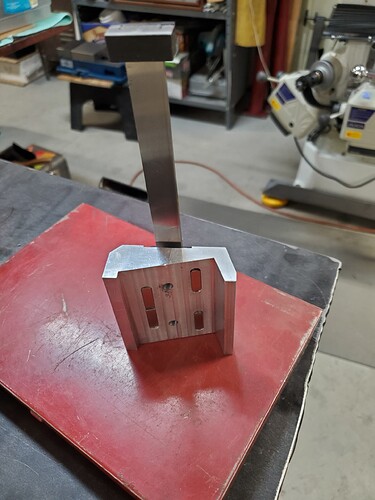
Ok, now I need to make a bracket that goes from the “encoder” to the “encoder reader thingy”

So its off to the scrap pile.

Just by happenstance, I had a piece of “mystery aluminum” that fits nearly perfectly…a little narrow, but it should work.

A dab of Dykem and it’s “hole lay out” time.

IMG_2987[1].JPG

Now its time to drill the carriage, to accept the bracket, but I do not want to go all the way through and hit the ways, so I carefully measure and then wrap the drill bit with painters tape as a sort of "drill depth guide/marker.

IMG_2989[1].JPG

(Off topic) for some reason this is one of my favorite tools…It’s nothing special, but for some unknown/stupid reason this stupid thing brings a smile to my face each time I use it.

IMG_2990[1].JPG

Well doing things “on the fly” has some “pitfalls” of course.

So when I go to “bolt her up”, I can’t get to the damn bolt heads cause it’s too close to the “encoder reader thingy”

M$^$#@#$%^^&&**(
[image]

IMG_2992[1].JPG

Well after some searching though the nearly useless hardware they send with it, I find that “diamond in the rough” and I have to do some 'hole relocating"

IMG_2996[1].JPG

Caution small rant: I am not blaming anyone in particular, and I suppose that it has simply “evolved over time” but my local Ace Hardware used to have basically everything you needed…I mean my dad would go in there and ask for some crazy, off the wall stuff, and they would have it, and the Crotchety Old Man would know exactly where it is, and give tips on how to use it…

Now they have every new cooler and insulated mug you can imagine, and an entire warehouse of F’ing candy at the checkout…but the kid selling it to you, couldn’t find his ass with both hands but apparently he knows how to pierce his face, and the location of the local tattoo parlor…But no Bottom taps, or even what they are…

GET OFF MY LAWN KID!!! Sorry, rant off…

So now I am just waiting on some “bottom taps” from the Big A, to finish tapping the holes a bit better.

4 Likes

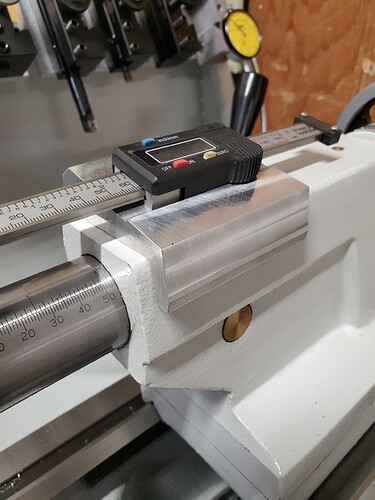
Now for the cross slide.

Things are pretty tight and it sticks up a little more than I would like, but this seems to be a common problem/occurrence on these small lathes.

But the run out is minimal right off the bat, so it’s drill time.

IMG_2997[1].JPG

So here we are…the Dewalt is simply not going to fit.

IMG_3006[1].JPG

I figure that an ‘extra long drill bit" would solve my problem, but I reasoned that if “Bottom taps” confused and amazed “Stevie from Ace Hardware” then a "long drill bit’ was like asking for a copy of the Magna Carta…

So what to do???

I know I have 90 degree drill somewhere, and searching for it reveals a “long lost friend”

Enter “The Hurdy Gurdy”

IMG_3008[1].JPG

Haahahah…I haven’t used one of these since I was in the Marine’s working on EA-6B’s. I am shocked that I even kept it. Now for those of you who have never used one, you have not had the "entire experience’ yet.

What a totally archaic tool, that I used to be quite skilled at using. I have drilled out “literally thousands” of rivets with one of these, and logged thousands of rainy/sunny/freezing/fuel/hydraulic fluid soaked hours on EA-6B’s using one of these…

Thank God for the advent of the cordless drill.

So for “old times sake” and since it fits, I “give her a whirl” (literally)

IMG_3007[1].JPG

Well my “memory lane love affair” lasted about 15 seconds before my 'flash-backs" of using this POS tool jogged my memory…

Ahhhhhh…much better now…

IMG_3009[1].JPG

I could have sworn that I had a “pan cake” drill that used threaded drill bits but maybe that was a “shop tool” that I had to give back when I left the “company”.

Now that thing could get into amazingly small places.

Now my problem is that I don’t have a “tap wrench” that will fit.

So I cobble this thing together.

IMG_3011[1].JPG

and it works…to a certain point anyway.

IMG_3013[1].JPG

It will start the tap, but after about 2 1/2 turns, the resistance is enough to “un-twist” the nut and the tap loosens.

so then I have to use an allen wrench to twist the tap when the hole is not aligned.

IMG_3015[1].JPG

IMG_3016[1].JPG

IMG_3017[1].JPG

1 Like

I forgot to take pics of the cross slide “done pictures” , but I was able to get’er done.

Now to mount the DRO head.

Without instructions, it took me a few minutes to figure it out.

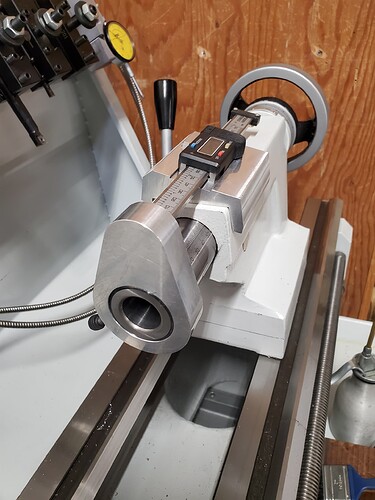
So I decide to mount it to the “electric panel” that houses a ridiculous amount of wiring for the motor.

IMG_3020[1].JPG

IMG_3019[1].JPG

And here we are…the moment of truth…

IMG_3023[1].JPG

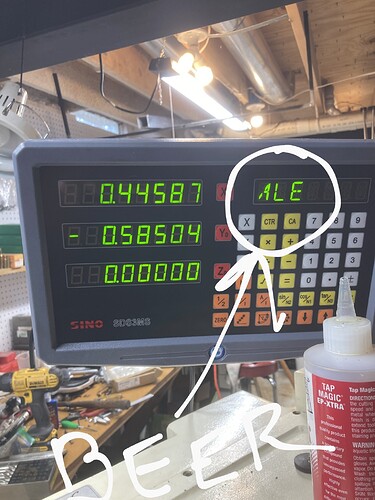
She works like a champ!!!

I now return you back to reality…and for me its, cleaning the damn shop.

2 Likes

That post was quite a project in its self! WOW
Looks good

2 Likes

Now I feel better I put a wang chung DRO on my very old mill. I went through just about everything you did, it has been working well. I just putter but I felt I needed it because the mill is very loose and accuracy was never my strong point but this helped a lot.

1 Like

I’m not sure what Donovan’s song from 1968 has to do with your DRO. But I believe it wants you to have a beer and a cigar.


Good job, my friend.

3 Likes

@RunsWithScissors Im curious did you ever read the book Running with Scissors?

1 Like

No sir, never heard of it before your post.

Yea, I just like the concept of have a DRO, even though most “real machinists” say that it is not necessary on a lathe.

This Lathe has almost no wear on it that I can detect and it was claimed to be only 12 years old, but I have no way to verify this.

I got it at an estate auction and he had another “Big Monarch” that I believe was was his primary lathe.

I also have a “sneaking suspicion” that most of these DRO’s are made by the same company, but just “rebranded” and marked up, so for $193 it should be accurate enough for a “hack” like me. :smiley:

1 Like

Hahahah…I must have bought a “smart DRO”… :+1: :+1: :+1:

I will have to brush up on my “Ching’lish” and read the manual to see what that means.

2 Likes

You really should be writing children books for us “Senior Kids”…I would buy one. Titles:

  1. Shopping at the local auction house for a lathe
  2. Getting said Lathe in the Shop (downstairs)
  3. Adventures at the local Ace Hardware
  4. Have a toilet in your shop…you never want to interupt your thought process.
  5. Tools that won’t work in tight places

We weren’t! After finding those feeler gauge parts in the drawer, we knew you had a drill that would do the job!

Loved all the pictures along the way. Your topic now probably takes the most storage on the server of any topic!!!

I saw this topic when you originally posted and saw how long it was. I had to plan for when I had time to read and pay attention. Glad I did. It put a smile on my face.

2 Likes

Thank you for the kind words sir, and I’m glad you enjoyed it. :beers:

Did you use only the X and Y axes?

So far thats all I have used.

I plan on trying to figure out how to “rig up” the Z axis for the tailstock.

The price difference between the 3 axis and 2 axis machines was only 25 bucks so I went with the 3 axis.

Hard to beat for $193.

1 Like

I was wondering if you used the third axis on the compound slide. Not a lot of room but seems like it would be good to have. Cutting threads is done with returns of the cross slide to zero and advancements inward of the compound slide inward until you finally cut to the root diameter of the thread. Only other way is to set up a depth mic on the compound every time you cut threads. Not to mention other operations. On my tailstock I rigged up one of these under $30 units. Works well. I’ll send another picture later of how I installed it.

2 Likes

I have seen that mod for the tailstock, and I have thought about it.

I need to brush up on my “Ching’lish” and read the manual to see if there is some sort of way to possibly use the SIN/COS/TAN functions (or some other functions) to my advantage.

I am certainly NOT a machinist, so this DRO stuff is pretty new to me.

1 Like