Like others I have wanted to add a pen drawing device to my crossfire pro for some time. Initially I wanted to mark bend lines for the brake and draw nonstandard brackets to check bolt hole and other alignments needs prior to cutting them in steel.
I have seen others, but I didn’t like that some of them require you to take out the torch to draw then reinstall the touch etc. So wanting to keep it in place while cutting require it had to be made out of something non-burnable or meltable.
I also wanted it to be a little less idiot-proof (for me) so I wanted to make sure setting it up generally was as straightforward as possible.
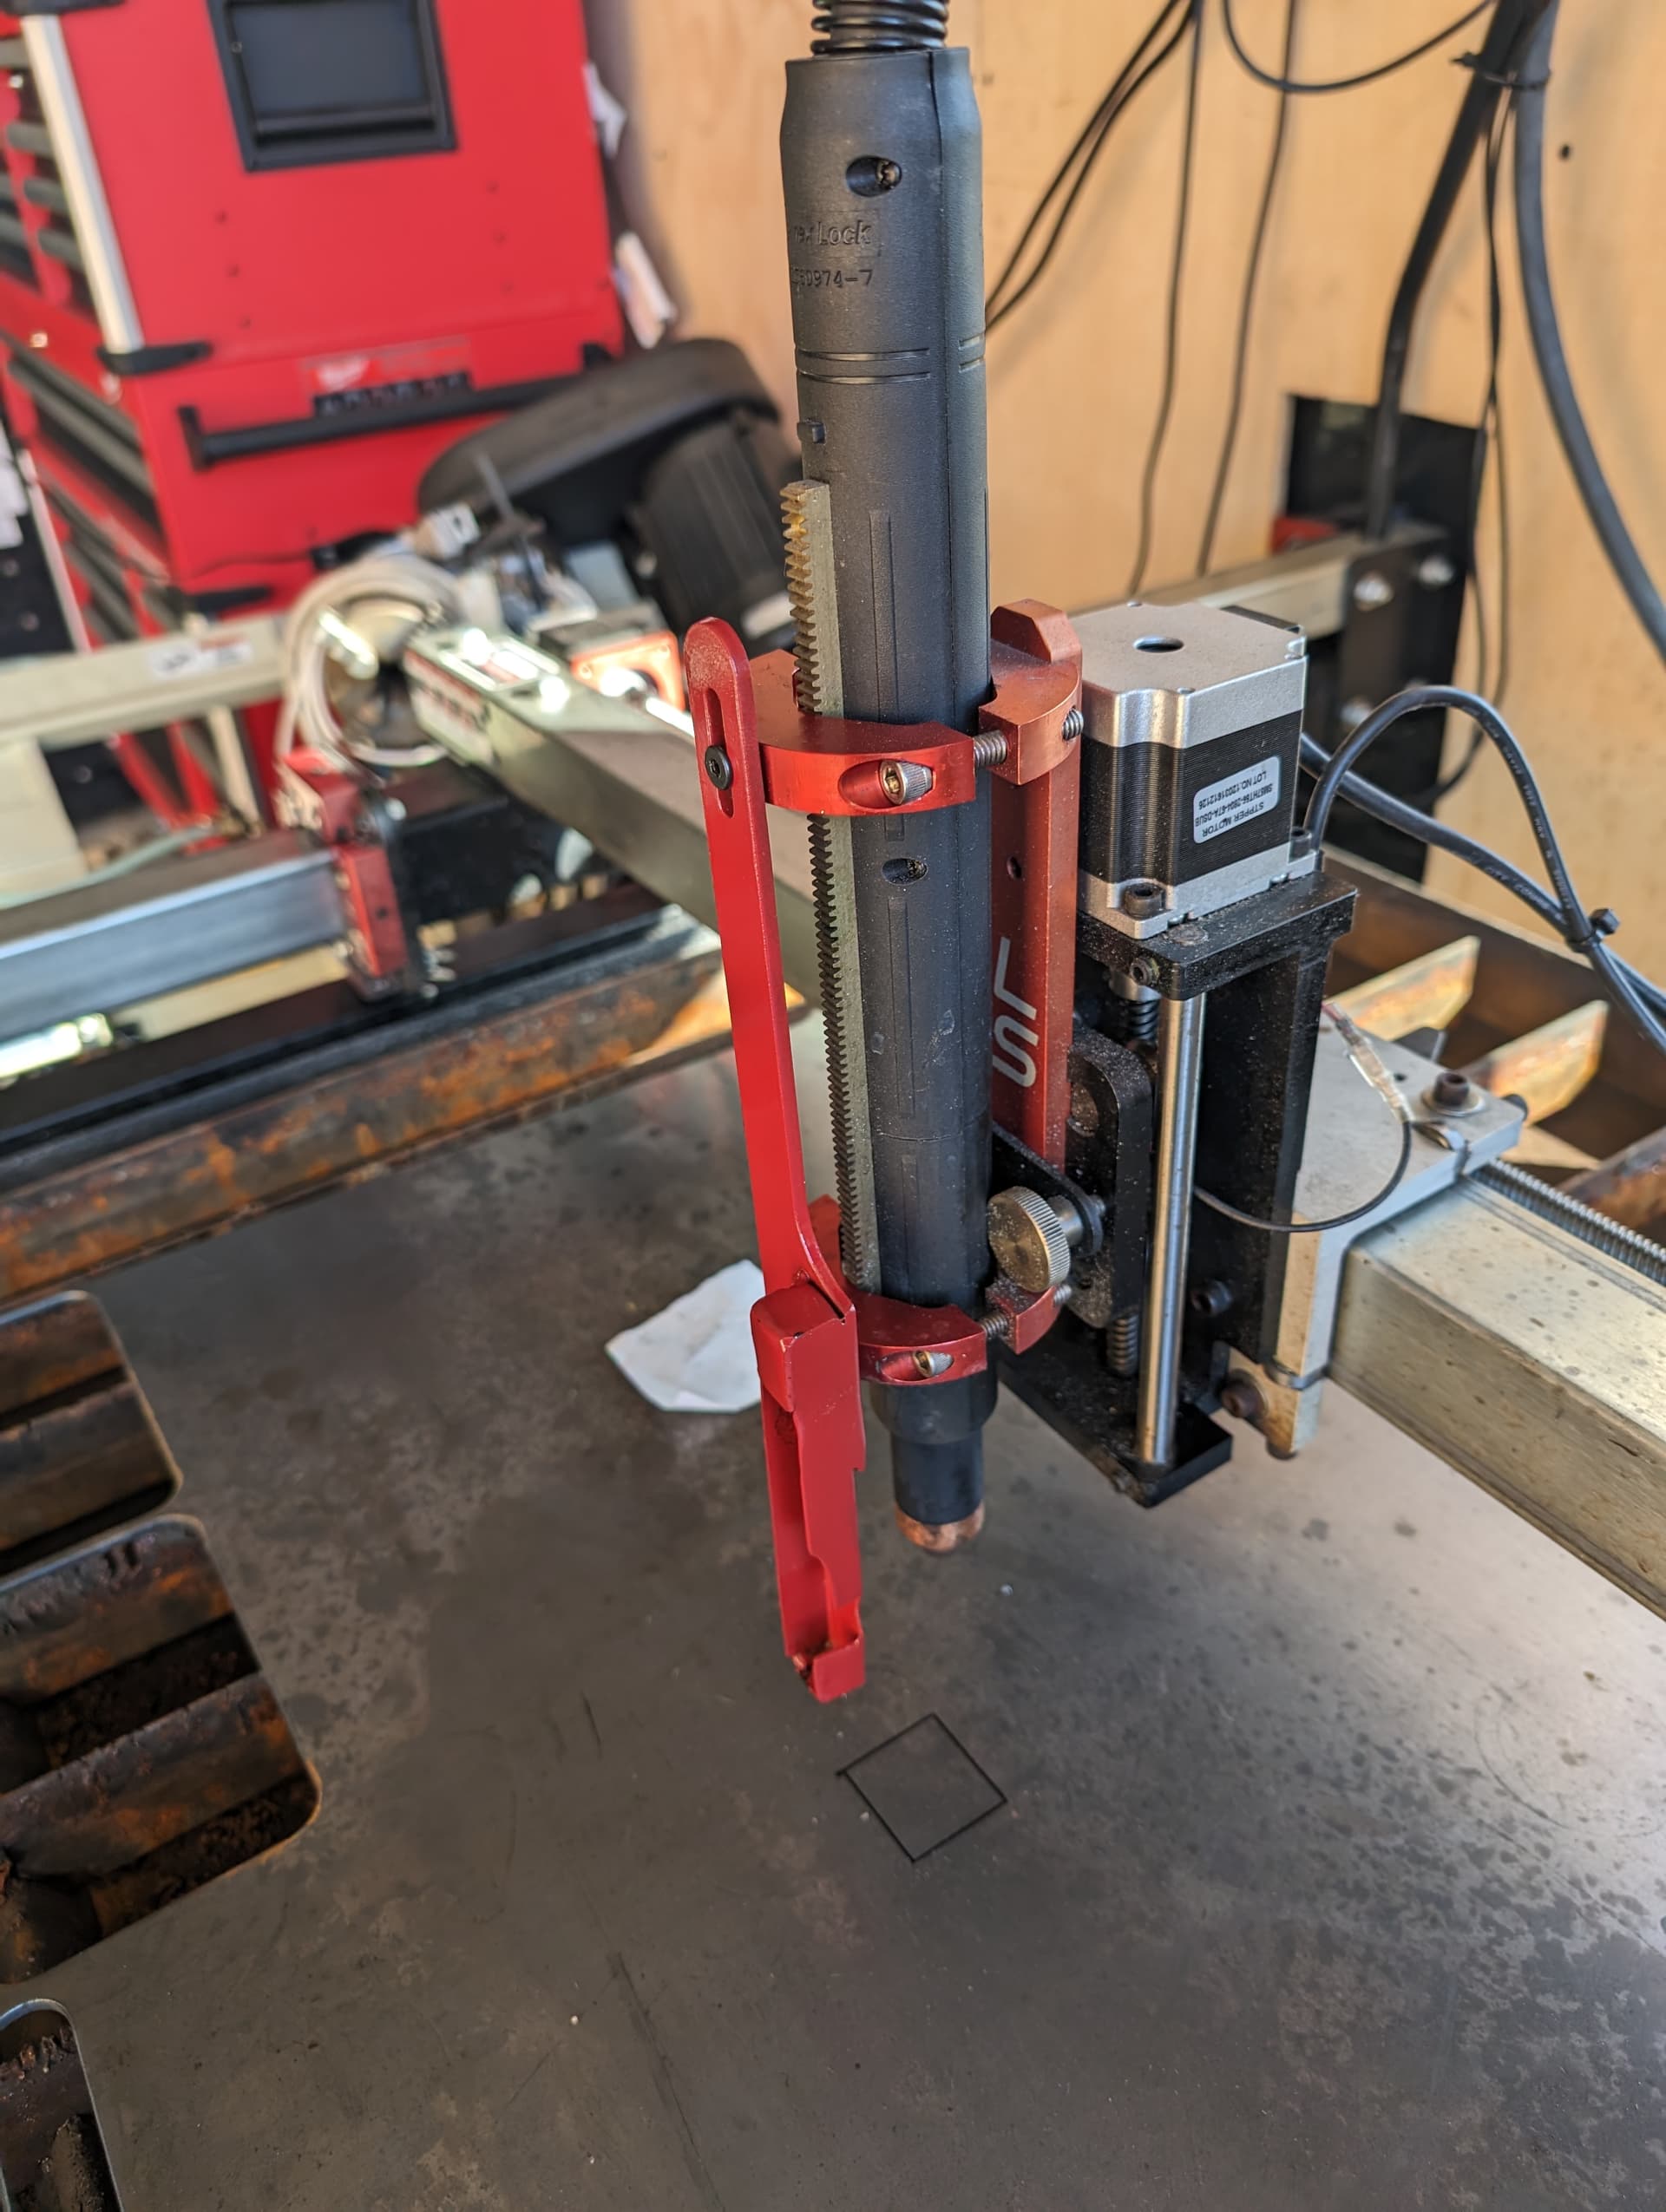
I drilled and tapped two m5 bolts into the machine torch holders. Cut the long piece out of 1/8th and the pen holder out of 16 ga. The pen holder is modeled as sheet metal in fusion so bent it up and welded the two together.
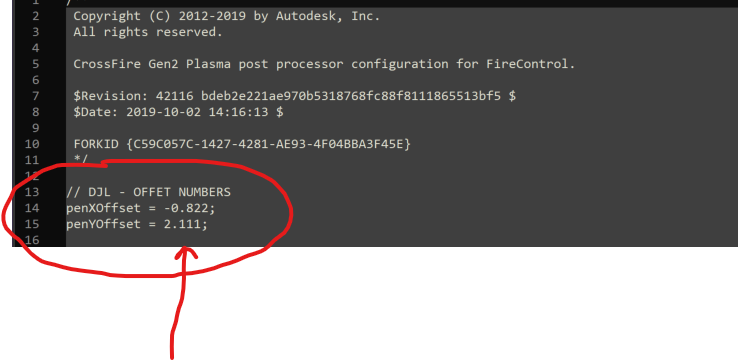
Lastly was dealing with offset of the pen (offset from the location of the torch X0, Y0) . I chose to tackle that in a custom postprocess.
The post processor takes into account the offset AND (remember making it idiot proofer) it makes sure the torch doesn’t fire, nor engages the THC. I force both of them to off.
I started the post process with a copy of the langmuir one and renamed it and went from there.
I added a stupid file ext f3d to it so I could upload it here. Obviously delete it as post processors end in “.cps”
If you build this you will need to calculate your own offsets for the post processor. Just play with them and plug them in the top of the post processor here:
This is great and like that you created the offset which would be the issue with doing this type of design. I’ll have to check this out over the holiday weekend. The design that I’ve been using is from @davebogdanski and really works good. He really thought of everything down to the correct spring in his design. I could even see using his sharpie setup in your bracket design. Best of both worlds.
Lastly in fusion, when you want to “draw something” you select the custom sharpie pen post processor. Again that shuts off the touch, the THC, and - temporarily - creates the offsets to position it properly. After use the offsets go back to normal zeros for cutting.
I’ve been having lots of fun with mine. I currently have a big mirror like 42”x12” I plan on sandblasting and putting a Detroit Lions design on it.
I posted on how to do hatch lines and setup a milling tool in fusion a couple months ago. It’s cool to use with sharpie. Really good YouTube video on it.
I’ll have to do a video on creating hatch lines because it’s a little tricky the first time you do it. I did it few months ago and found myself looking back at previous design scratching my head wondering how I did it for few minutes. If someone else wants to do a video please feel free to share. With all the recent sharpie talk I know it’s something others might like to tryout.
Don, how does this Sharpie help with your sandblasting project? Is it just to visualize how it will look on the mirror? Sorry, in advance, for the naive question.
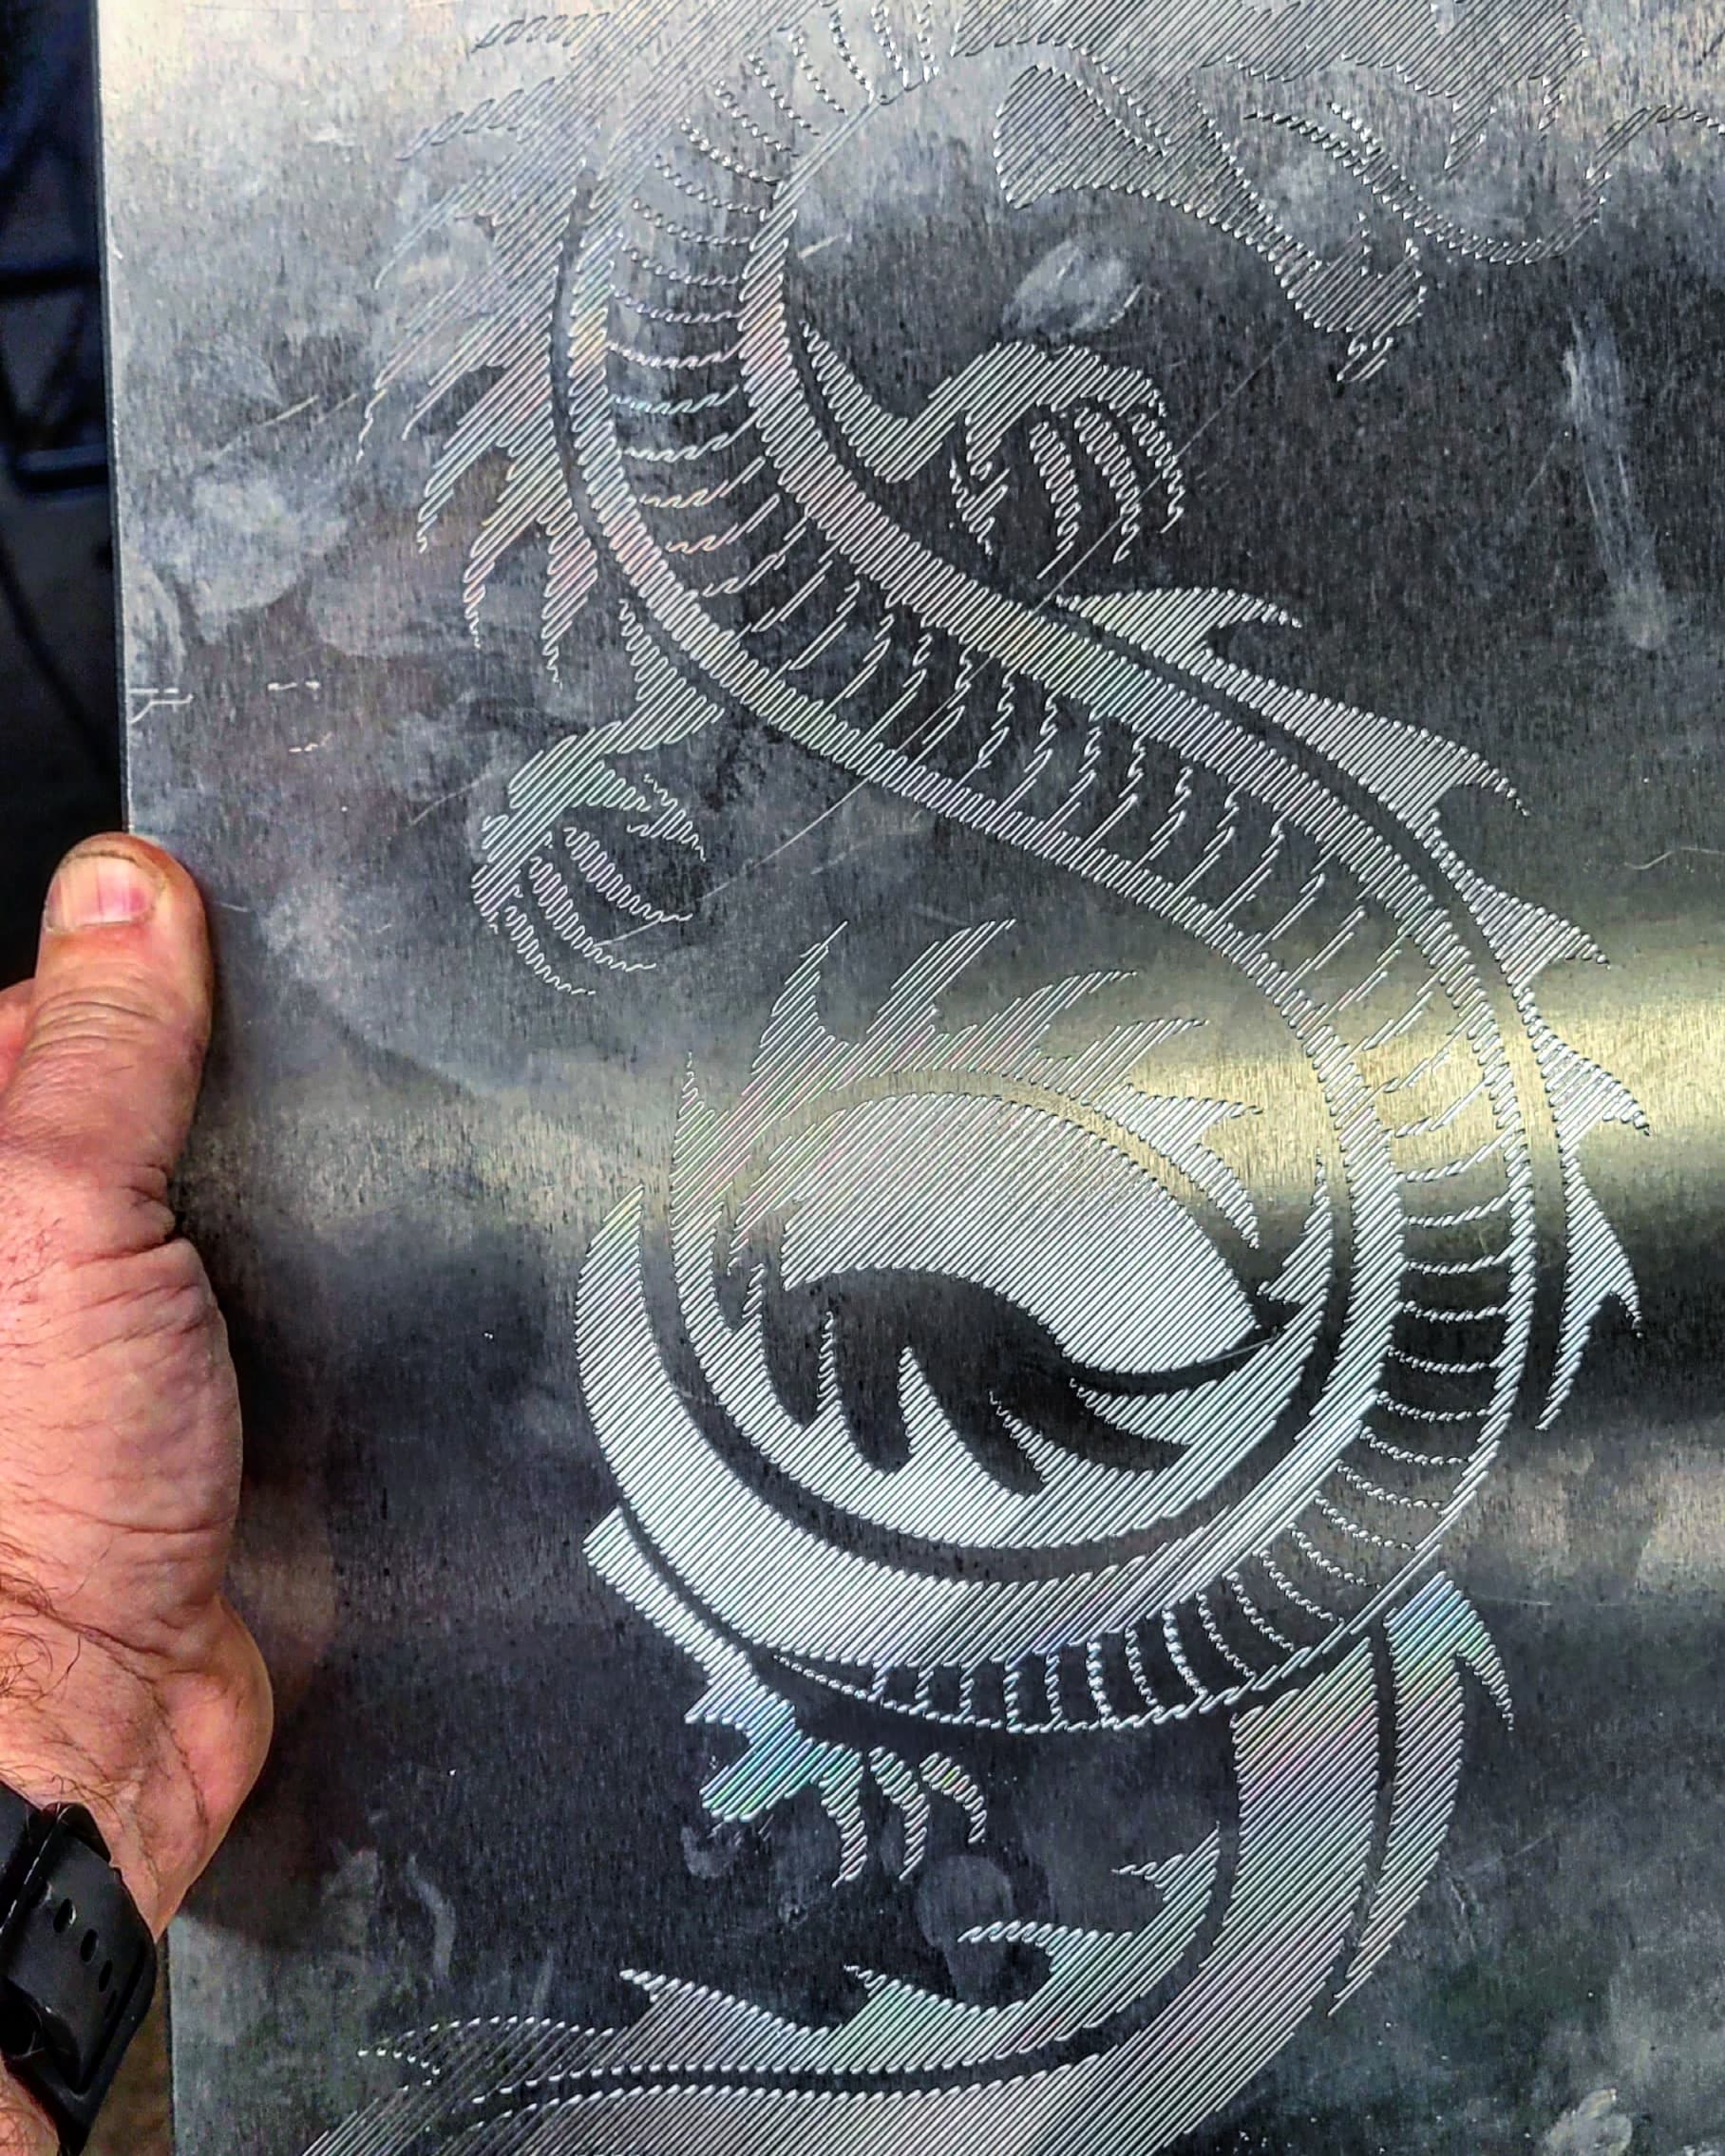
Here is one I did a couple of weeks ago works great.I used the axidraw extension for inkscape. Used the plate marker setup in sheetcam. I posted it on fireshare if anyone what’s to down load it. It took about 45 mins to draw it.
Some of it was I did the hatch fill. It would do some sections single pass others it would do a lighter pass then make a second I wasn’t sure what was going on. I watched a few videos on it
I’ll have to check out the gcode later. I played around with my easyscriber about 6 months ago on painted steel, but it was chipping so I lost interest in messing with it. I mainly used it for bend lines but now I just use my marker setup.
Recently we had a discussion on this forum and similar holder. He created the offset in the gcode which is the real issue with this type of pen holder. very cool to build that into the gcode. I like the one i have but you do have to remove the torch but no offset to deal with it. not sure if you care about the offset but if you plan on using for bend lines and things that also use your torch in combination you’ll want to figure it out. Once you know the offset you could zero torch in firecontrol and just move the pen to your offset and hit start. that would be the easiest way to accomplish it.
I think we’re talking about two different things. If you want to use your easyscriber and torch on the same design my post above might make sense. You can’t zero your pen and zero your pen at the same origin without understanding your offset. It’s very cool you’re doing the scribing. I look forward to seeing other designs.