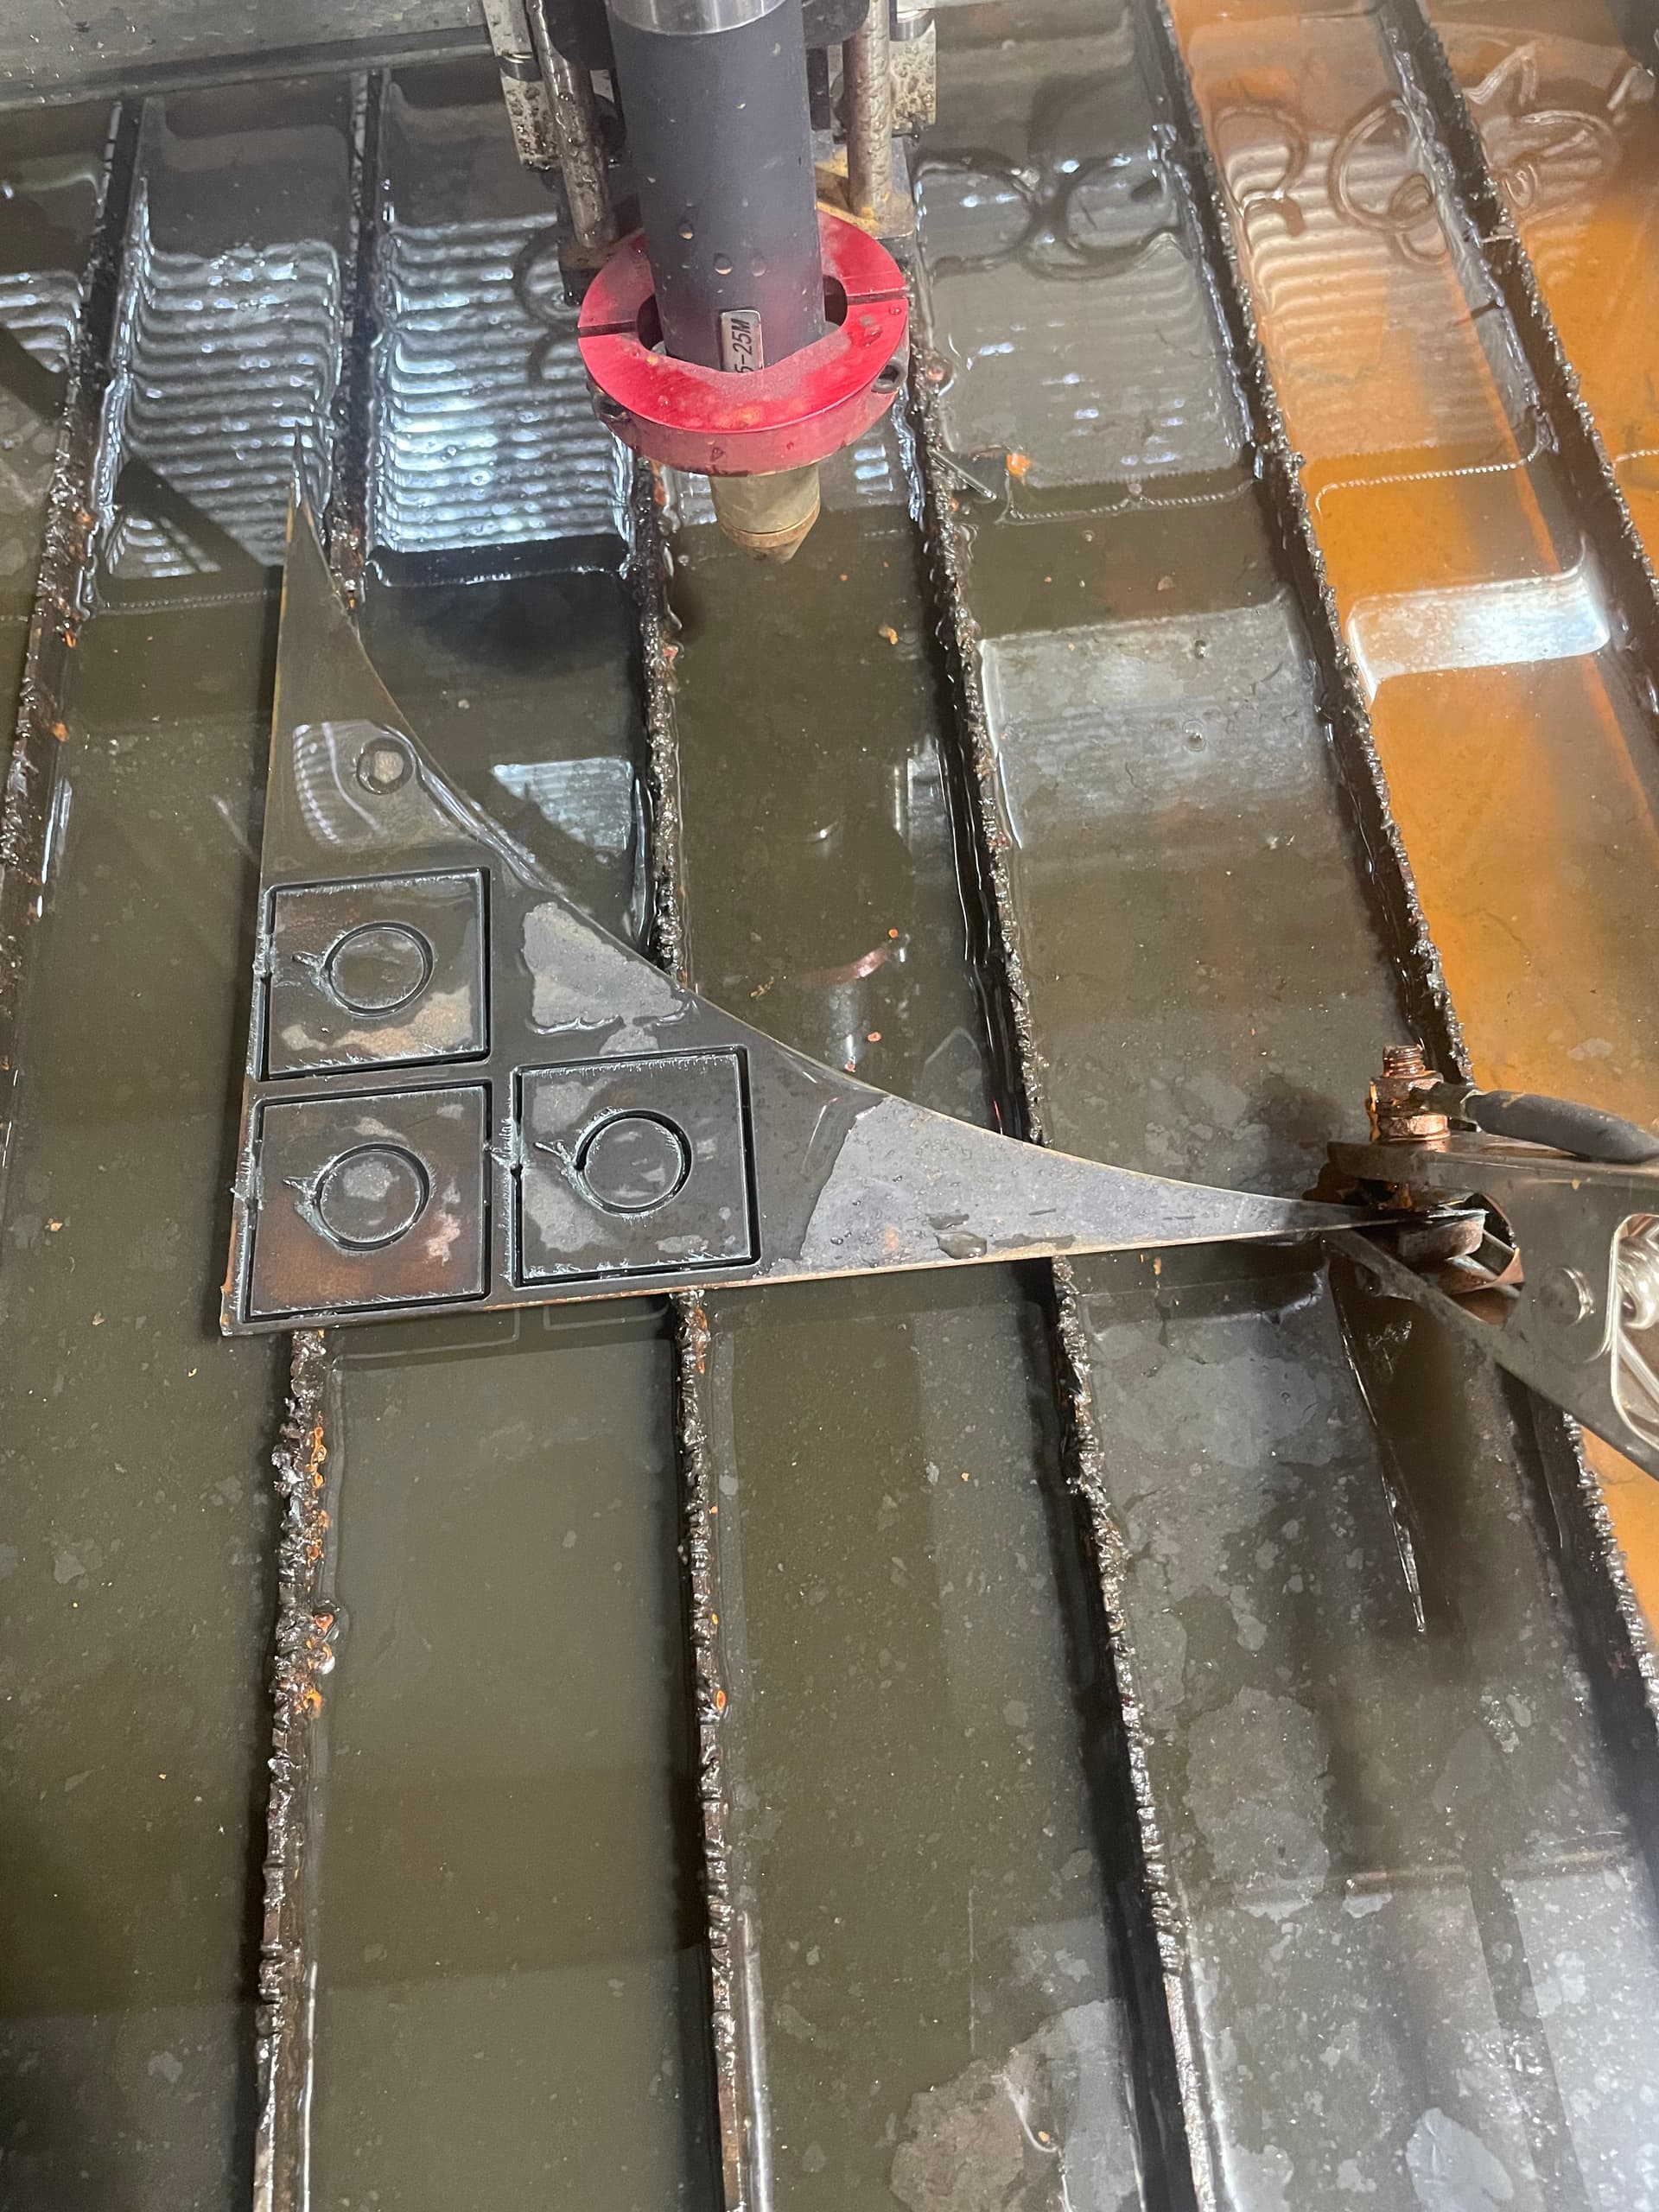
Hello, I am decently new to CNC plasma cutting and I have ran into an issue that does not happen all the time but has shown up in the majority of pieces I have cut. I have attached some photos of the incomplete cuts that are happening and I have tried my best to find solutions.
Here are the settings and possible solutions I have tried already (all measurements are in inches):
I have a razerweld cut 45 plugged into 220v and set at ~38amps and 90ipm for 16ga mild steel and new consumables (this seems to have the cleanest cuts for me) with 80psi of dry air going in and the readout on the plasma cutter saying 75 without cutting and dipping around 62psi when actually cutting (60 gallon air compressor too)
Using fusion 360 my cut height is 0.063, pierce height is 0.15 & pierce delay is 1.2sec
I run into no errors when generating the Gcode and the only part that does not fully cut is the first 0.5" of my cut path
I have made sure that my THC voltage is properly set at 112v nominal and that is .063" measured with calipers as it was cutting (I have also turned off THC all together and there is no noticeable difference)
My ground clamp is properly attached to the work piece
I have tried all the solutions I can think of and still I cannot find a solution. The only possible solution I can think of would be to set the finishing overlap to 0.5" in order to have it finish the cut but that sometimes leads to errors when generating the Gcode and I would like to avoid needing to do that if possible. Is it common to have a finishing overlap like this?
The ideal solution seems to me would be a setting that slowly increases the feed rate in the beginning in order to give the machine time to fully cut the first .5" but I have yet to find that setting.
Any input would be great and highly apricated, thank you for reading.
How do you measure cut height with calipers? I think you might mean Kerf width?
Cut height is measured with a feeler gauge between the sheet and torch
I have a RW45 and always leave it at 45 and adjust IPM accordingly . 90IPM seems pretty slow for 16 ga even at 38 amps. I cut 14ga at 110IPM @45 amps
this should be .5-.6 for 16 gage
Do a search in the upper right and look for cut height and you will find out how to check it correctly so you can rule that out @Phillipw has a file he can give you if you don’t find it searching.
you can set this in fusion if you look where you set your IPM in the 2d cut profile menu you will find there are setting for lead in and lead out. but it doesn’t look like you are using a lead in or out?
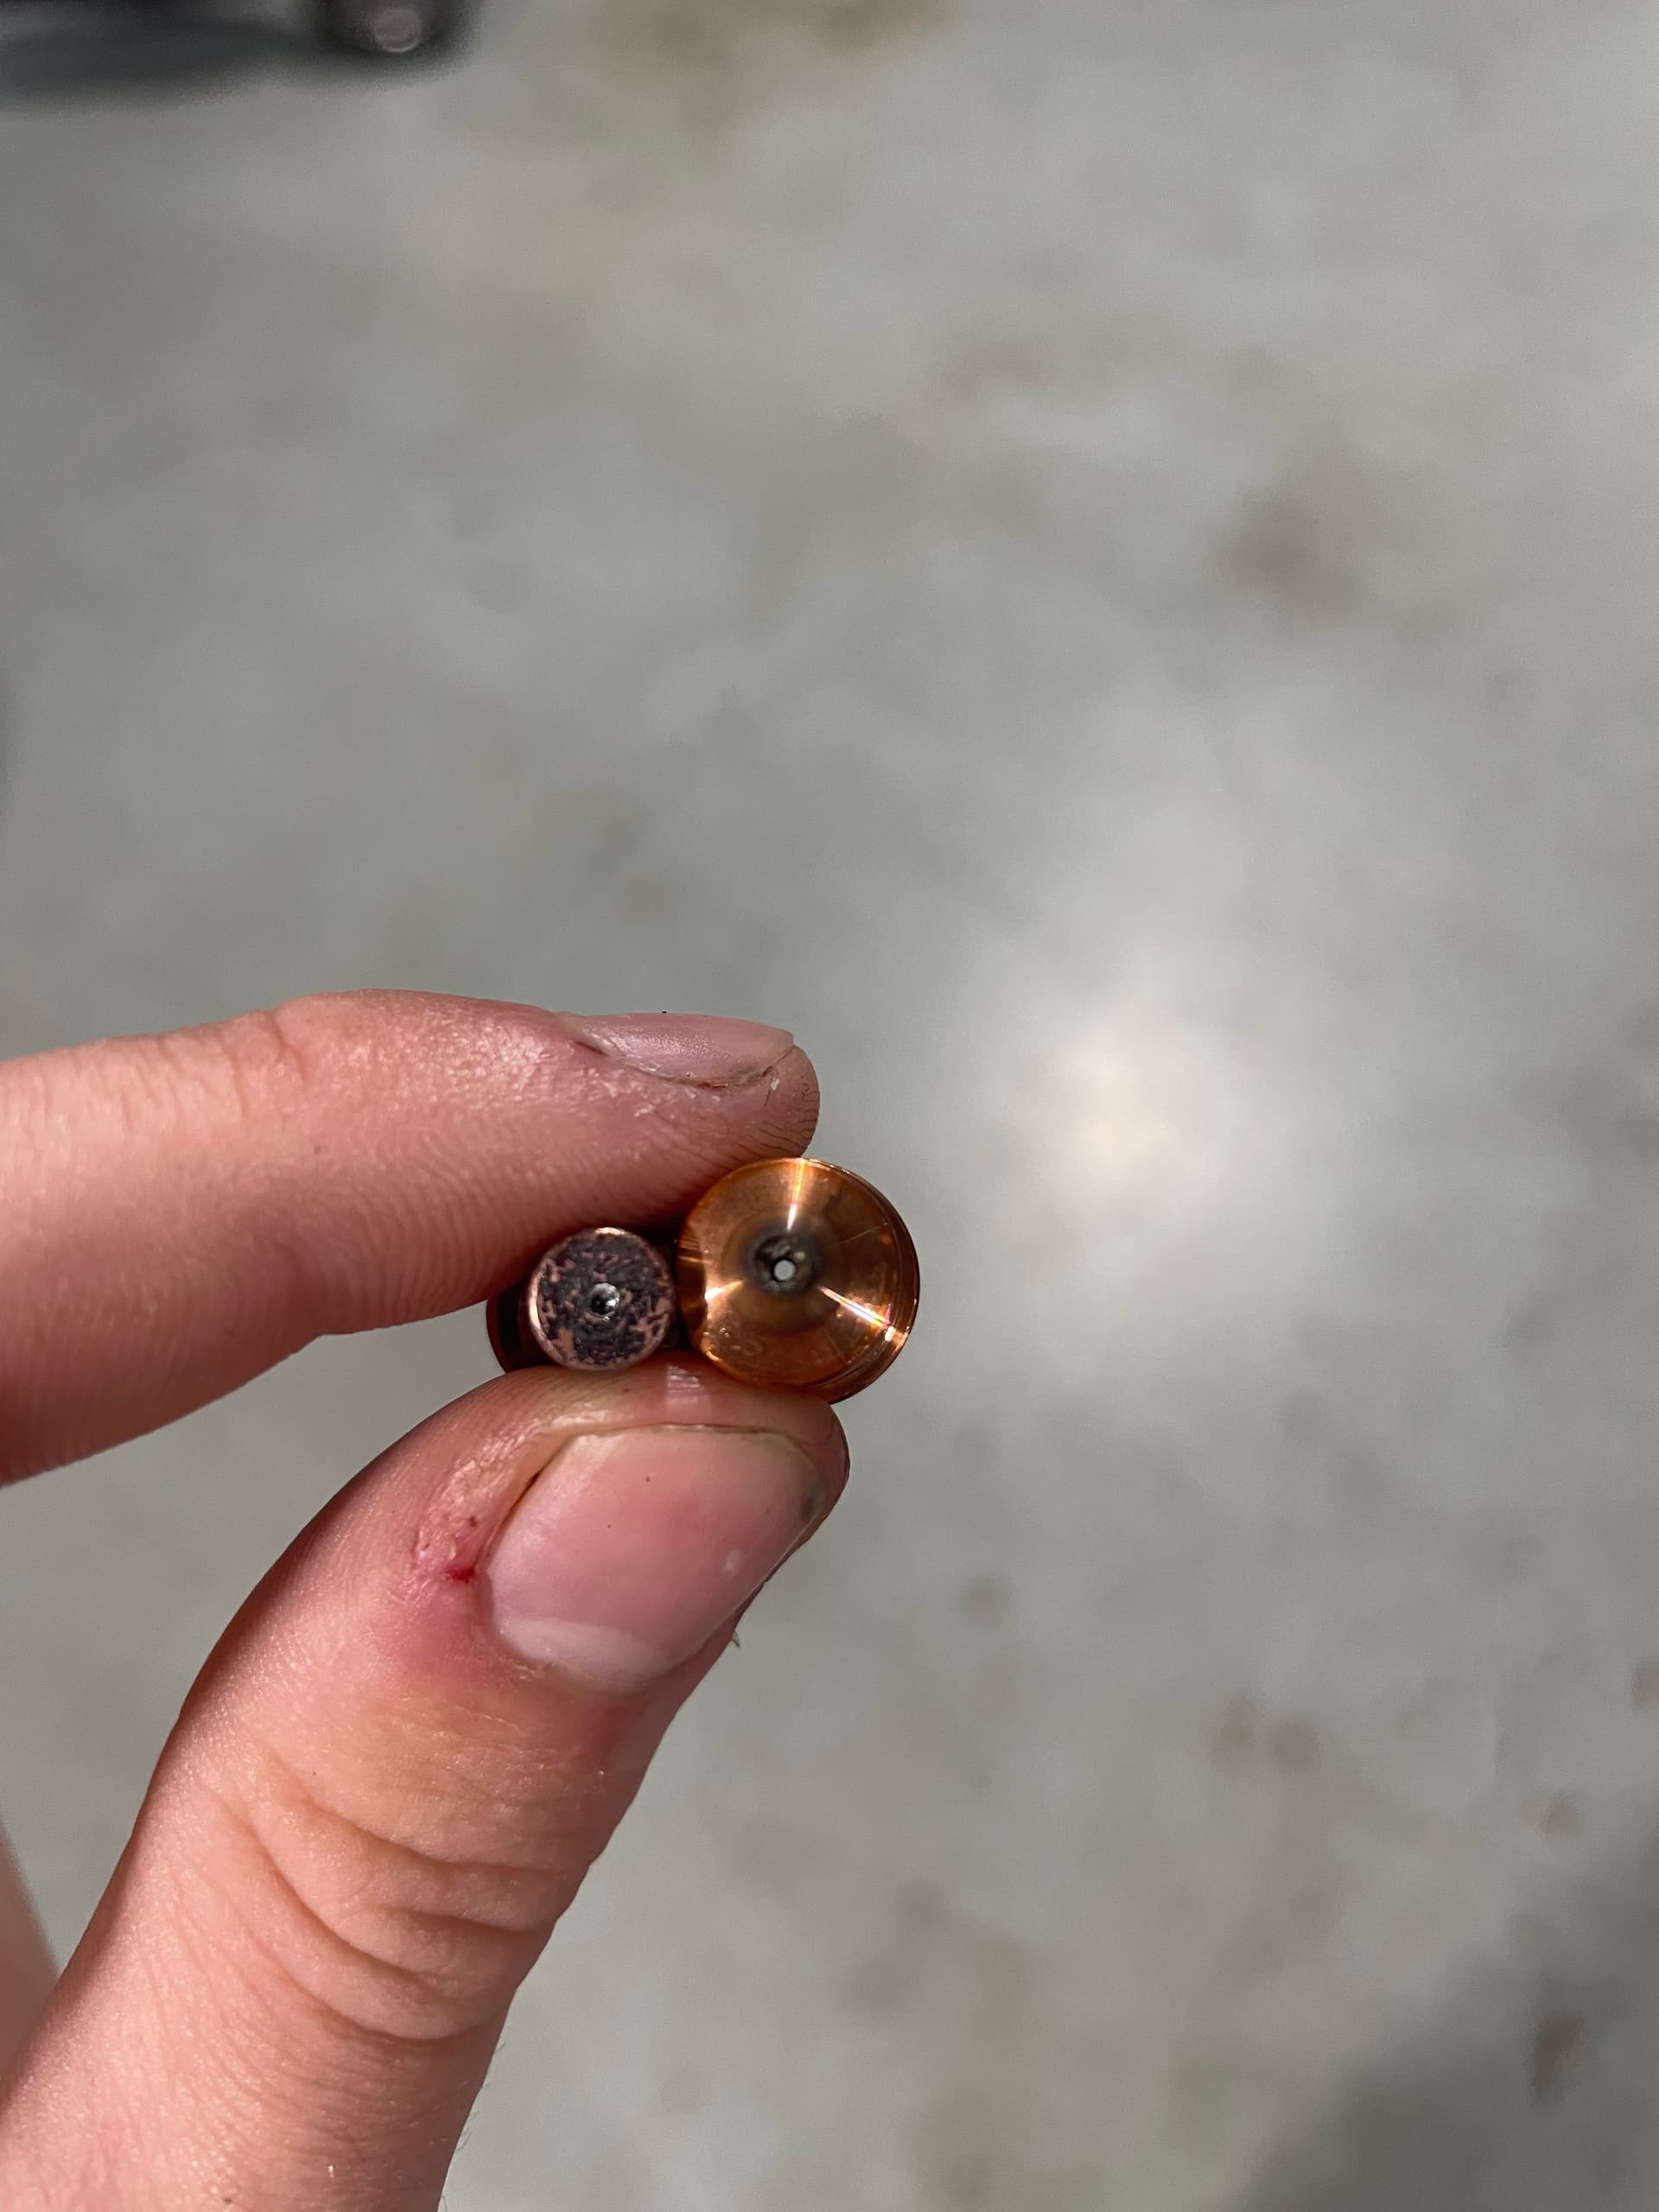
Not saying you don’t have dry air… What is your means of removing moisture? How much cutting is on these consumables? Can you post a picture of your nozzle and electrode? Where are you buying your consumables?
When I started before and good air dryer and using cheap consumables. I was making cut look just like those.
When I increase my input psi to my Razorweld 45 the built in gauge reaches a max psi of 75 (can I open the plasma cutter up and adjust a regulator or something?)
I just stop the program mid-cut and move the torch to the edge of test material and get an estimated reading with the digital calipers
The reason I am testing without a lead in or lead out is because whenever I try to generate a complex cut profile with a lead in or lead out the Gcode tends to have errors and not include some loops/chains
I just replaced the consumables with brand new ones and the issue showed up right away
If it matters I have my machine connected to 220v and its on its own circuit with a 30amp dual pole breaker (should I worry about popping the breaker?)
Here is a link to the air drier I am using (1/4" NPT and 0.01 Micron) https://www.amazon.com/gp/product/B08XQFKNZ9/ref=ppx_yo_dt_b_search_asin_title?ie=UTF8&th=1
Yea with less than 20 minutes of cut time, and 200 pierces is that what they should look like?
Also where should I look into getting a decent air drier setup that wont break my wallet?
(Ill look at some other threads too for air drying)
With your dryer that isn’t too bad. You can get way more with a better dryer. You will pay for a better setup just on money savings on consumables. You need something that can remove suspended moisture.
Alright, thank you very much for your help. Just for a ball park estimate with a good air drying system what amount of torch time/pierces should I be aiming for?
That all depends on the consumables brands. With a good setup I and decent consumables you possibly could double or triple that.
The drying setup you need all depends on where you live. Me I can use my compressor for a pressure washer without my setup.
On the bead dryer I still don’t have the best setup i use two small ones tandam. Not the best it works for now. Keep in mind the more air drying you do the more air restrictions. I have a dry air tank after all my drying equipment.
Oh and yes most open the plasma up and adjust the regulator.
I also have a Motorguard filter after the dessicant dryer.
When I was running the PTM60 torch with Tecmo consumables, I was getting between 300-500 pierces per set. I switched to a torch that uses Hypertherm consumables and I’m currently at 1300 pierces on the first set of consumables.
so…this is my drying system…I went from around 500 pierces to well over 1500 with this…and cut time is well over 2 hours of actual torch time…
a lot of this was found and repurposed…but the basics are…drain the tank all the time…refrigerated dryer is a real great thing…but a beaded desiccant drywr and a motorguard filter are a must.
#2 You need to get the air dryer #3 There is something wrong you should never get a drop of more them 5 psi from static to flow. You have a restriction some were in your air system. #4 You need to get the right consumables for your torch. Cheap Chinese copy Hypertherm consumables are not the way to get good results. Also you don’t have a Hypertherm plasma cutter or torch so why would you think they would work correctly. #5 Until you get these 4 things taken care of you are still going to have trouble. Then you have to work on programming. That’s another hole different thing.
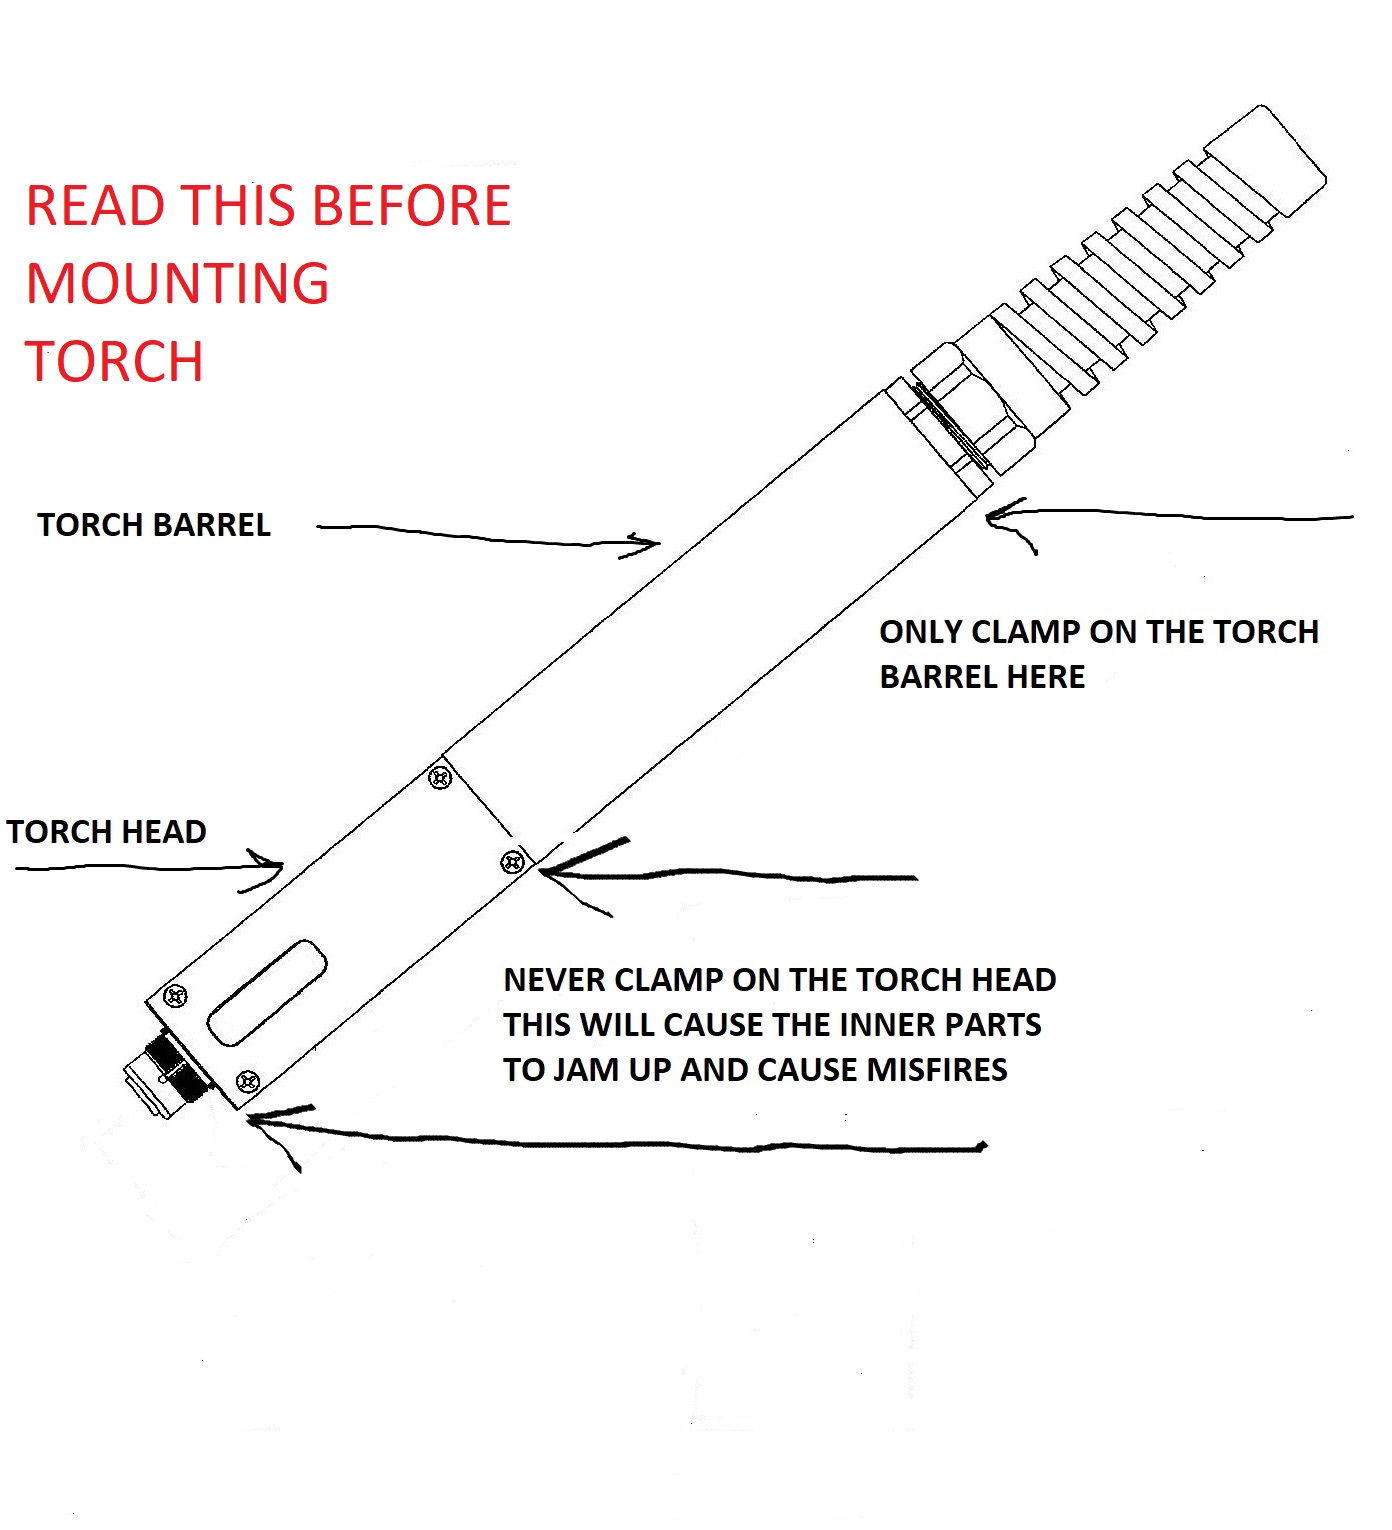
Looking at the picture, seems the problem is at the beginning of each cut, right? Also, the problem is almost identical on each piece so not intermittent. In addition to repositioning the torch in the clamp as suggested above, you may need to revisit your settings in CAM and see if there is a cause there.
@MetalCustoms
take gthe advice from @mechanic416 toi heart…he has forgotten more about plasma workings then most of of will learn…he selld and repairs plasma…
For sure the torch needs moved. My opinion based on my experience is. The consumables are trash I seen the same cuts with mine.
So I got my table early in the year it cut fine as soon as it warmed up. Yup this is what I had. I could turn the amps up a little and it would help. It will pierce the metal because of the long delay then the consumables can’t cut through. Then the material heats up enough that it finally makes it through it… Just my two cents . He actually doesn’t have much at all to remove moisture.
My air line coming into my plasma cutter is 1/4" NPT is that the point of restriction?
I purchased the Razerweld Cut45 with machine torch and when I searched for the replacement consumables I picked ones with the same part # (they looked Identical to the ones that where included)
What should I be looking for when purchasing replacement consumables?
I replaced the consumables and it cut almost perfect again so I think the issue is the poor air drying set-up along with the poor consumables
That would be my next step to work on my air supply.
when I said your consumables are trash. I meant that they was used beyond worth. I try my best not to knock on what people can afford but I do advocate some things are worth their money. It doesn’t matter what quality you buy excessive moisture will trash them fast.
You will get there just remember when you are having trouble only change one thing at a time. That will help identify any causes of a problem.