Creating One Operation for Multiple Parts

Good afternoon,
I’m having a little issue that the guys here, and myself, can’t seem to figure out.
I have a list of parts (16) I put into SheetCam to cut. I got them all nested fairly well
and went to create the cut path for the project.
Unfortunately, this is where my problem sits; I can only create a cut path for one part at a time.

Is there a way to create a cutting operation for all the parts at once or am I stuck having to combine them to do that? Right now, it seems like I have to create a cut path for each and every part individually. I figured, if maybe the parts were all on the same Layer (0) that I could have the tool cut every part that is on Layer (0) at once, thus creating a cut path for every part on Layer (0).

Any tips or tricks in helping us with this?
Any feedback would be very helpful.

Thanks in advance,
Mike

Attached are 2 images.

  1. The parts list with the layer, tools and cut operation. (Ignore that Part 1 is highlighted.)
  2. Shows the only cut path made after thinking it created one for the entire project. (FAIL)


Click on the nesting tool in the top toolbar and it should show all of the toolpaths.

You can also click on the simulation tool in the toolbar to make sure all of your parts will be cut.

Unfortunately you have ‘put the cart before the horse’.
I believe there may be two problems.

  1. first, import dxf into a part and design the toolpath for it. Repeat for other dxf as part(s). Refine the toolpaths as you like them, but if you need to tweak them after step 2, that’s fine provided…
  2. use part ‘duplicates’, not ‘copies’. Now select the Part you want to work with, use menu Mode / Nesting, right click on the drawing, select Duplicate, Multiple Duplicates, or Array of Parts, which ever fits your use case, all of them are ‘duplicates’ instead of ‘copies’. Manually re-arrange the duplicates as you like.

The magic of using duplicates of parts instead of copies is that duplicates have only one master set of Operations, change the master (parent part) and all duplicates get the change. Use copy of parts only when you want separate copies of Operations and I believe Layers, but I hardly ever use copies so I can’t be sure of Layers but it would make sense that there are copies.

1 Like

That’s generally what was happening.

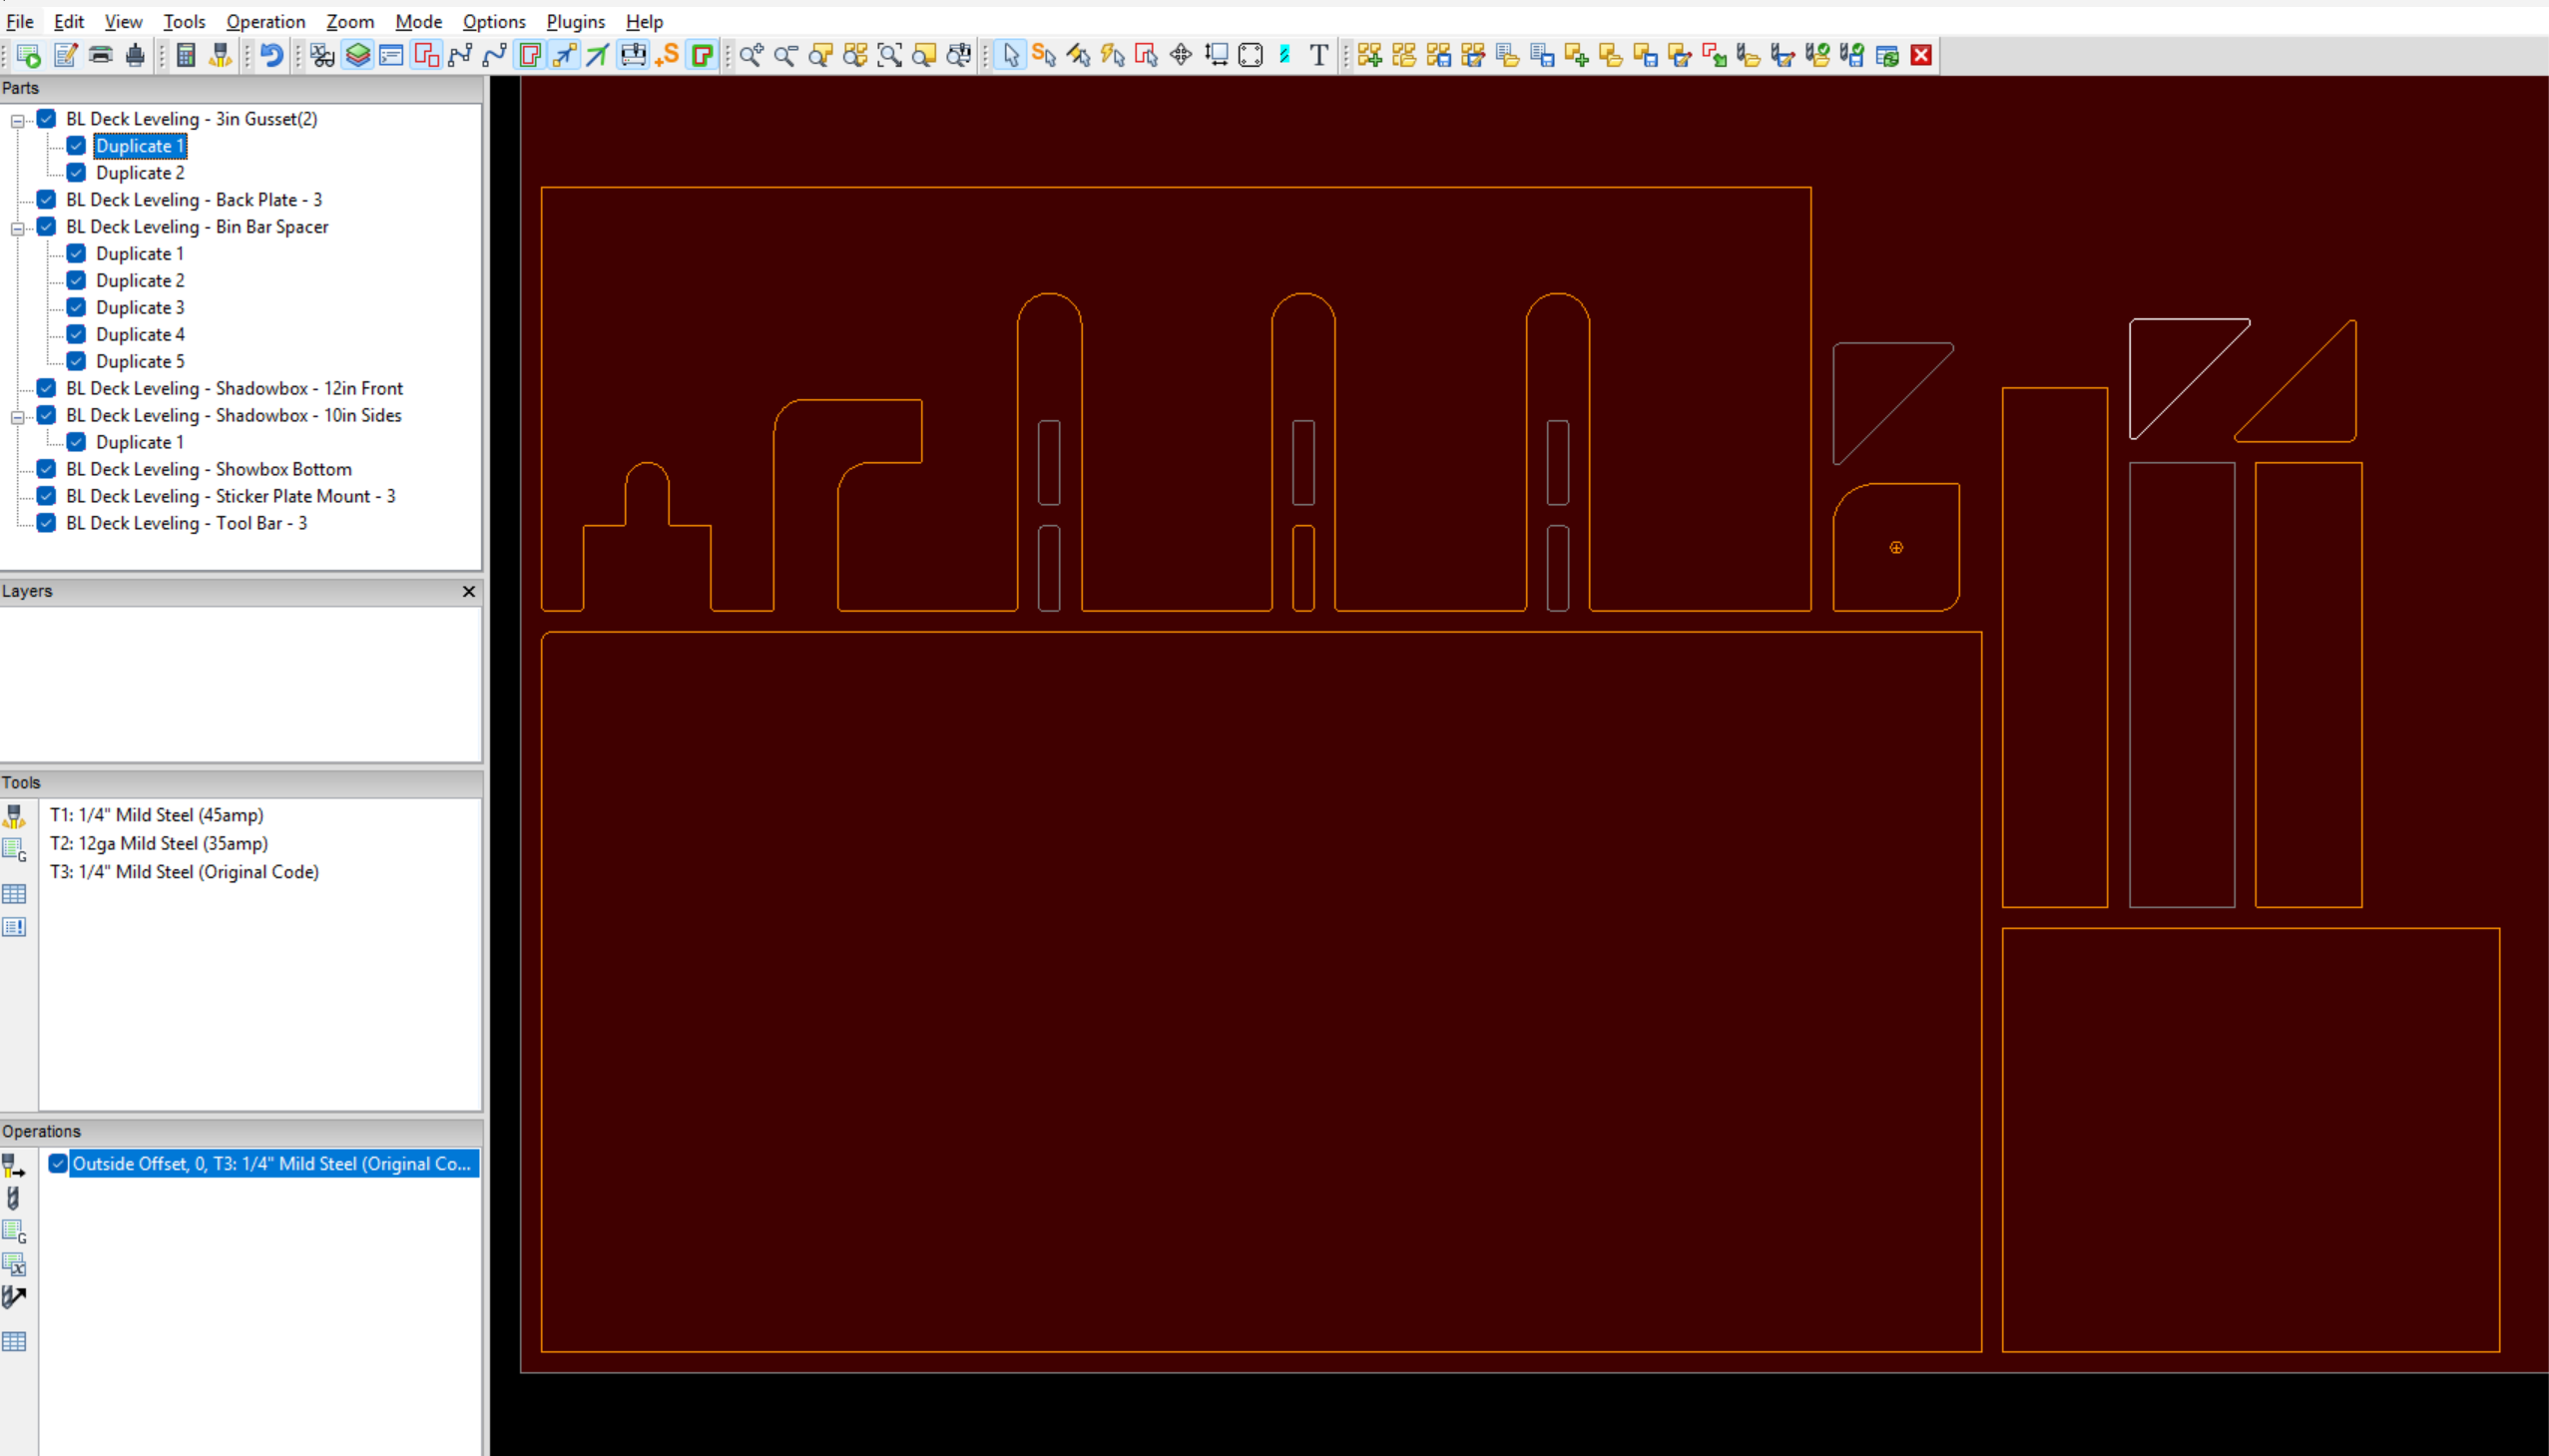
What I was doing was bringing in all my parts, making duplicates (not copies) of some parts, and then trying to create a single cut path for the entire job. But, what was happening was, it would only create a cut path for a single part, even though they were all on the same Layer(0).
(I did verify, no other parts had cut paths.)

Then, I figured I’d probably have to create cut paths for each one as the only solution, so I started doing it that way. But, what I was finding was that it was creating a cut path for Part 1, then going back to 0,0. Then going to Part 2, cutting that, then going back to 0,0 again. Then Part 3, back to 0,0…You get the picture.

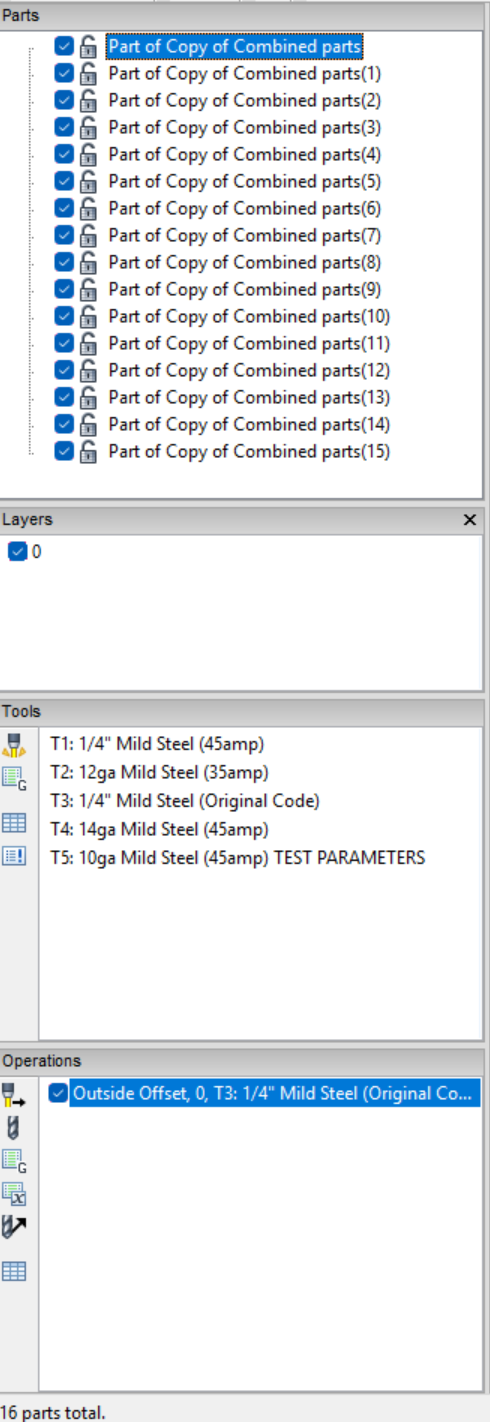
So, my next “great idea” was to combine all the parts as one. Logically, I figured if they were all as one part that it would create a cut path for the now “one part.” Well, that didn’t work out as planned. What it did was create a cut path for just one single part of the entire grouping. So, I ended up having to break them up as individual parts. That’s when it changed all the part names to “Copy of…” (The parts, again, were not “copies.” They were duplicates.)

At this point, I tried to click on individual parts, but I couldn’t click on anything. It was as if it wasn’t recognizing the part being there, though it clearly was. I tried clicking on the part in the parts list, but it wasn’t highlighting any parts on the job screen. It was as if it broke and suddenly didn’t recognize any of the parts anymore. I did verify that I was using the Nesting tool to select parts.

We replicated the problem on another guy’s laptop, too, but at this point, he was only able to click on parts in the parts list, but not from the job screen. (Progress! Right?) I compared notes and everything, including settings, all matched up 100%.

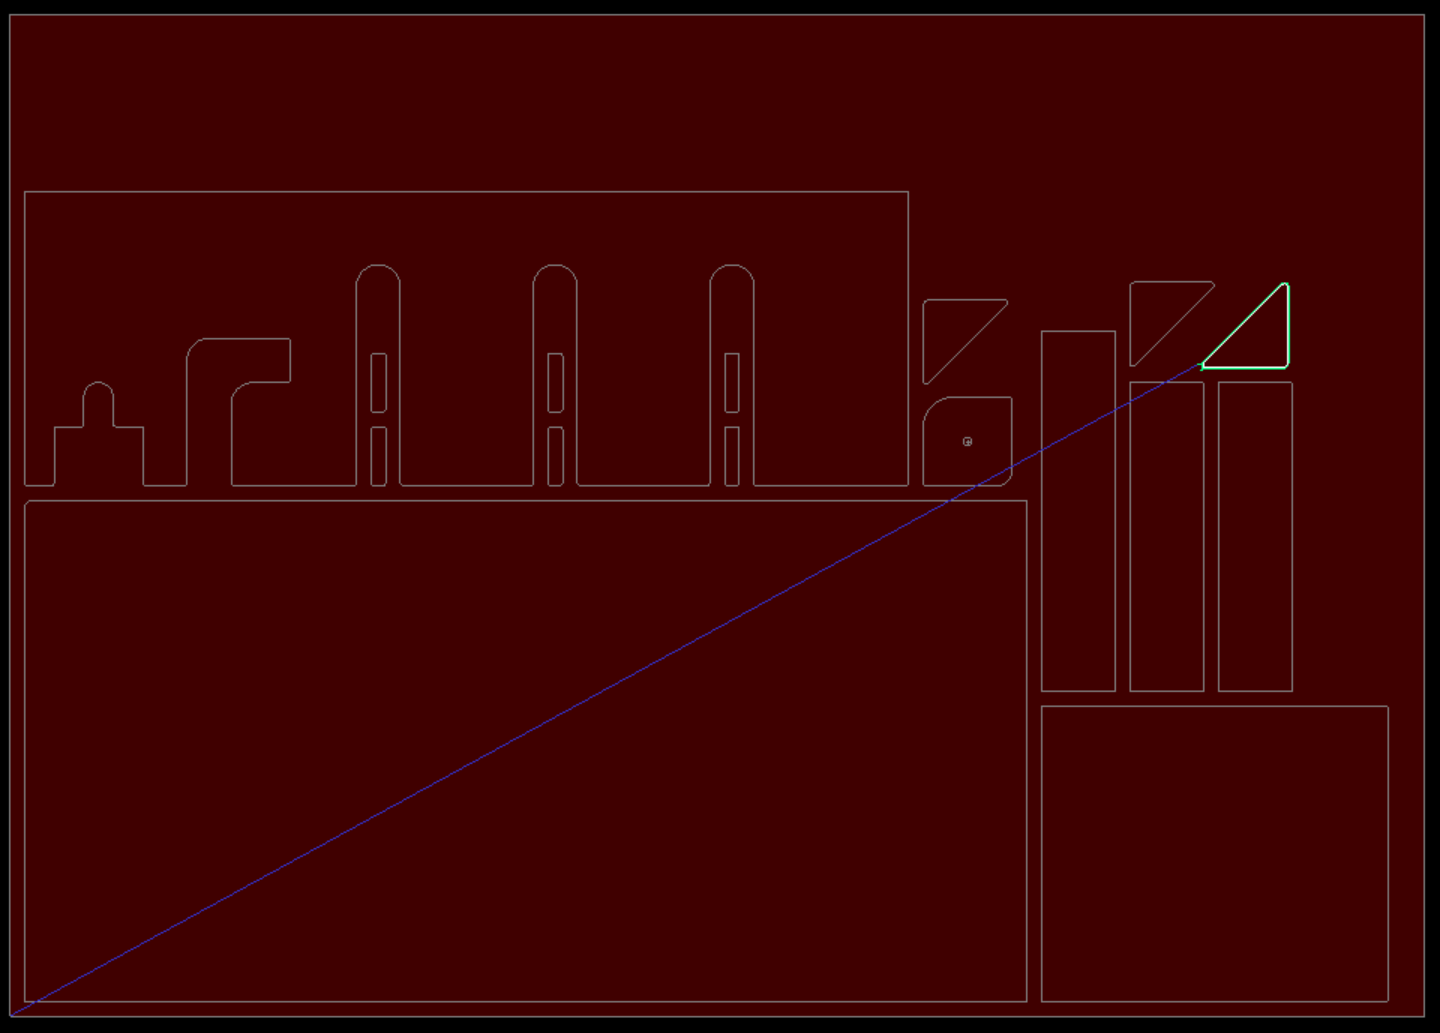
**In the pictures below, the parts are highlighted so I could select the part to show you the situation. When I created the cut path, I was not selecting any single part.


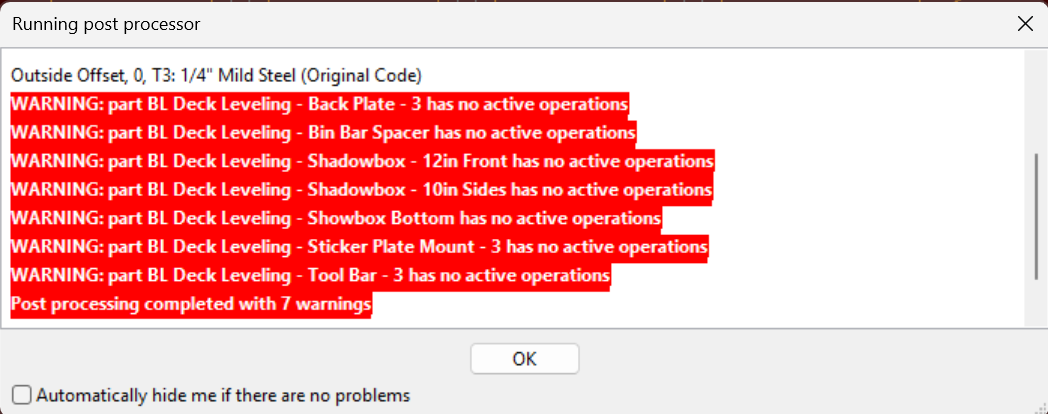
**Yes, I am aware these errors popped up because parts don’t have a cut path.
But, the reason they don’t have a cut path is what I’m trying to figure out.

So, why can I not create a cut path for all the parts at once?

-Mike

It would be best if you sent me a customer support.zip. Please see instructions here- Creating a Sheetcam Customer Support file - Problems and questions - Sheetcam

Sorry I misunderstood your original problem (I highlighted the quoted text). It is not possible to create one single master of an Operation which spans multiple Parts. Operations are children of Parts. Only Duplicate Parts of the same parent part can inherit the parent part Operations.

You can however create an Operation in a Part and consider it a ‘master’, then right click the Operation name, Copy, then individually select other Part names, right click in their Operations window/view, then right click and Paste. This works without further Operation editing if the Layer names in the copied from and pasted to Parts are the same name. However, these are independent Operations of each parent Part. Net: this is a simple copy and paste exercise of the Operation name/object from one parent Part to another.

Combining Parts in V7.1.40 was intended to solve your original problem I believe, but there is a lot going on in that scenario you describe so I can’t say your use case was entirely valid in that regard. It also sounds like your sheetcam .ini file may be fouled since you were having trouble selecting Parts after combining and perhaps later breaking up.

I do not know what field(s) in the .ini file are affecting this odd behavior, so you may consider resetting your .ini settings file to factory default values. Here’s how…

  • launch sheetcam, go to menu Help / ‘Open settings folder’
  • a Windows Explorer dialogue will open, leave it open
  • close sheetcam
  • rename the ‘SheetCam TNG Development.ini’ file to *.ini.save
  • delete the .ini.bak file
  • launch sheetcam, you will be prompted to go through the setup wizard.
    done.

You can delete the .ini.save file once you are happy with the new one AND after you have used Options / ‘Plugin options’ to enable and provide key values for any of the five purchasable plugins. you can find your key values in the .ini.save file. Your sheetcam base license file is not affected by this procedure, just the purchased plugin key values. I can always look them up from our purchase history if you loose them, write to sales@sheetcam.com

1 Like

returning to X0Y0 after each part may be a function of Options / ‘Job options’ / Parking, or it’s occurring by way of post processor logic, perhaps in OnNewPart().

1 Like

@sheetcamCS2
First, thank you for the responses and feedback. Your advice was extremely helpful!
I did get a solution to my problem from what you had suggested.

Starting a new job, I added in each of the parts, but before adding in another part, I added a cut path to the one part. I hadn’t nested them just yet, just added a cut path to each part. I noticed that as I moved the parts around, the cut paths would change and be more accomodating to the parts and their locations. So, it achieved, essentially what I wanted. So, big thank you to all your help and support.

1 Like