I have spent several hours and multiple coupons trying to get the torch to cut square to the table. Front to back is square just follow setup guide. However, I cannot get the torch square to the table left to right. The adjusters on the Z axis don’t provide much adjustment as only the right side has adjusters. As far as I can tell the roller on the left side of the Z axis cradle are fixed. I’ve tried tipping the torch but that doesn’t work because the torch clamp is designed to center the torch in the clamp.
I’m running a Prime Weld Cut 60 with their 60 AMP machine torch.
I’m cut .25 mild steel
45 Amps
60 PSI
50 Amp tip
Any suggestions would be greatly appreciated. The angle of the cuts are pronounced enough that is makes the results unusable.
There is a lot of adjustment in the Z axis itself when you tram it on the gantry which can effect that bit of tilt you’re referring to.
Also, ensure everything is set up correctly as far as swirl ring, test cuts down, etc.
I say this in case you’re new to this and you’re seeing beveling that isn’t caused by an angled torch. Assuming you’re also trying new consumables because a nozzle can get damaged quickly/easily by piercing at too high or too low of a cut height. That’ll damage the orifice and will cause consistent beveling throughout its life.
I would also raise the working pressure to about 65psi to 70psi on 1/4”.
Yes, I am.usong new consumables but I will recheck them. Regarding adjustments of Z axis, adjustments from front to rear are easy and easily accessible. Adjustments left to right seem to be very limited. Unless I’m missing something there are adjustments in the carriage only for taking play out of the vertical motion. The adjusters are only on the right side of the carriage and the ones on the left are fixed, no adjustment or am I missing something.
I’m not aware of any way to tram the Z axis in that direction. It should be square to the X axis rail by design.
Is this an original Crossfire table with the cantilevered X axis? Tramming in that direction is done by adjusting the X axis rail. The assembly instructions show the procedure for leveling the X axis rail to the table surface. You have to loosen the bolts that hold the red bearing blocks on both sides of the weldment that holds the X axis. that allows enough play to raise or lower the X axis rail to make it parallel to the table.
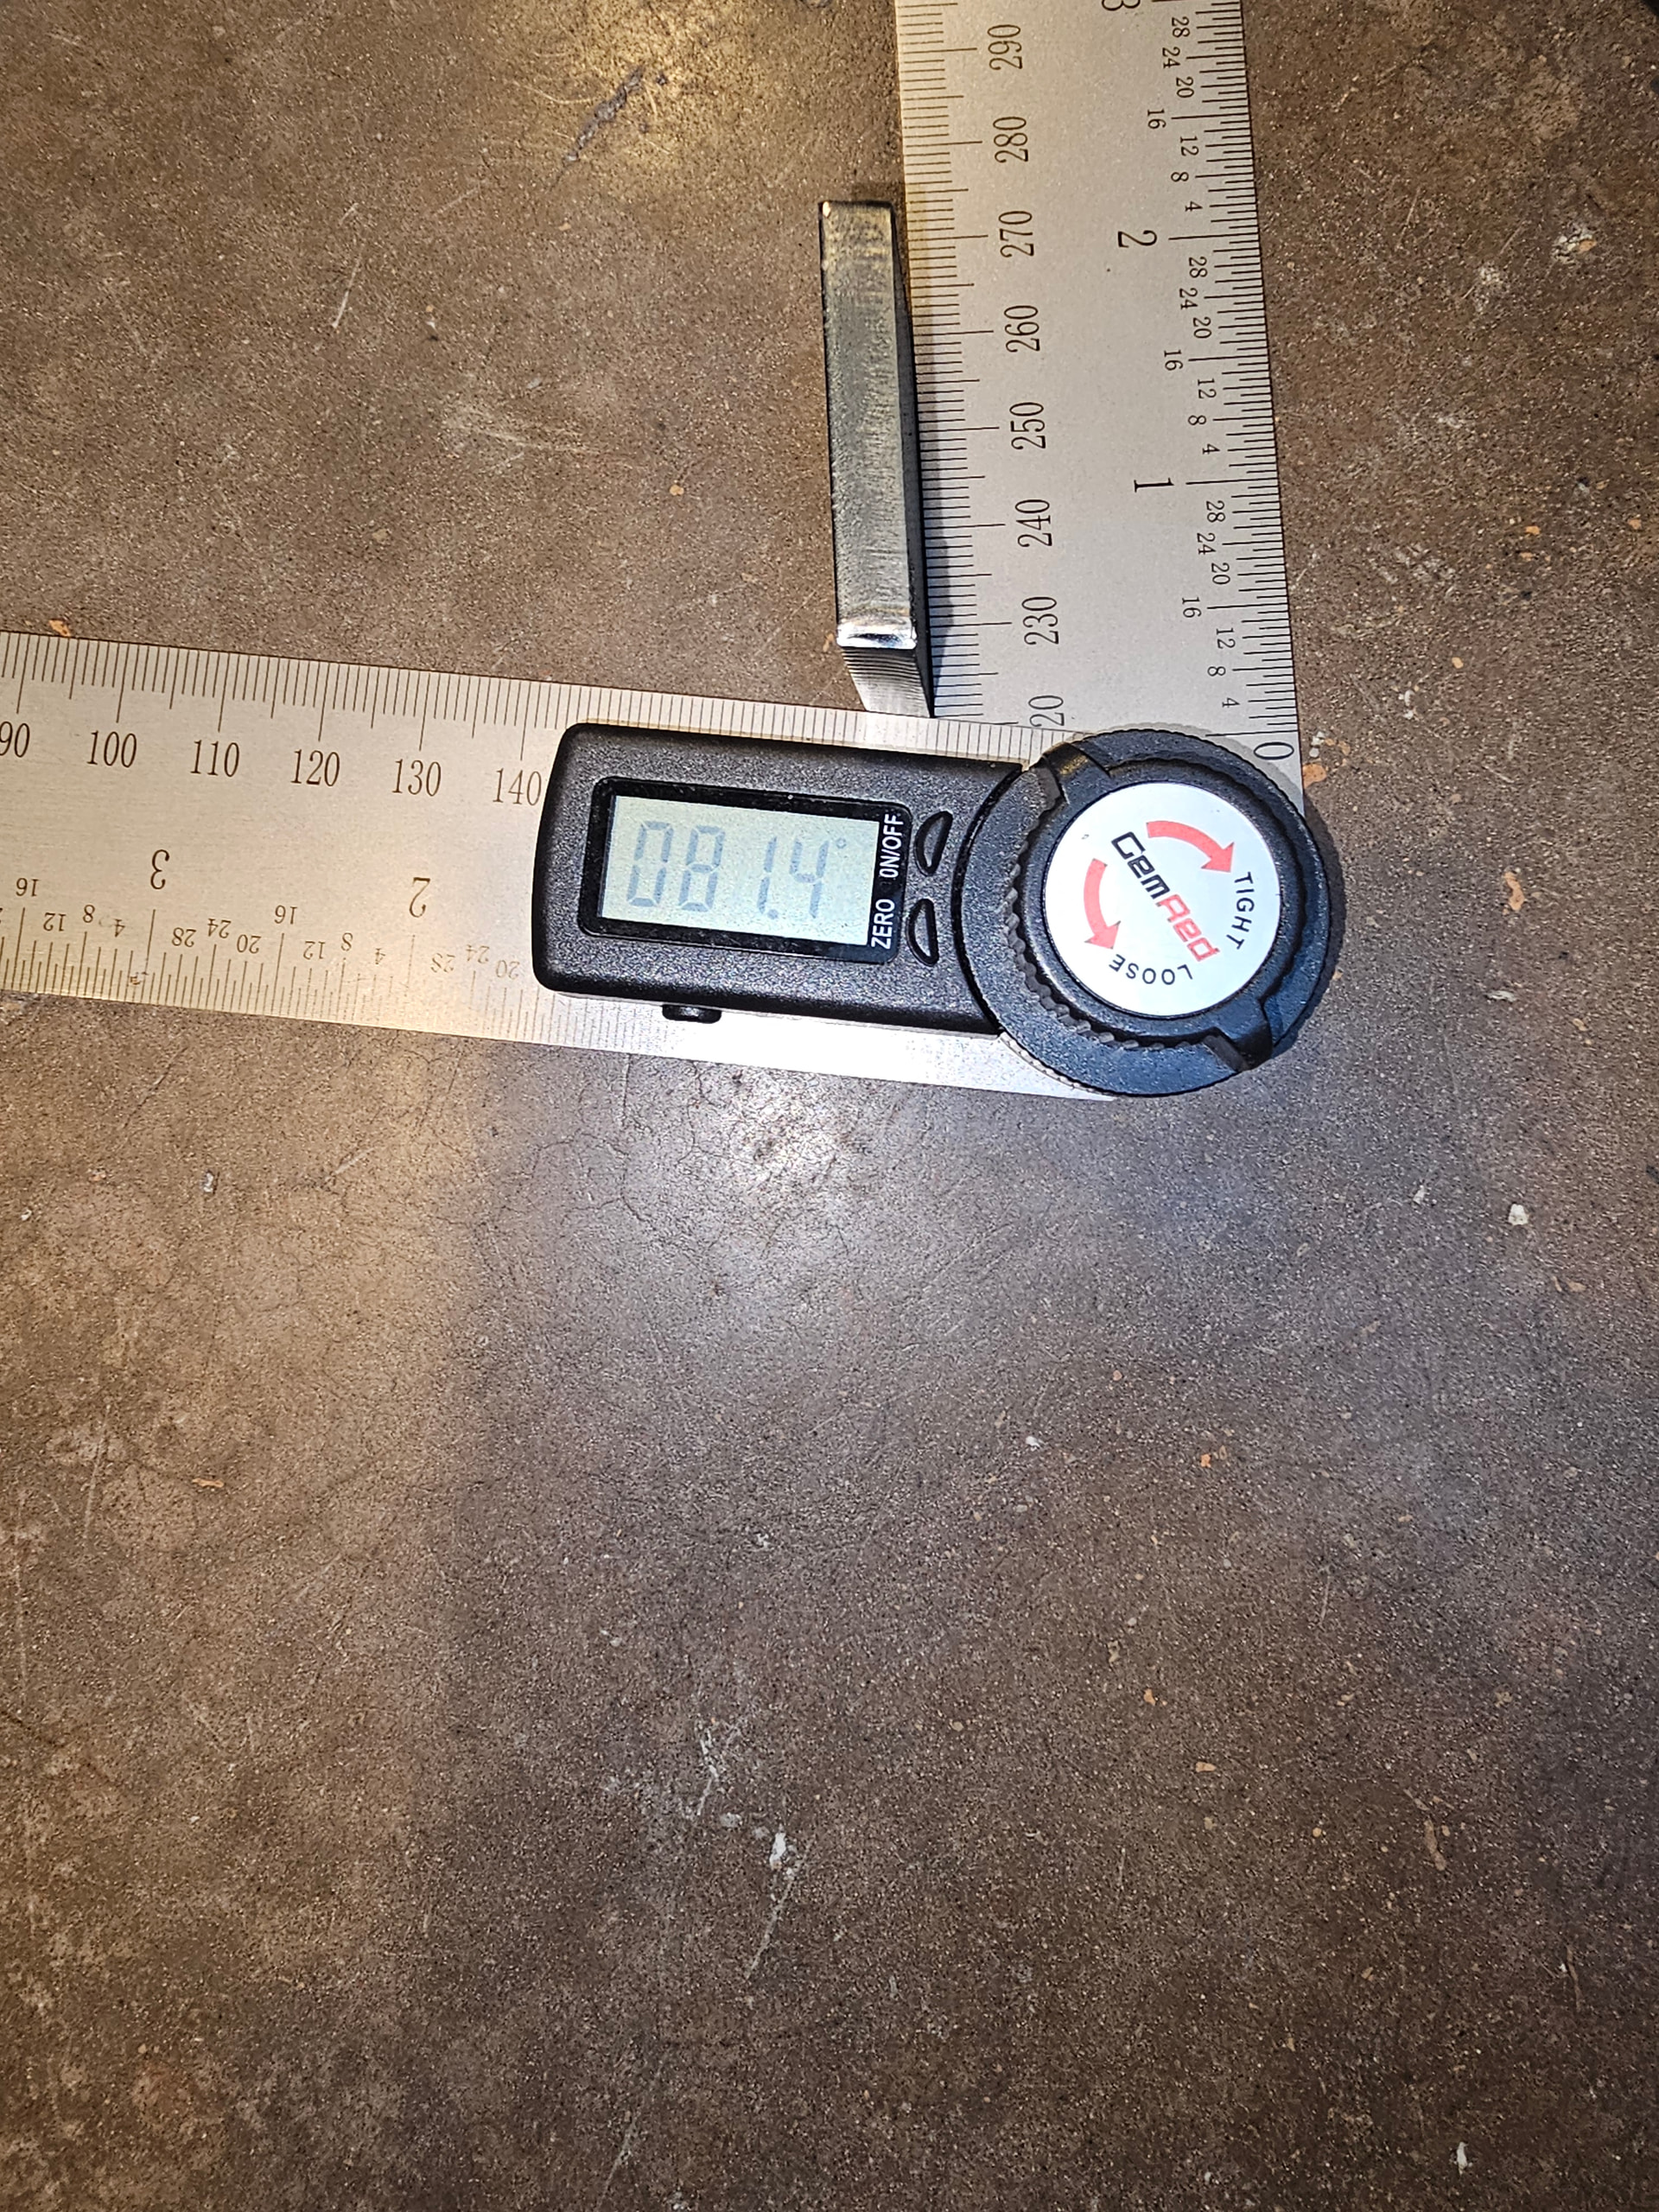
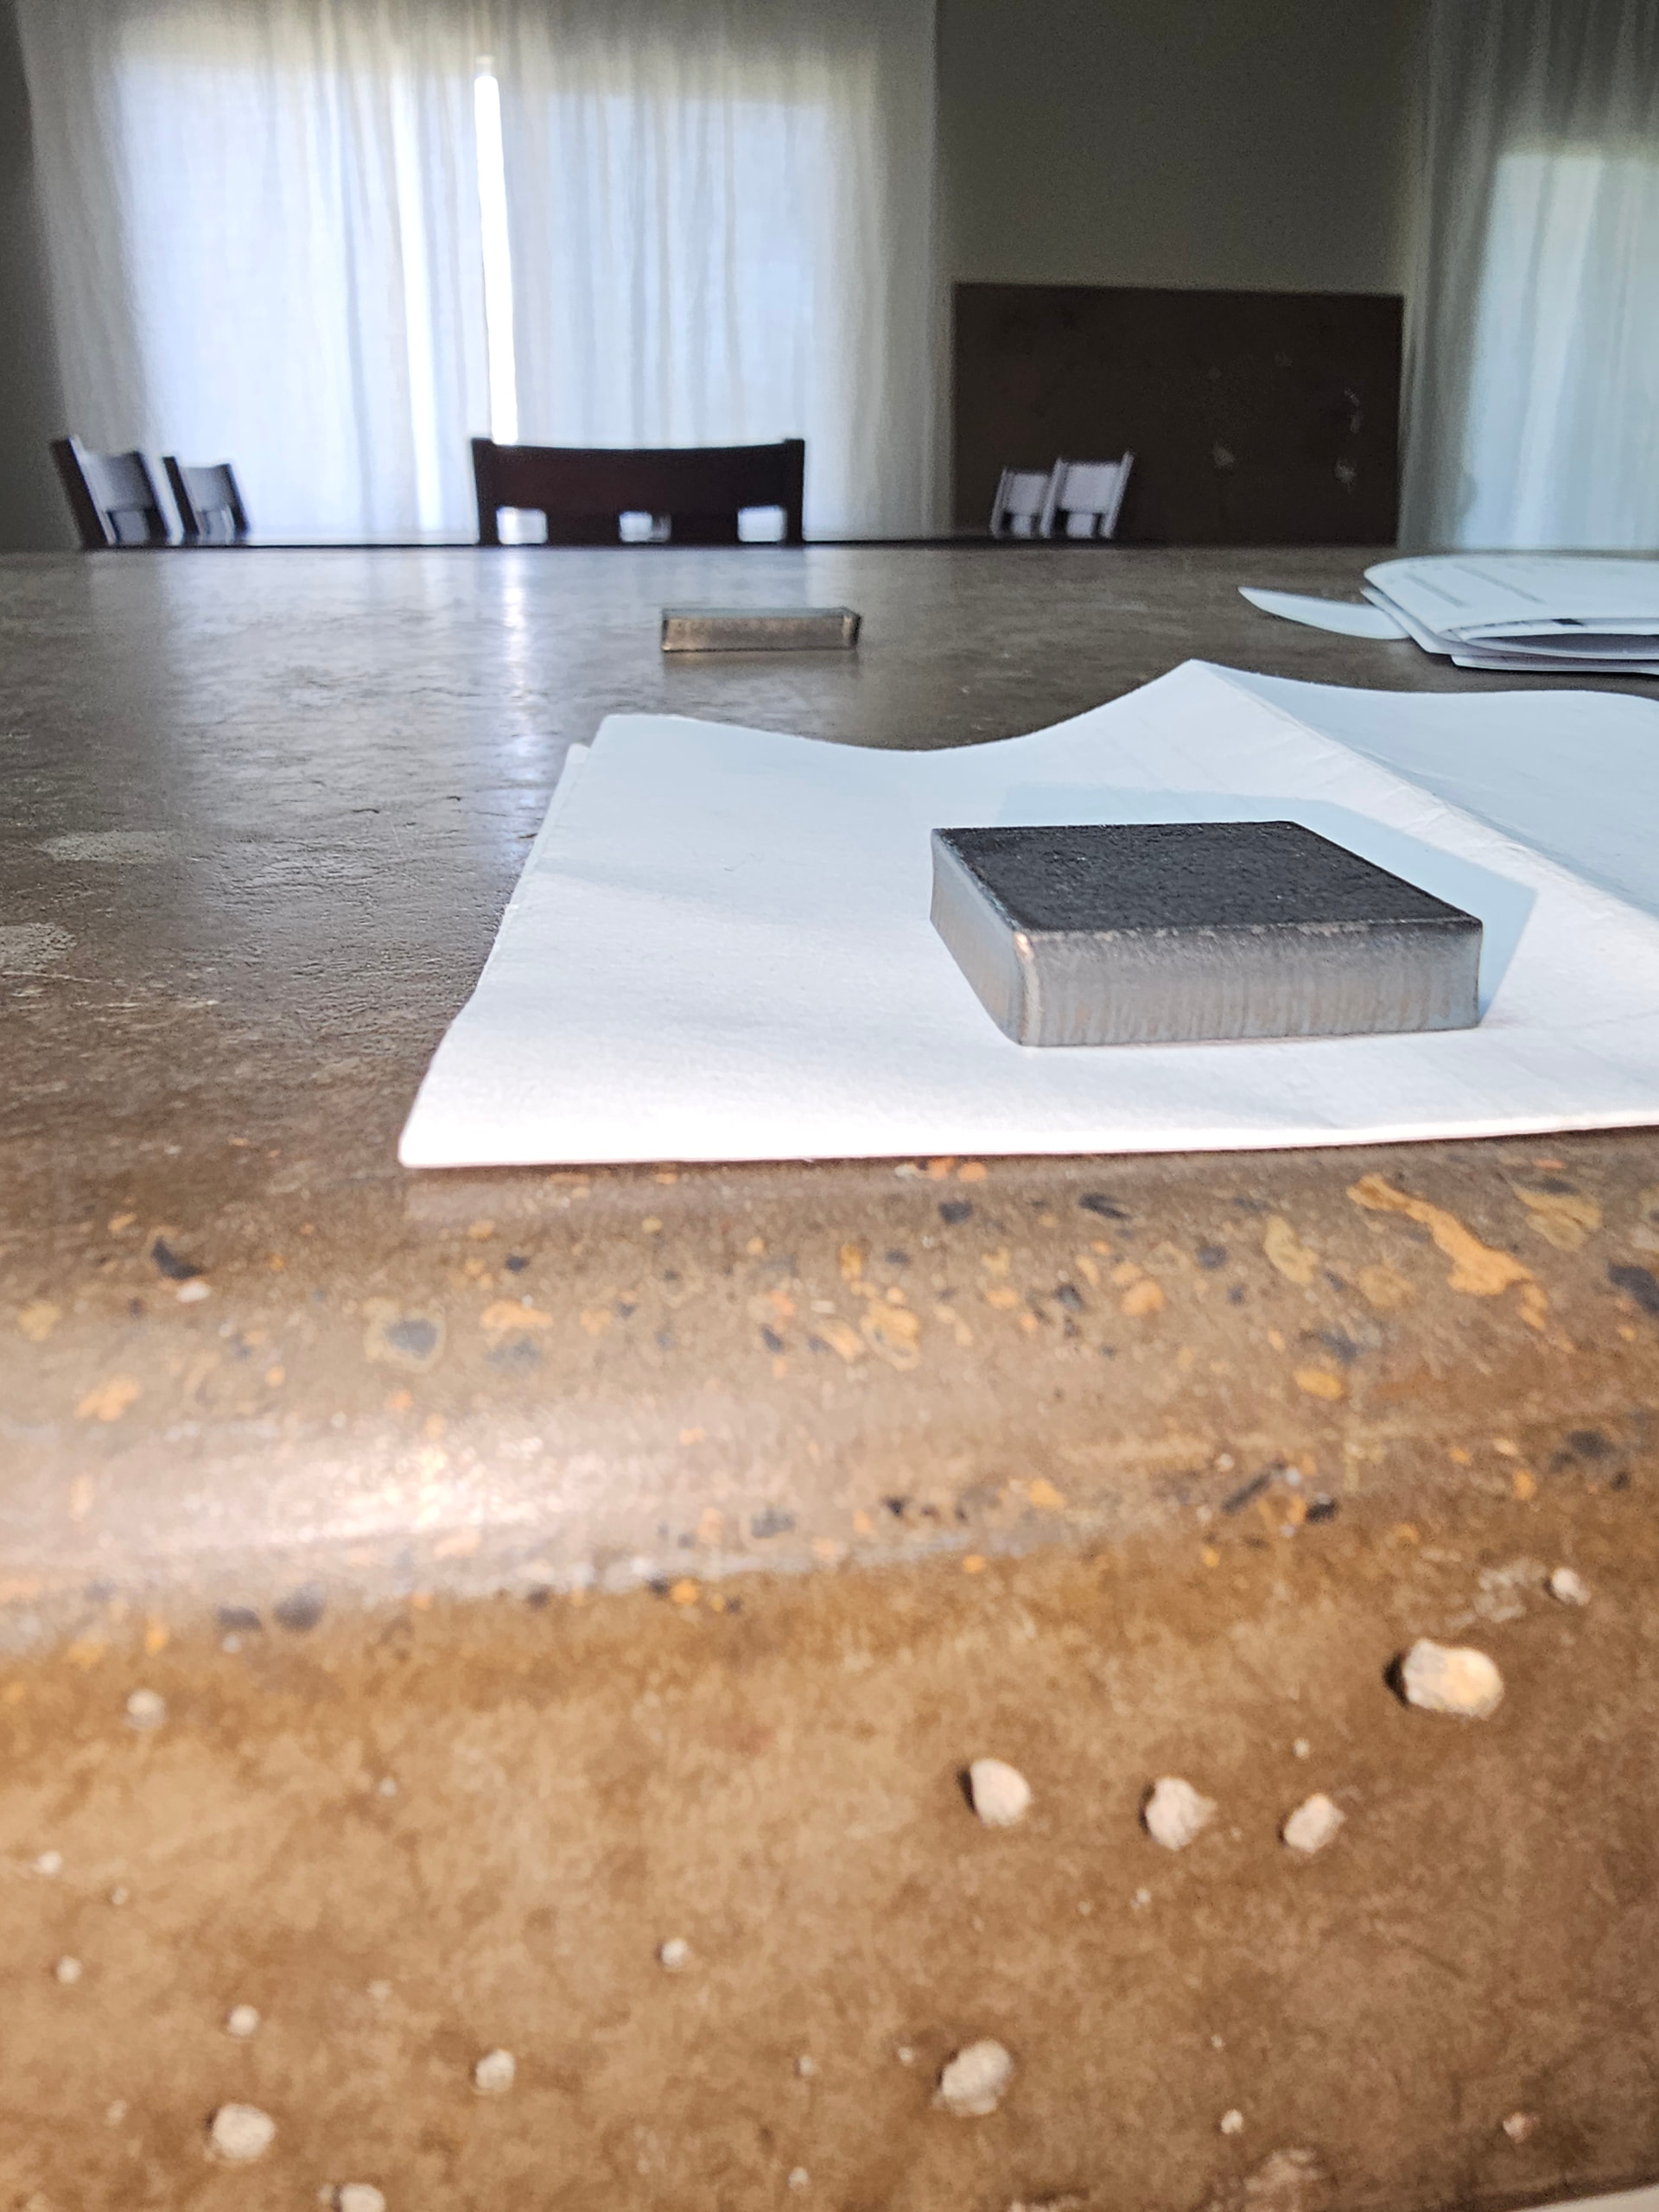
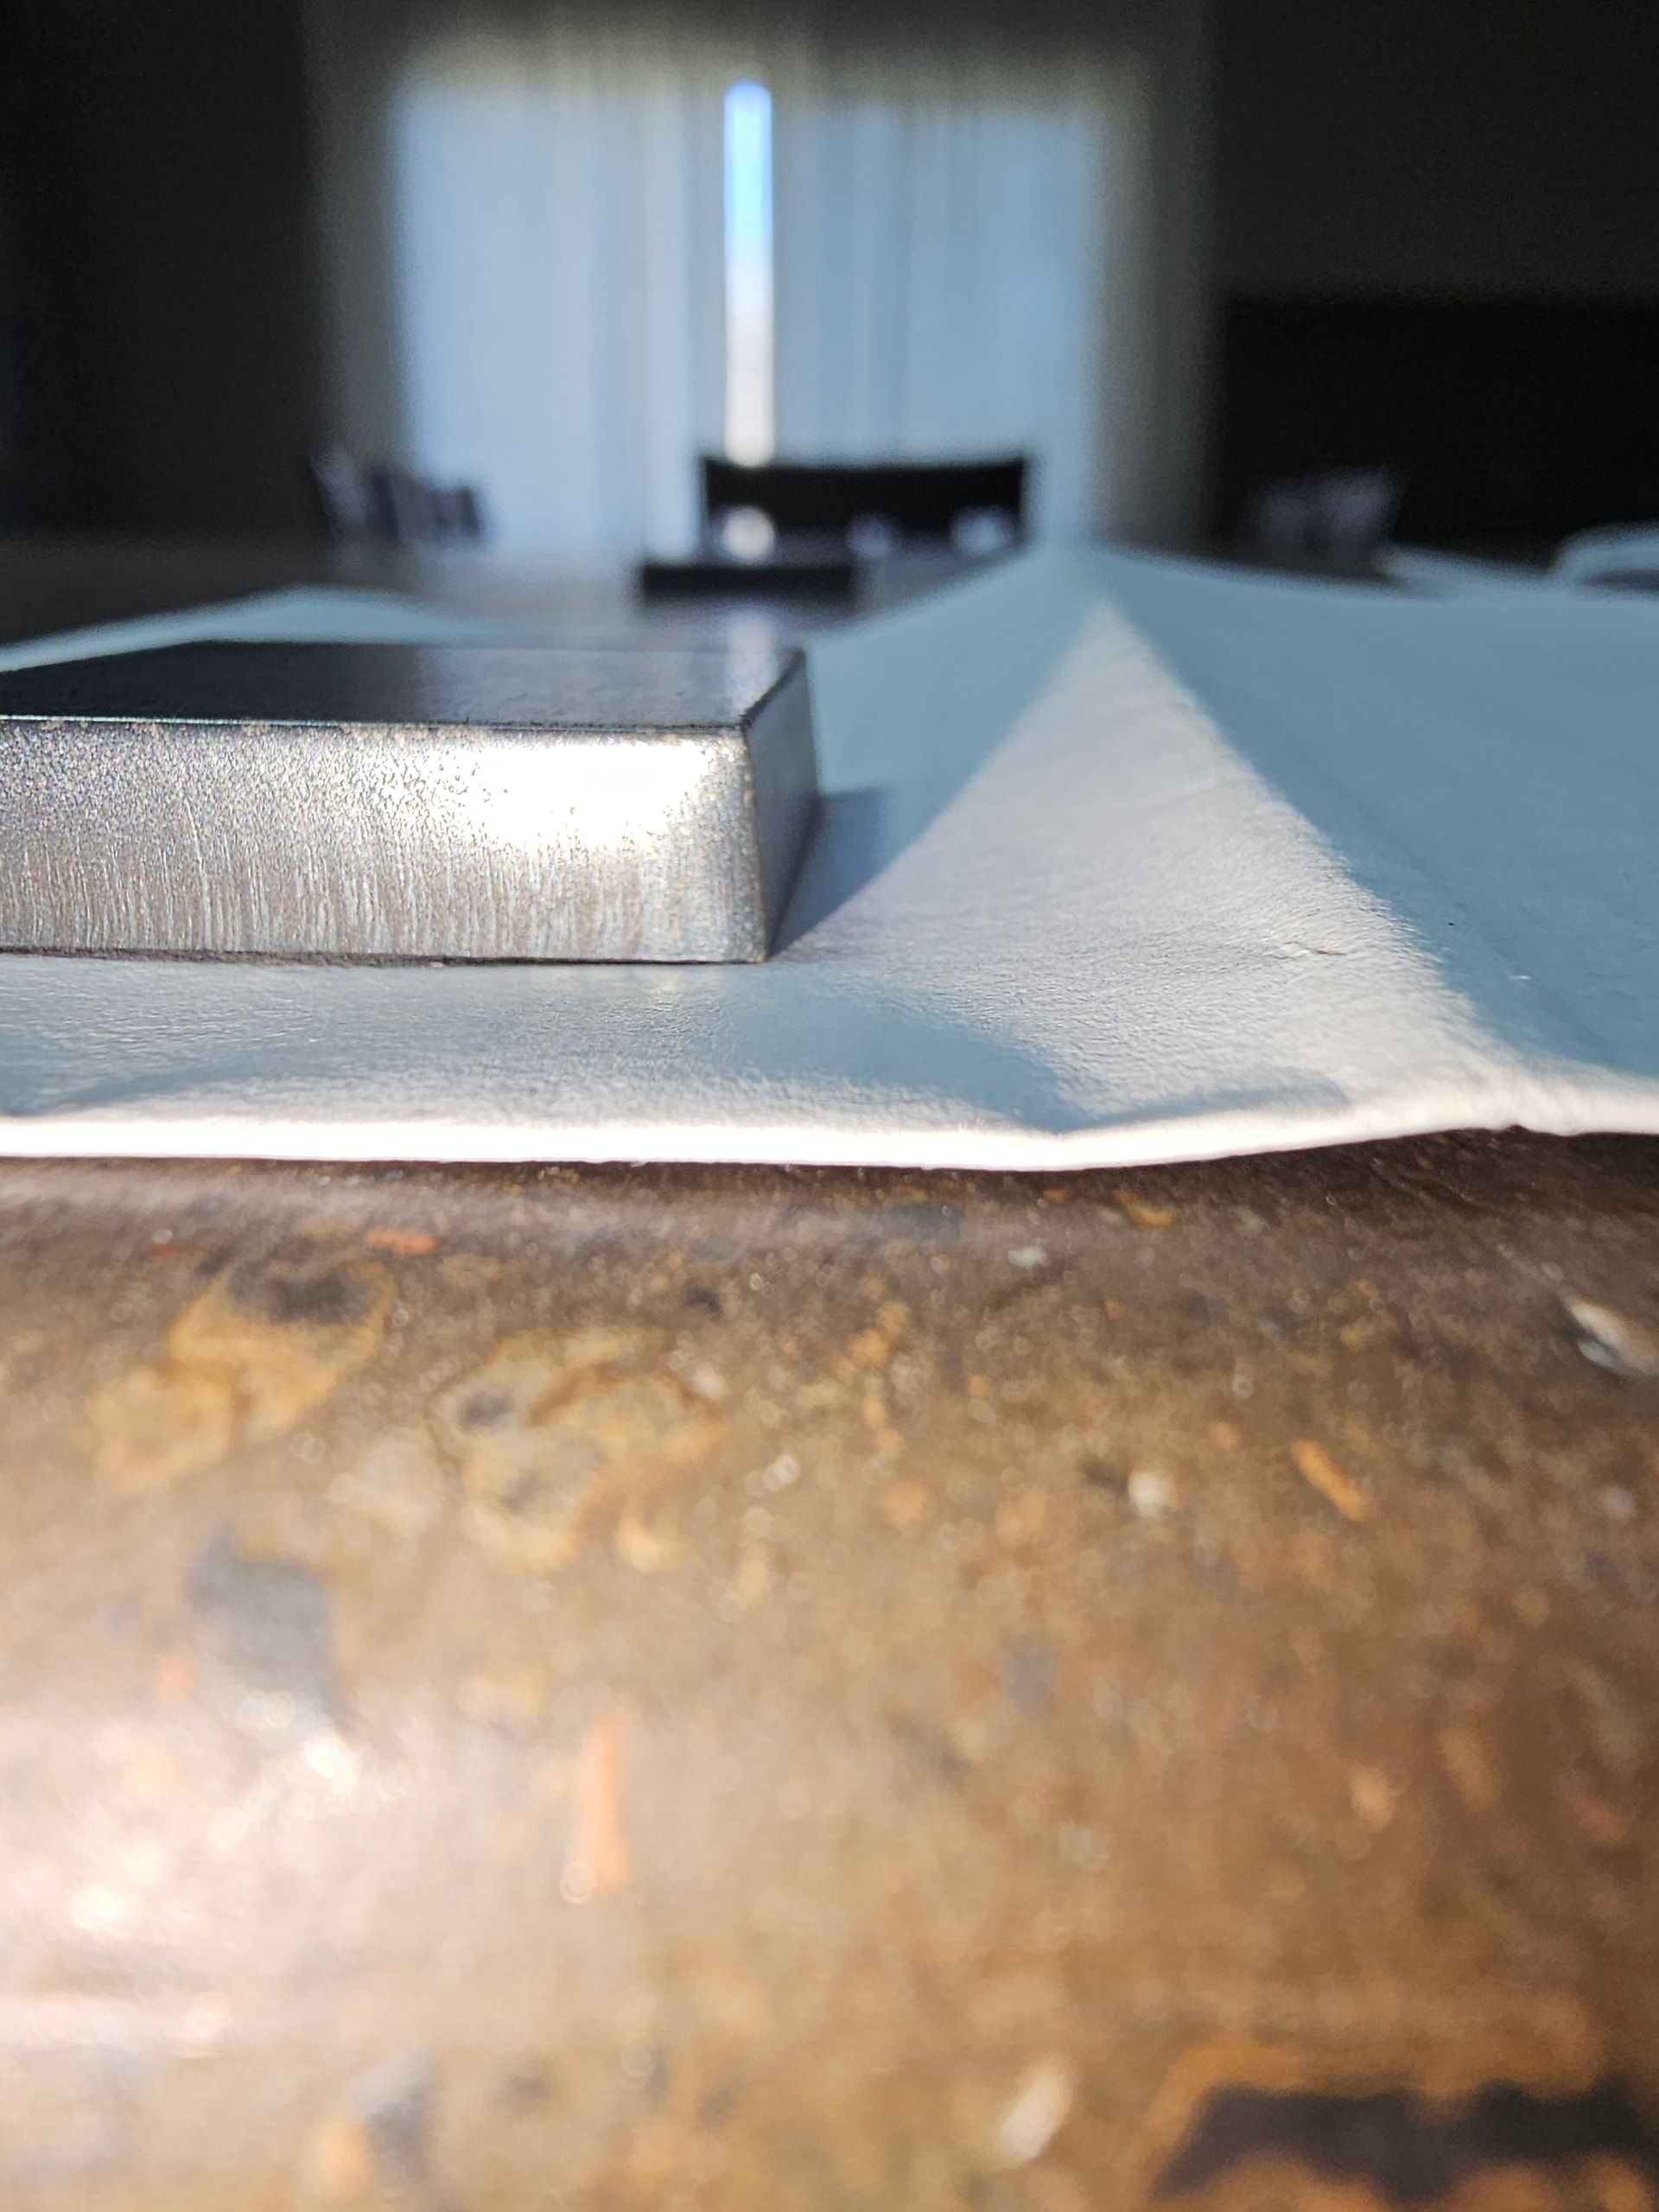
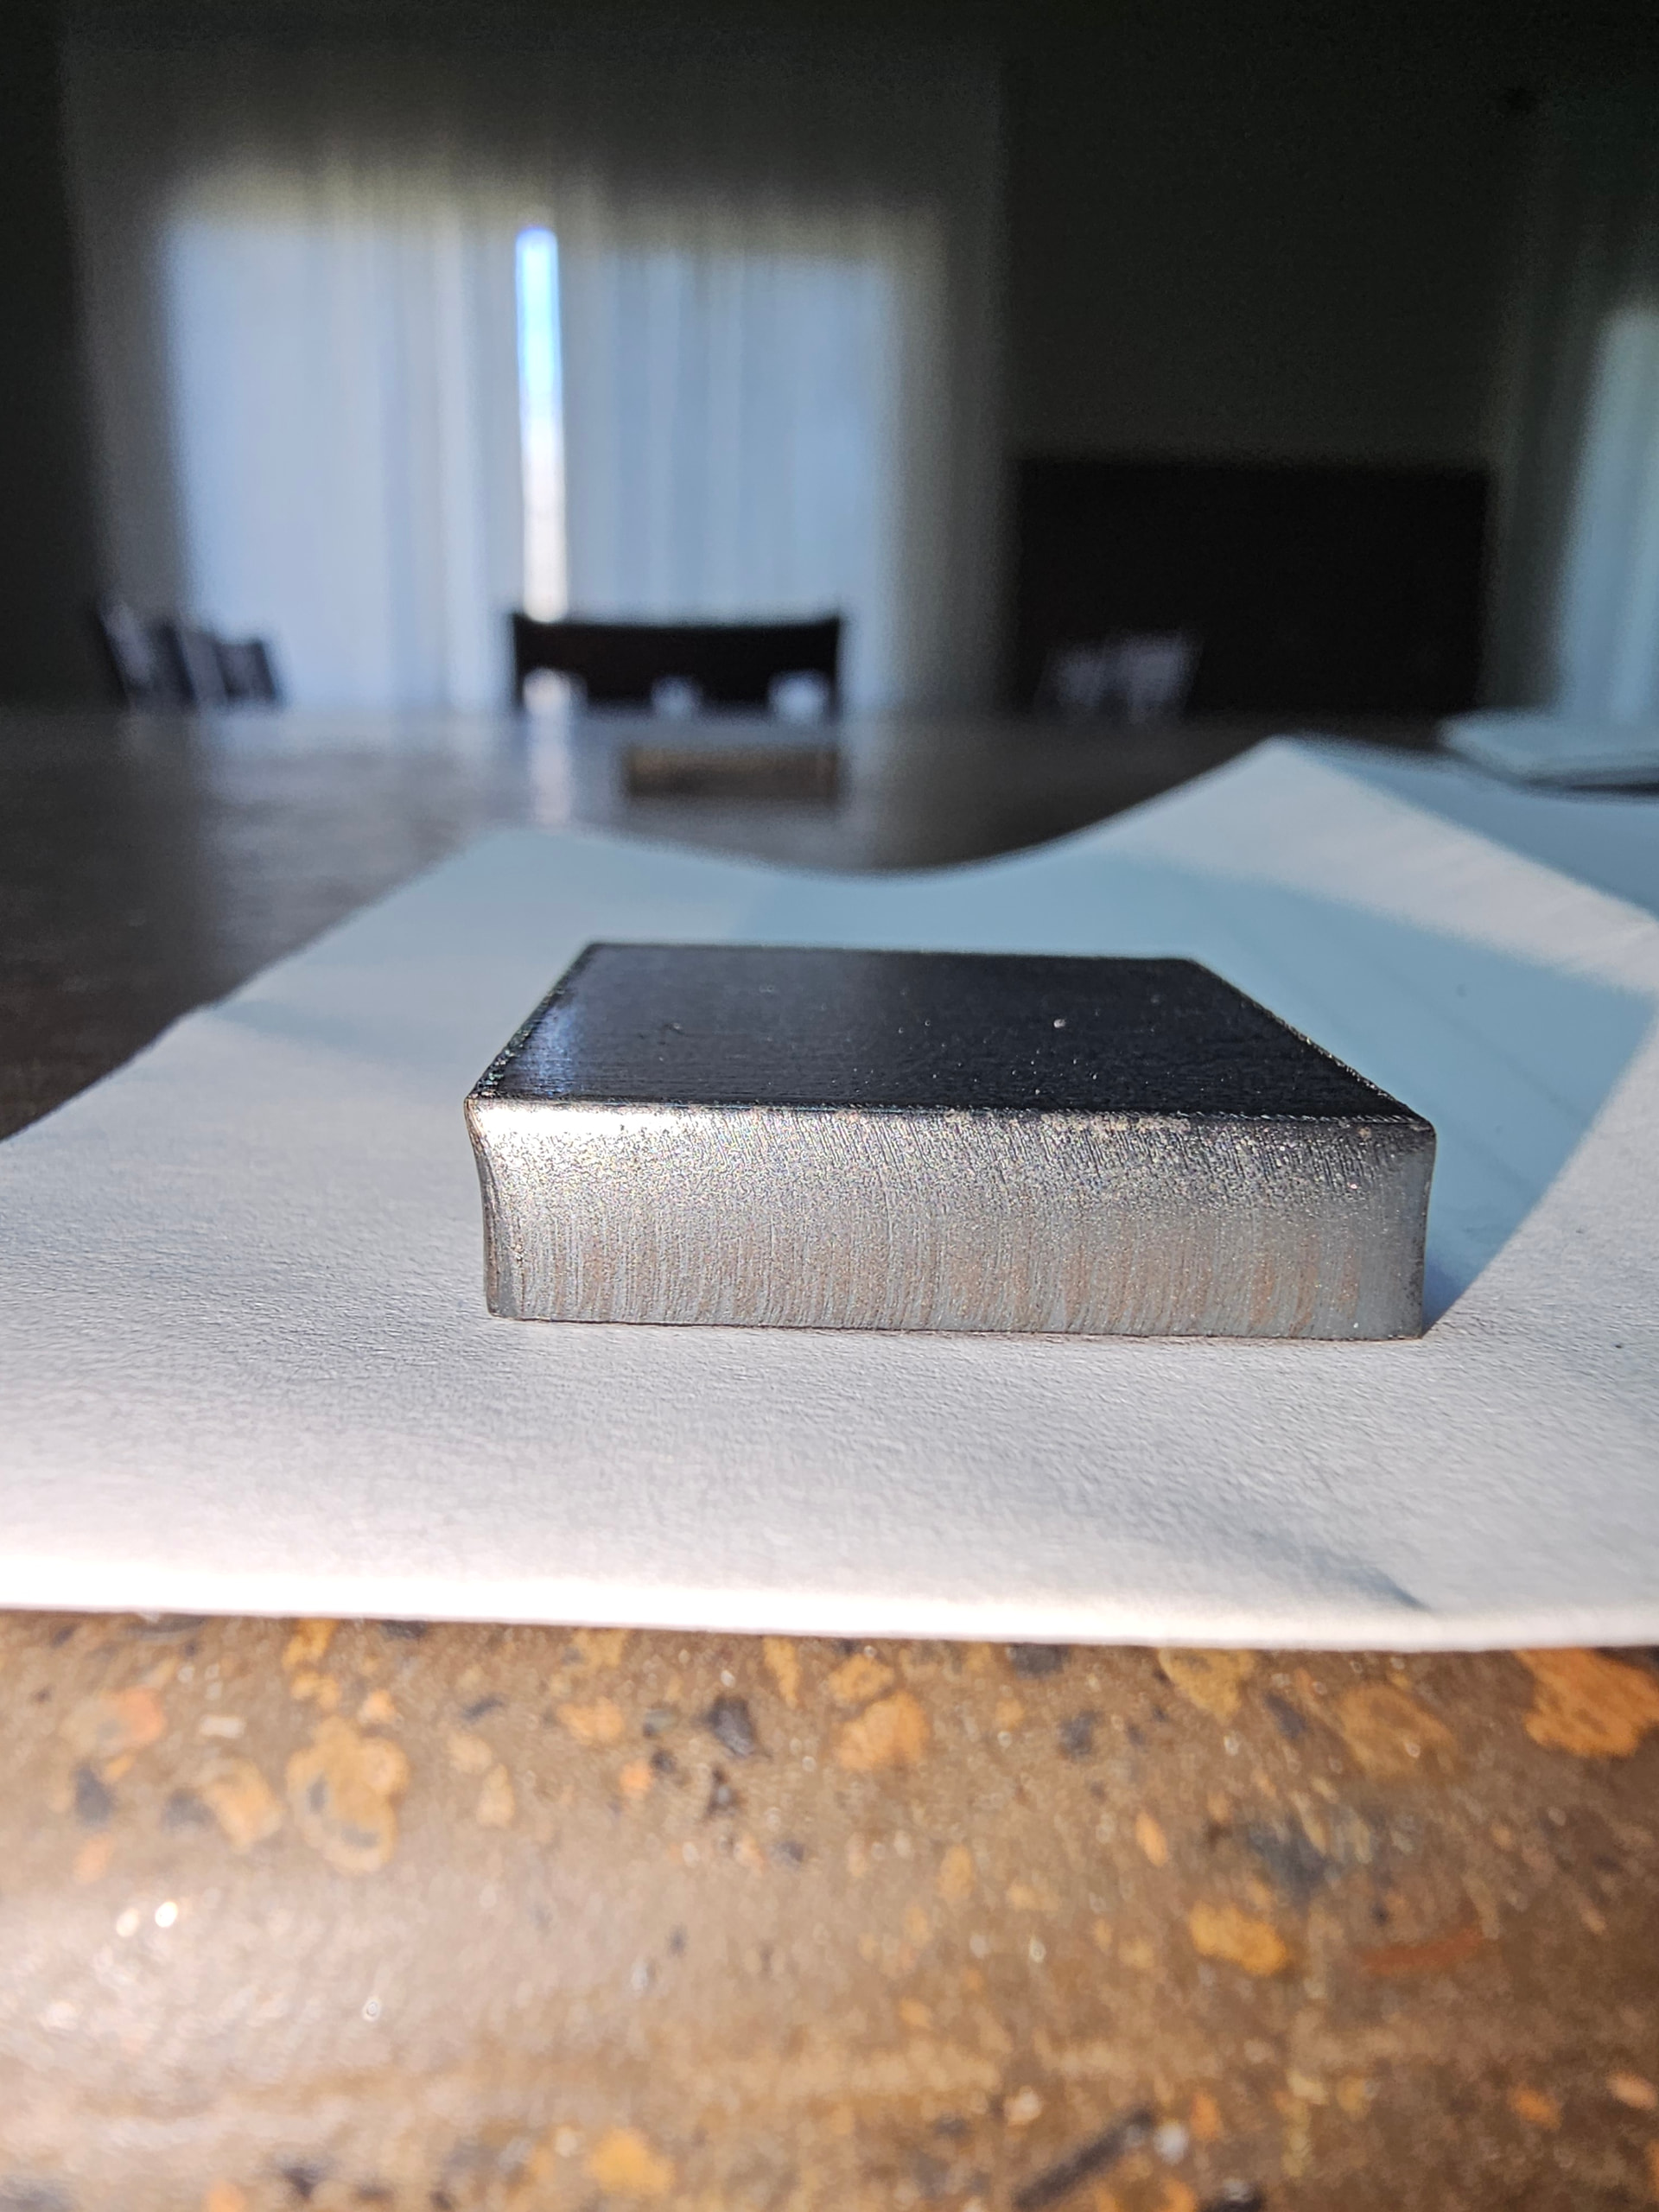
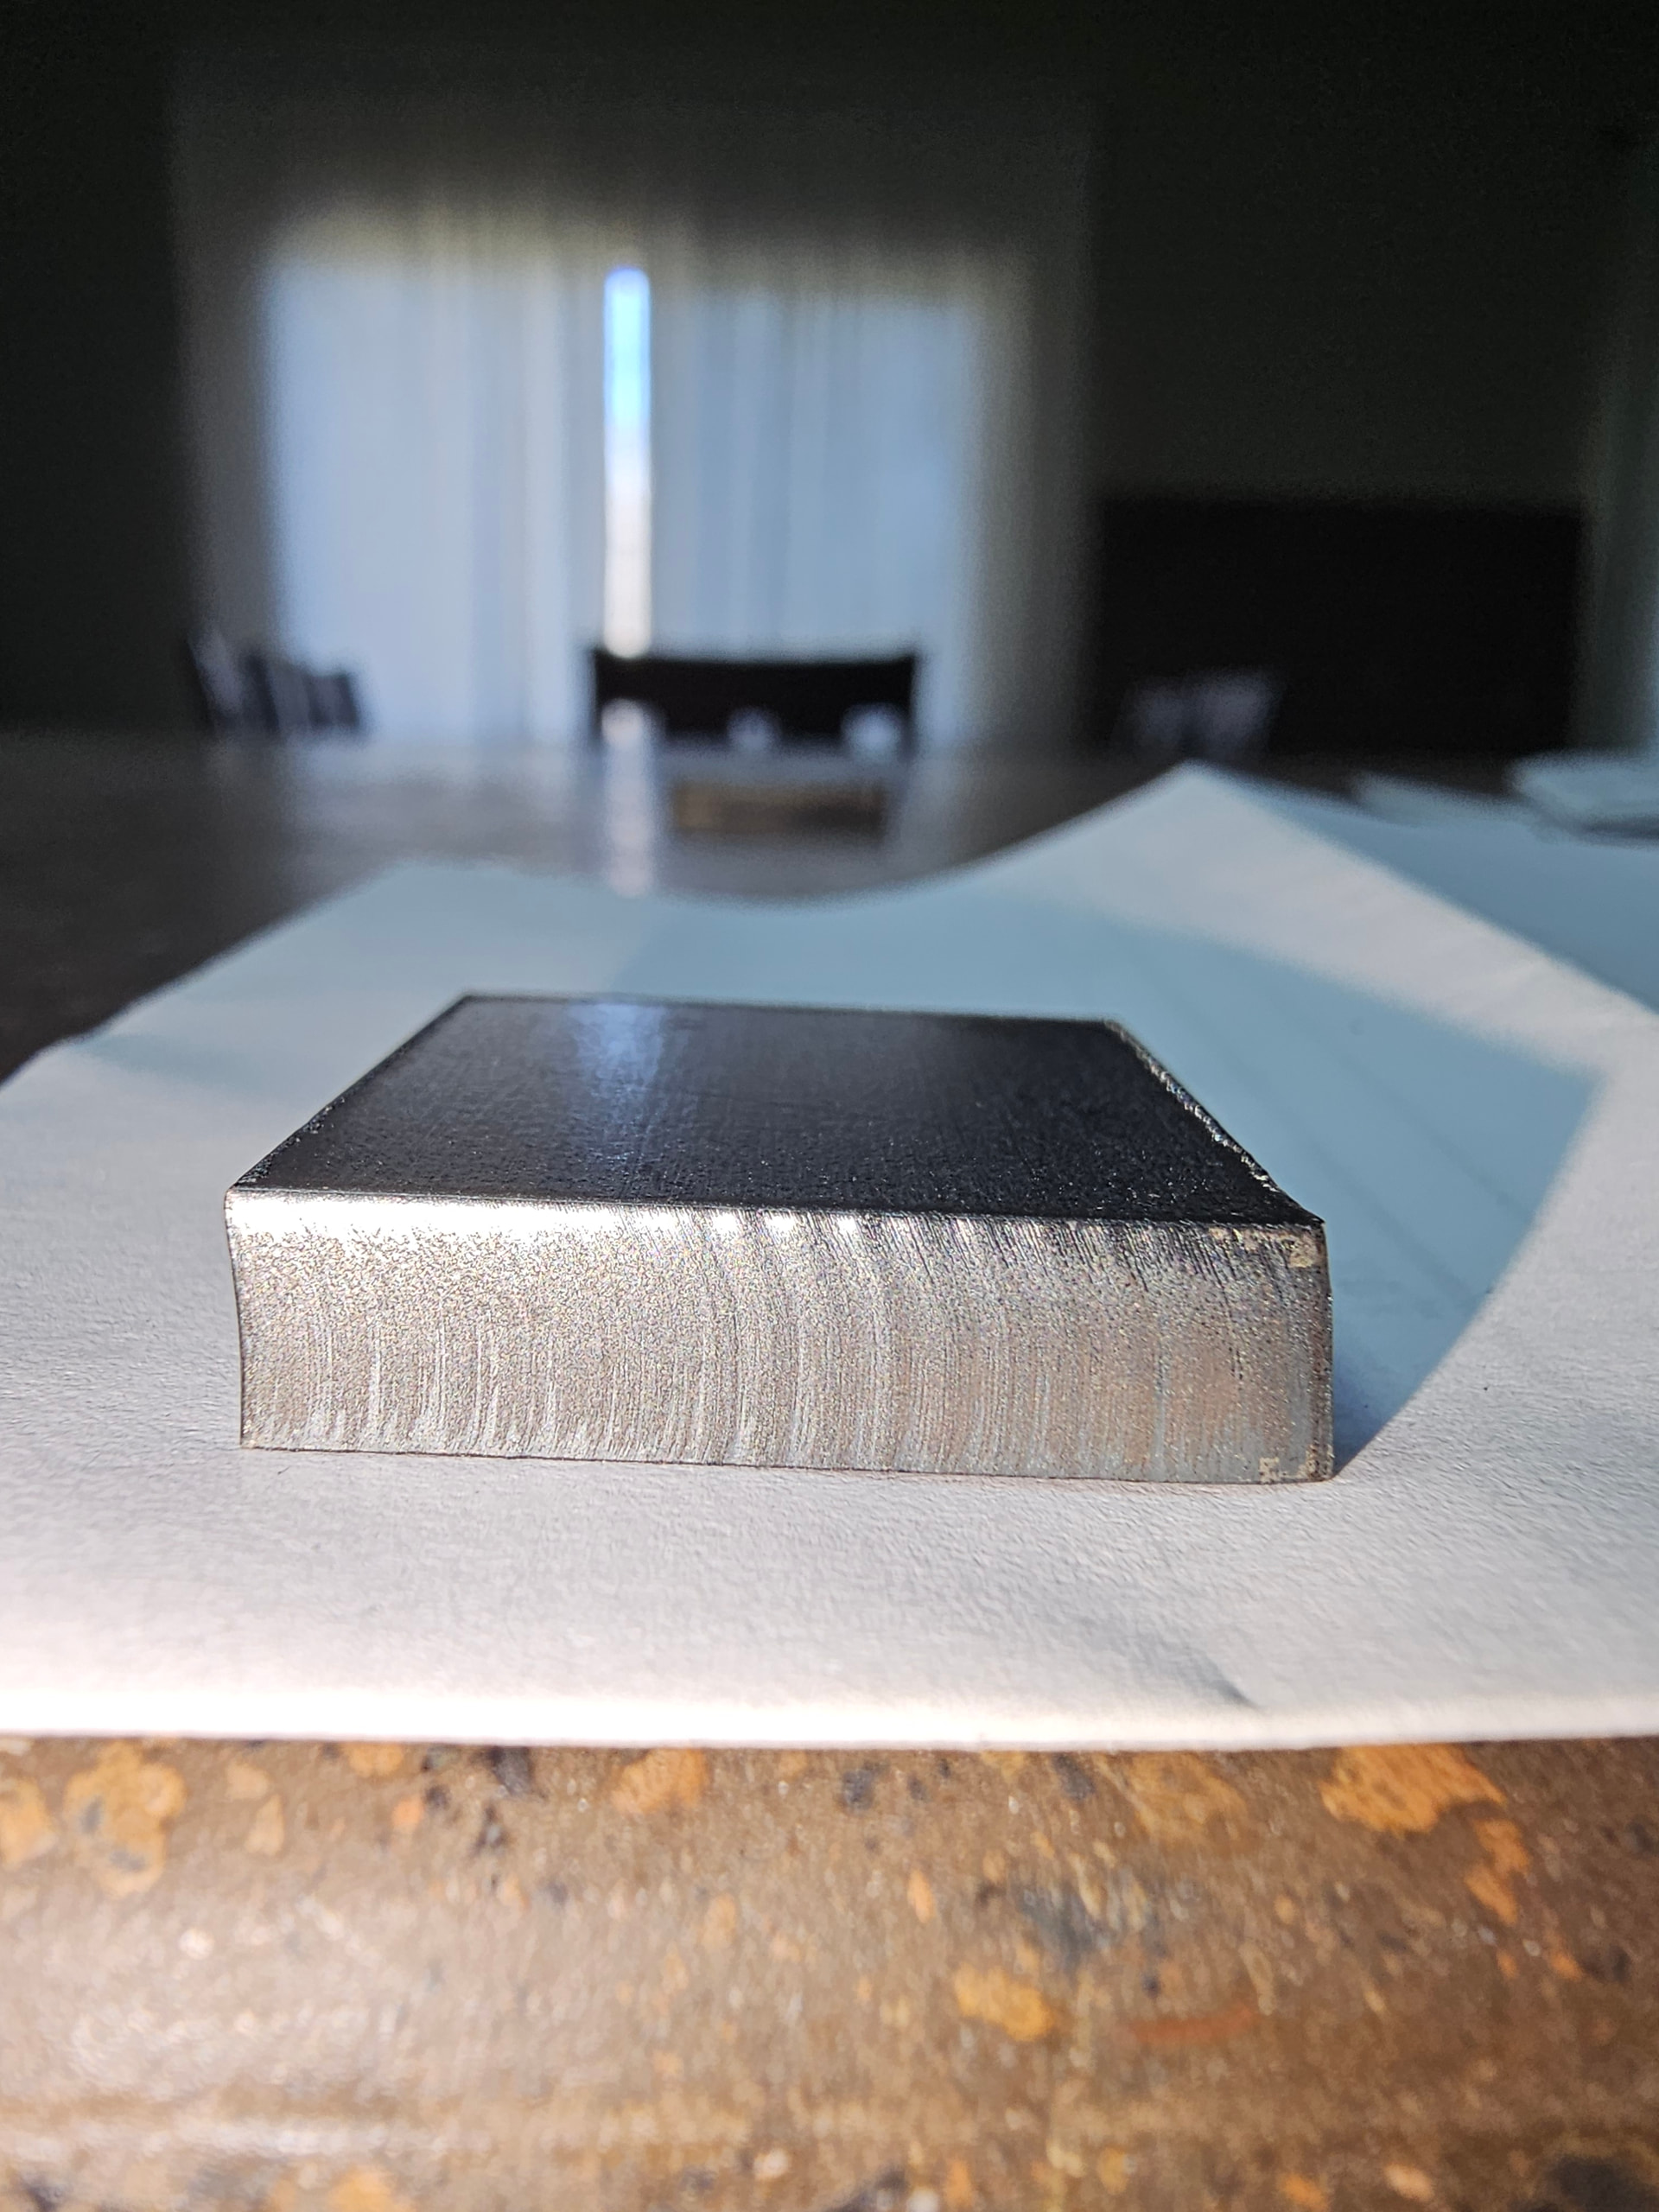
This is a CrossFire Pro. The cuts in the x- and x+ directions are square to the table it is in the y-and y+ directions that are off and that is the direction that I don’t see any adjustment for. My current approach it going to be to recheck the consumables and if they’re good I’m going to 3d print a sleeve to offset the torch at an angle to see if that will fix the problem. The picture shows how much the cut is off from 90 degrees. The angle measures 8.6 degrees. The direction of cut is along the Y axis.
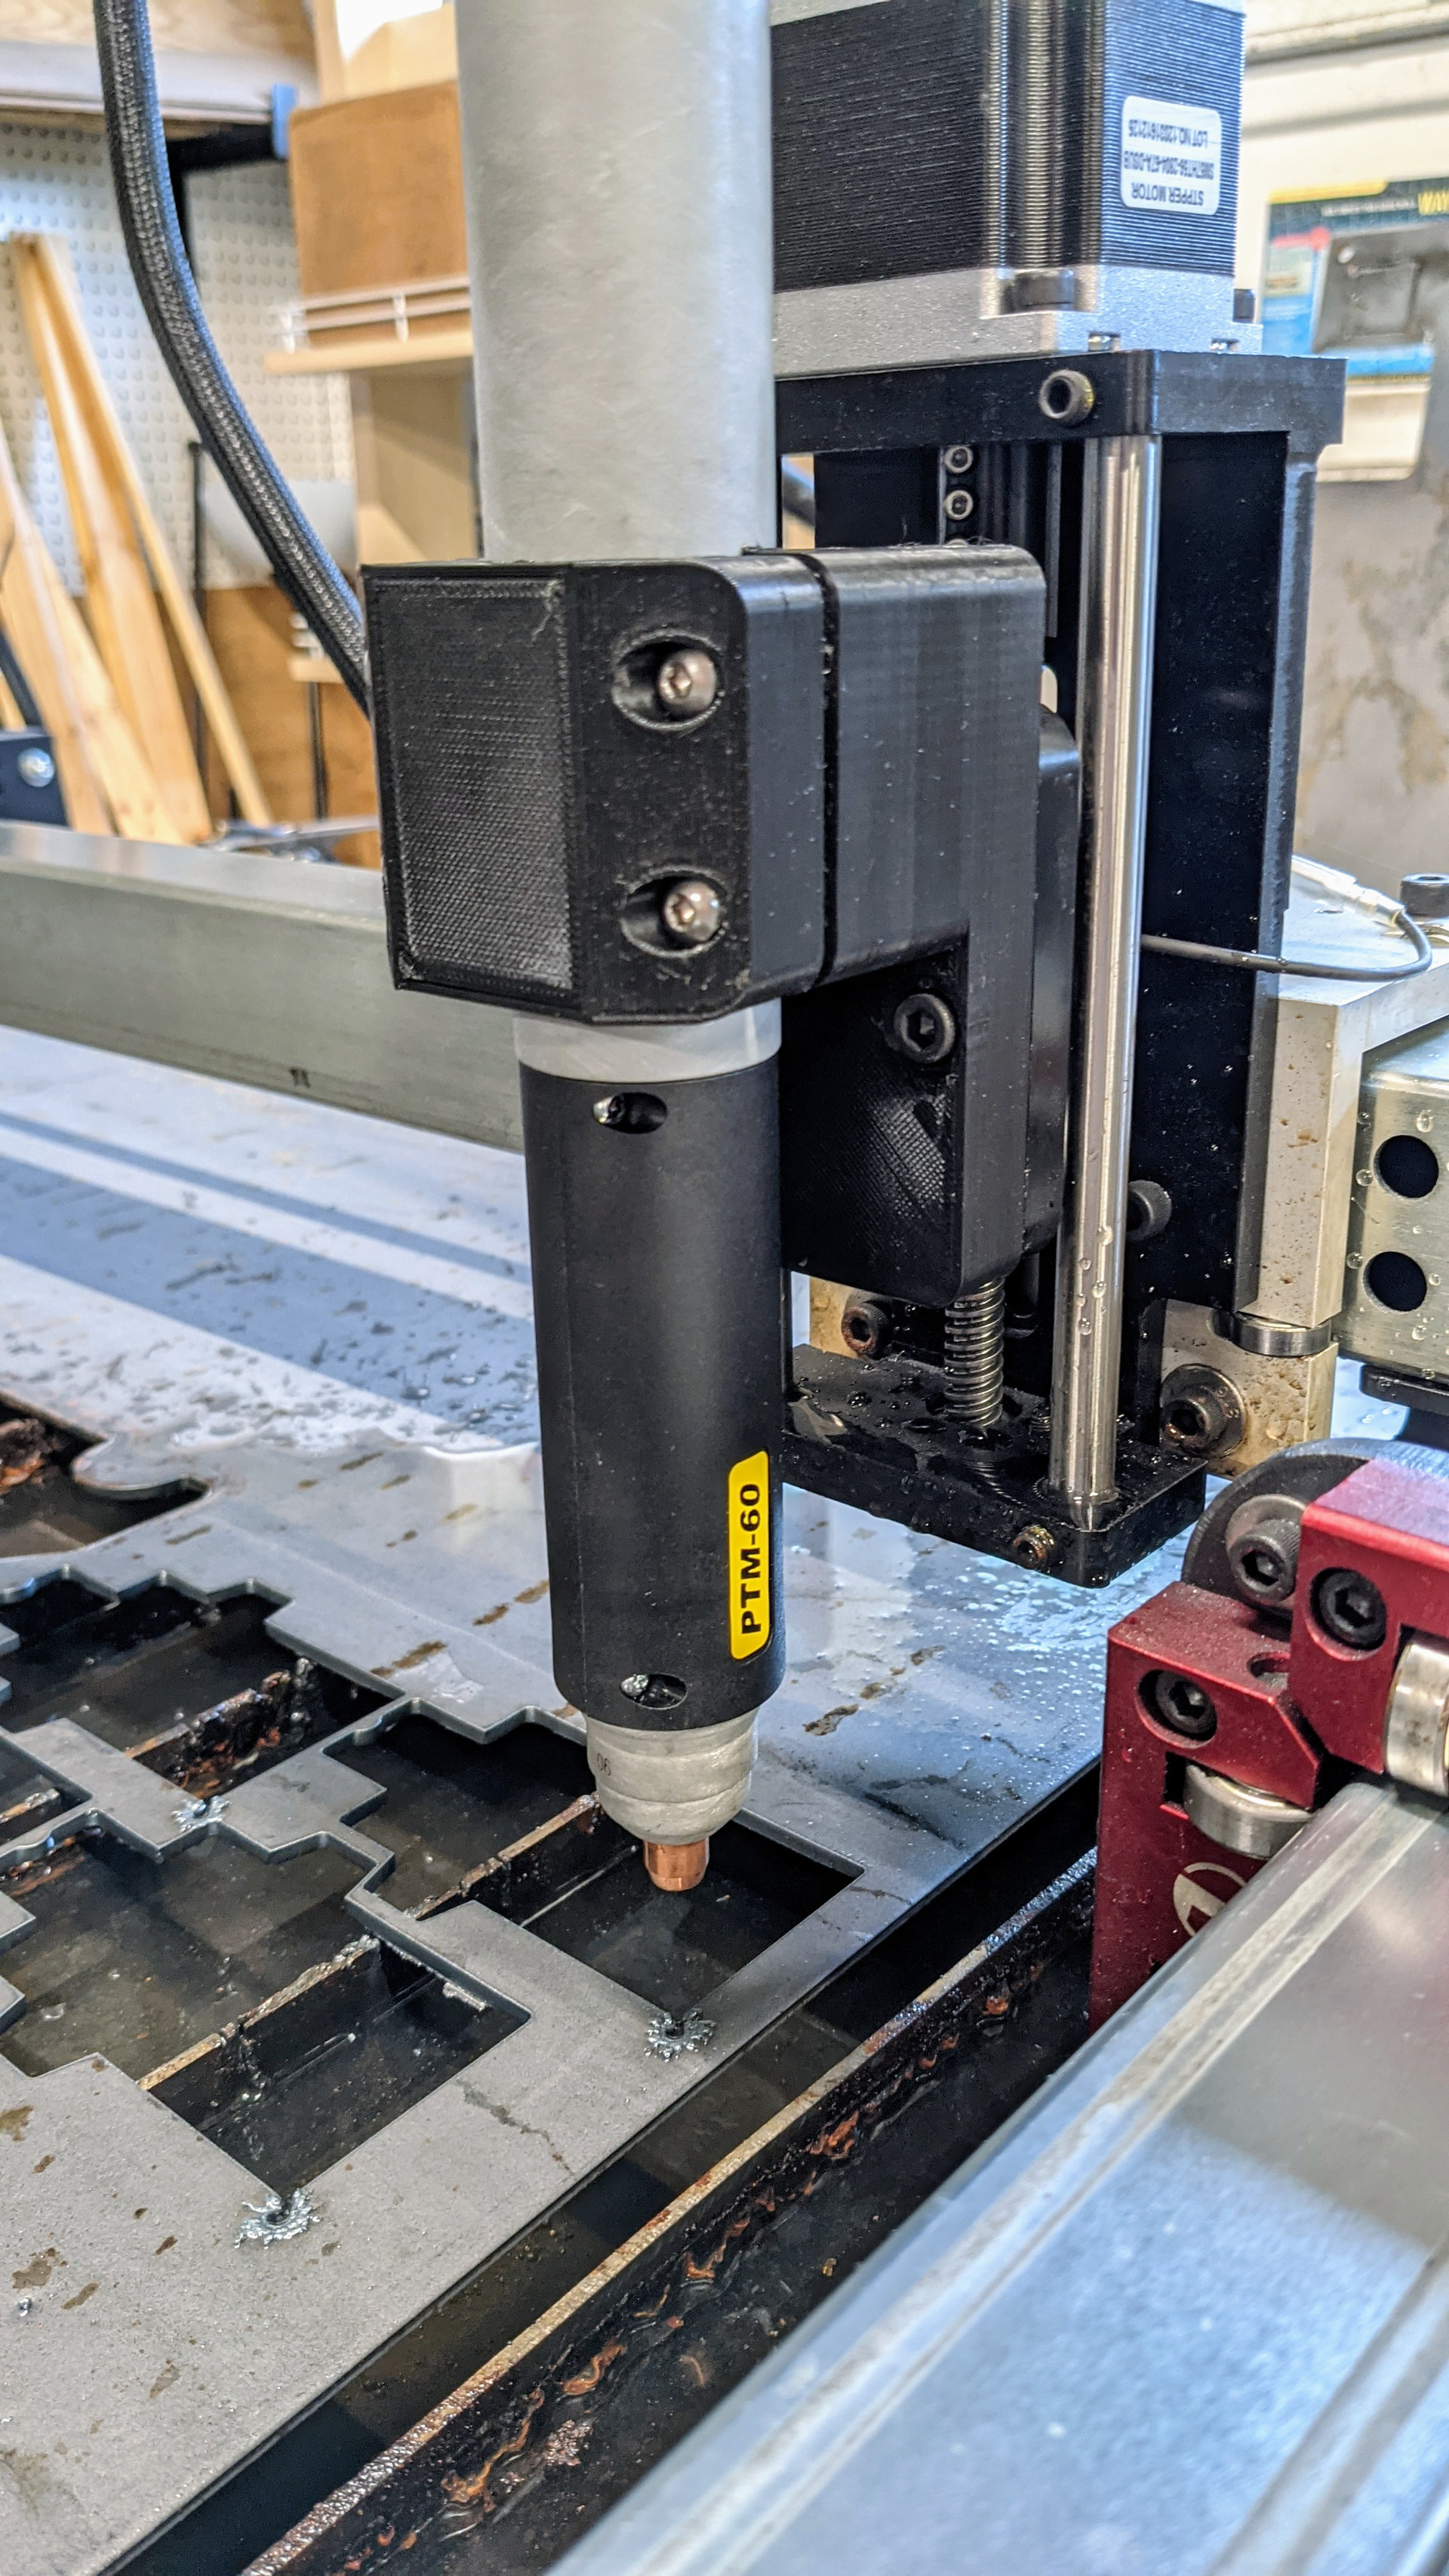
I use a 3d printed machine torch mount that I designed. I posted the files on thingiverse. There is a small amount of play in the mounting holes for squaring the torch to the table surface.
Any time I’ve had bevel like that, it was consumables. Rotating the torch to see if the bevel follows will confirm it.
Are you a bot or a spammer? Replying to me with a quote from the OP and adding an unrelated website link to the quoted text is an interesting way to spam a forum post.
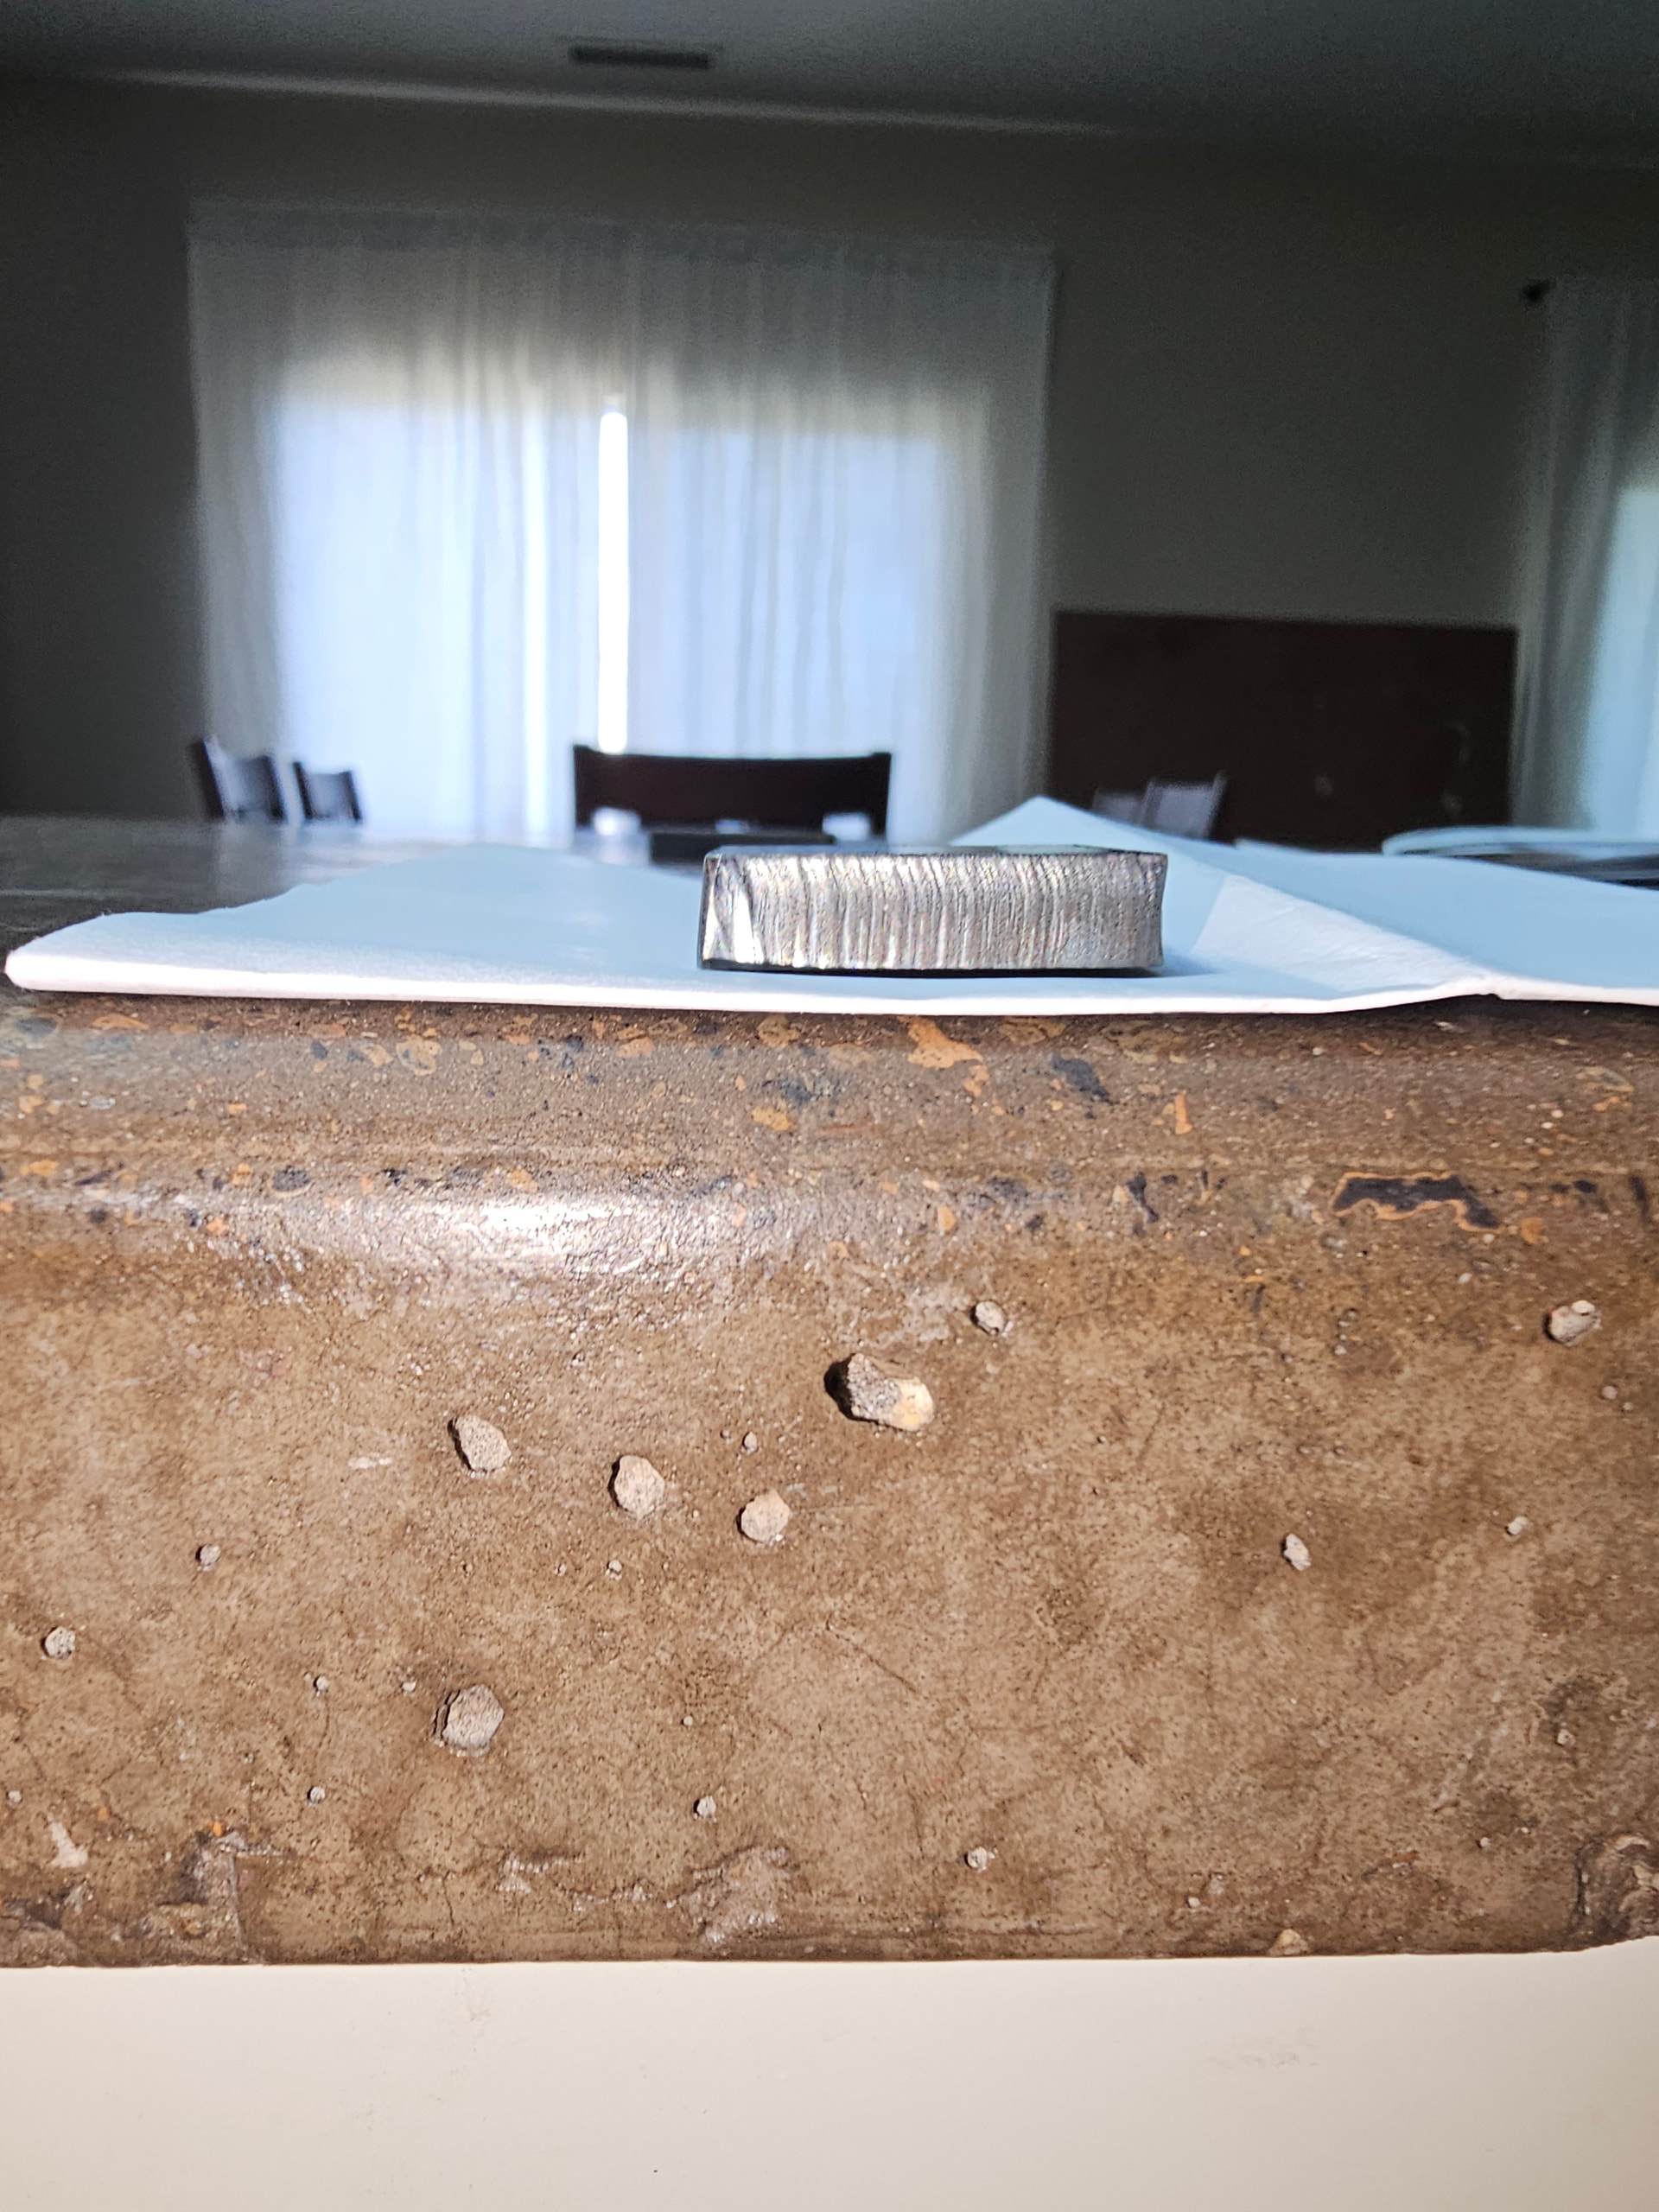
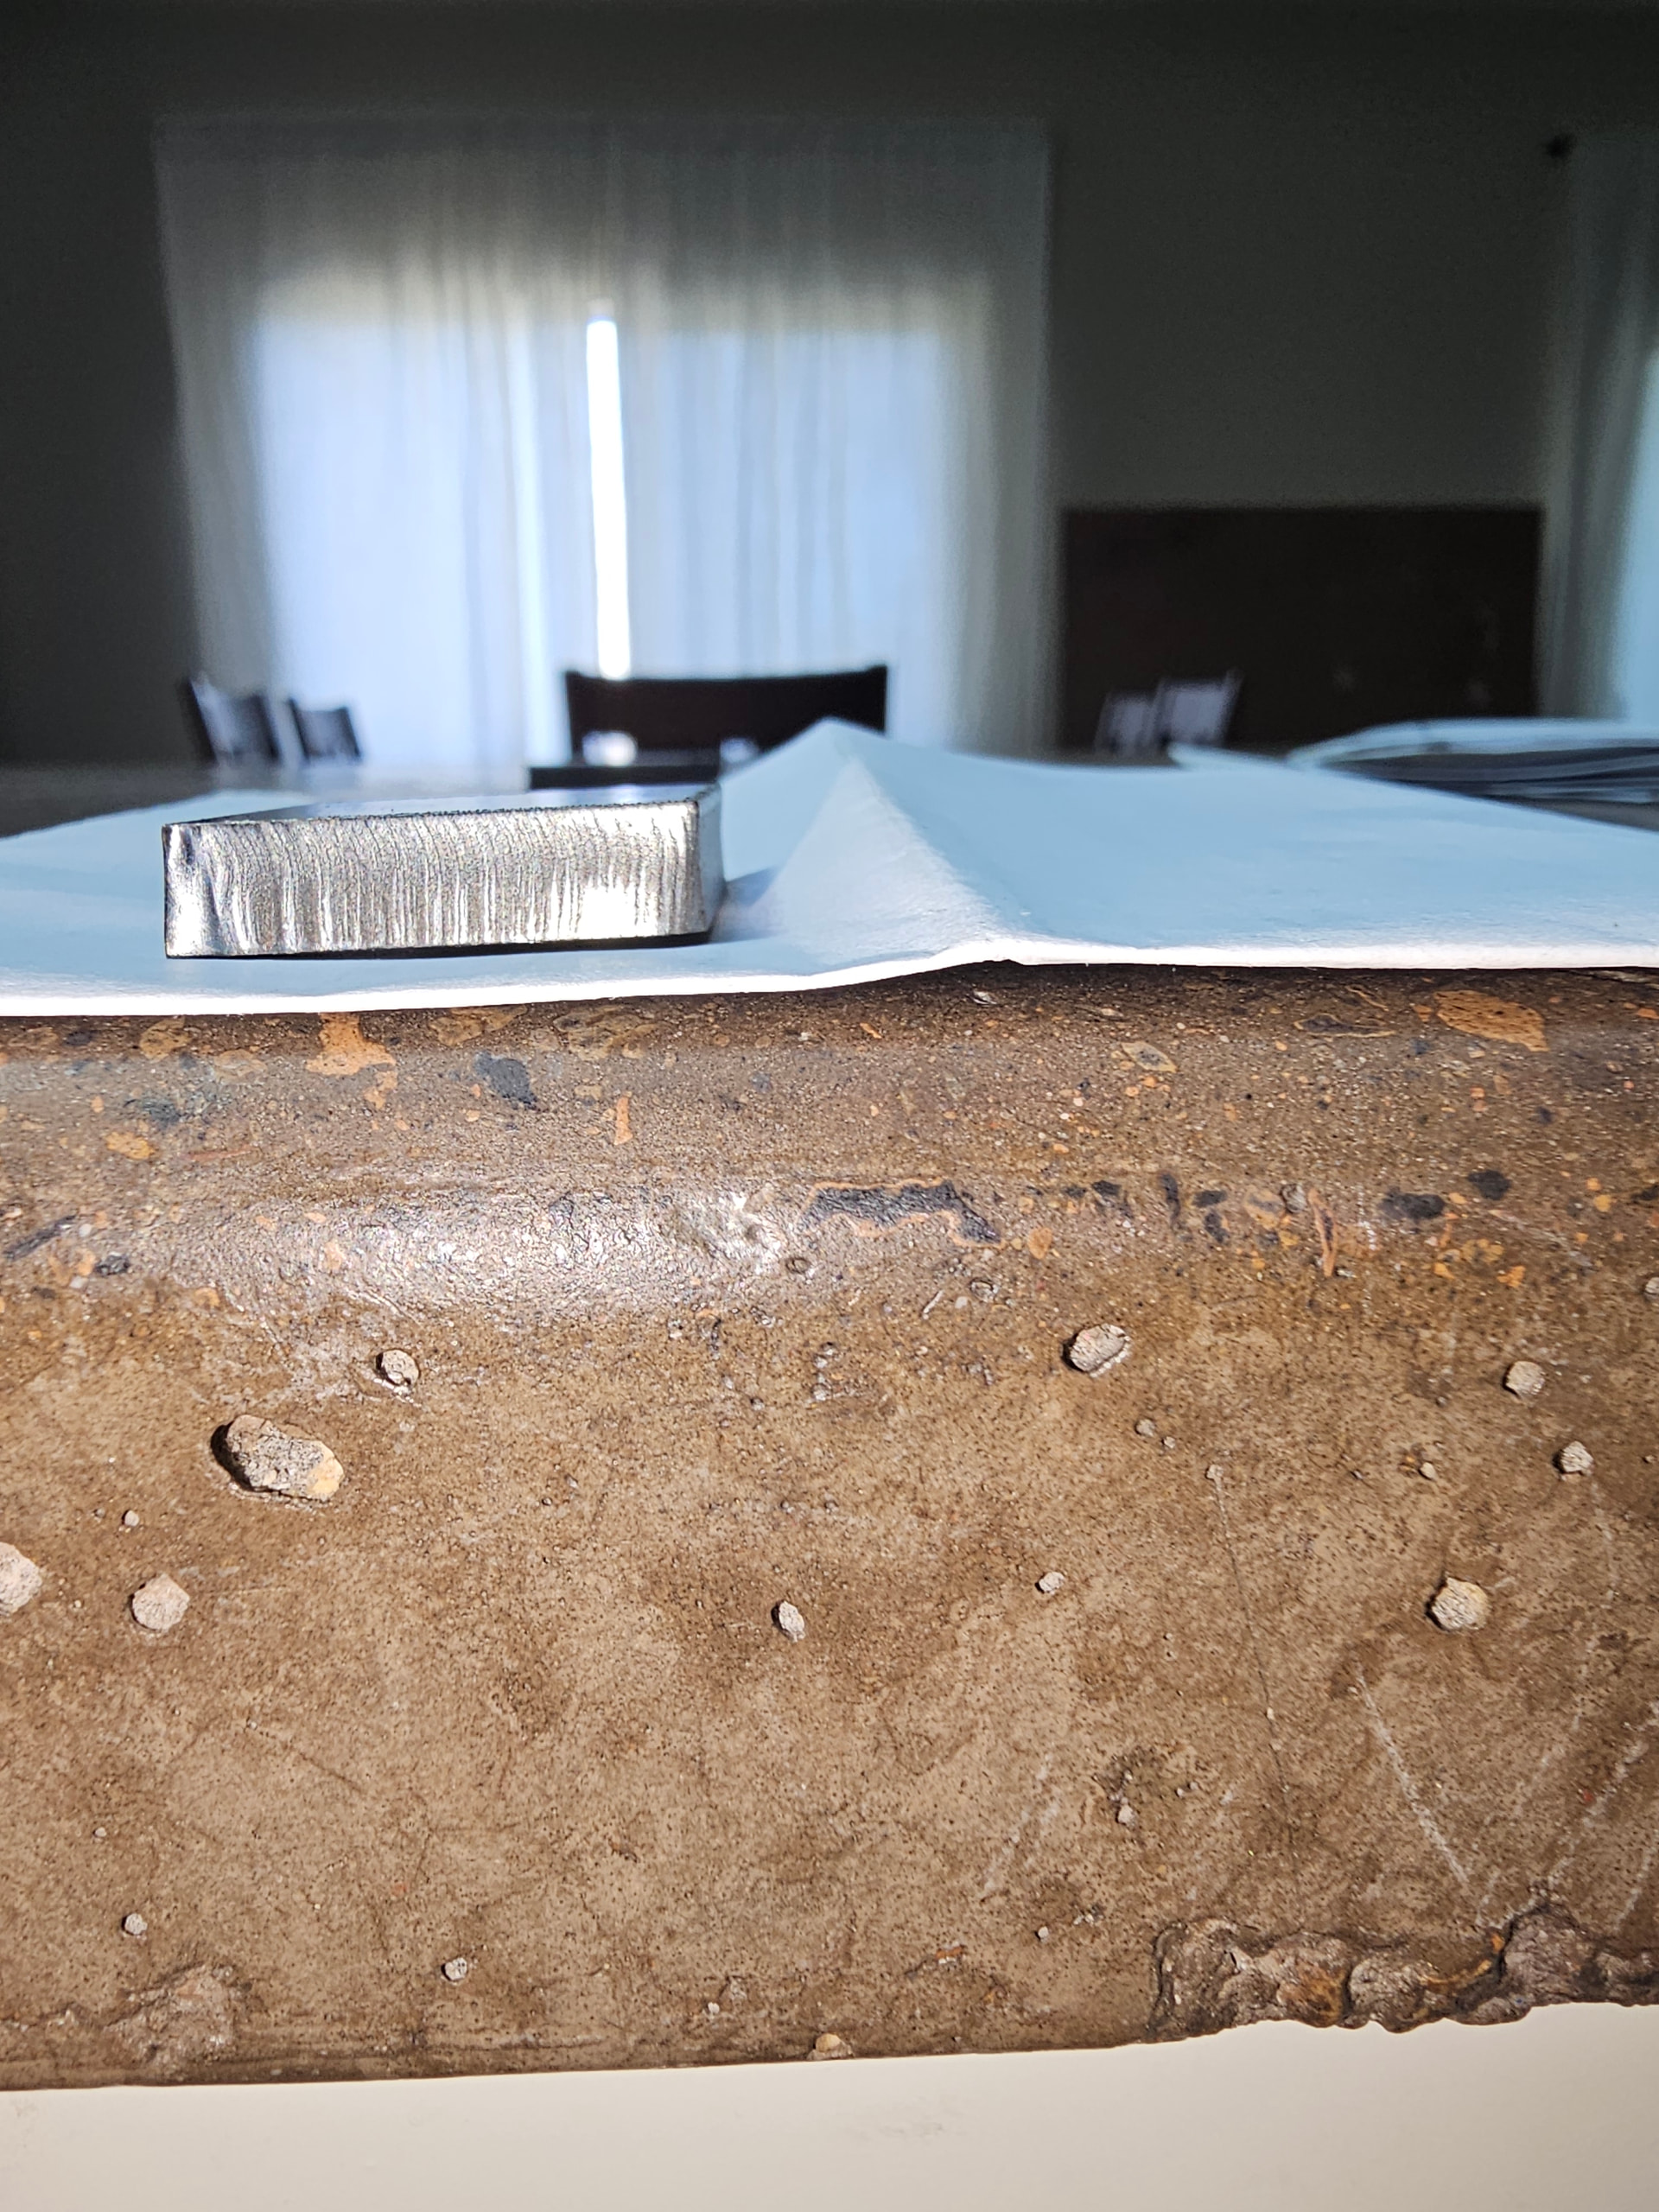
I rotated the torch with little effect. I did increase the air pressure to 75psi and I fiddled with the pierce height, cutting height and pierce delay. Here are the results I got. The first 4 pics are of the squareness of the cuts. The last 2 pics are showing the difference of the surface(finish) of 2 different sides. Would you consider these acceptable cuts? I do cnc machining and 3D printing. This is my first cnc plasma table, I was expecting better results. Maybe I have unrealistic expectations.
Try at least a 20 percent reduction. I had a similar issue cutting 1/2 material. I had settings dialed in pretty good then I made some setup changes. Slowing down really helped.