It’s not exactly the same thing, just at a different stage. Things will only cool to what ambient temperate is without a refigerated dryer, you’re only getting ambient temperature air. Lots of people assume their air is dry because water isn’t spraying out the end of their air line, but it’s not that simple.
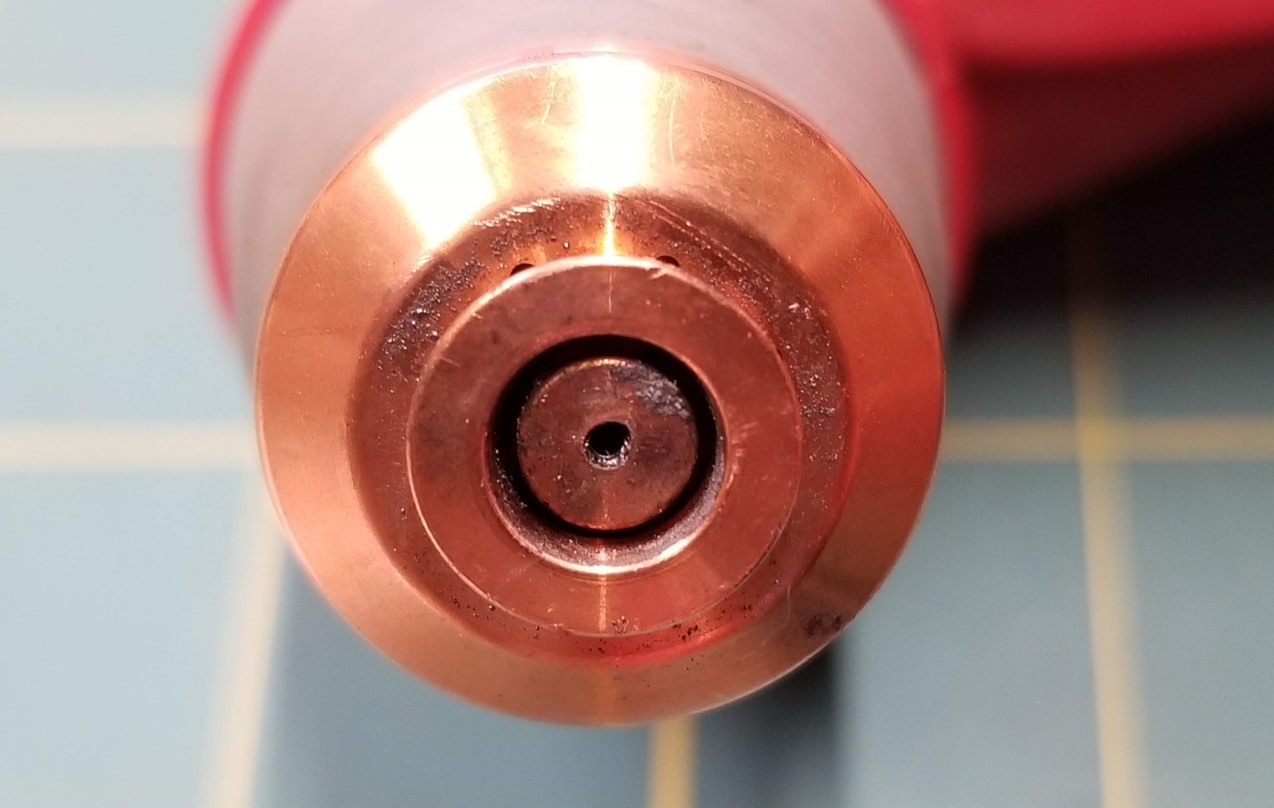
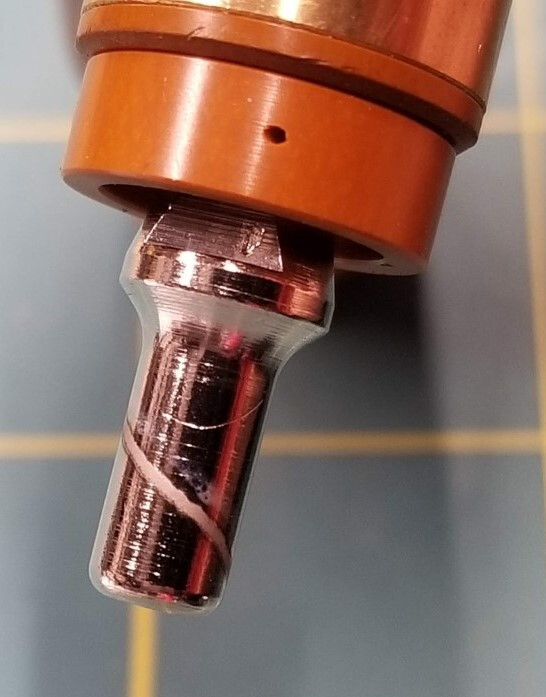
I don’t have one of those torch’s, but it was my understanding the swirls high up on the electrode were not normal. Last consult I had sent me a similar picture, then added a ref dryer and had much better results. Maybe @mechanic416 can weigh in if that wear is normal, I don’t want to be giving bad advice.
What caught my attention was the low number of pierces and only 5 minutes of torch time making your consumables look like that. Doesn’t seem normal to me.
That makes sense, thank you. I appreciate the constructive feedback, and I’m certainly willing to continue refining the system! I do wish there was a reliable way to accurately measure the amount of moisture remaining in the compressed air by the time it reaches the plasma cutter.
I’ve got a couple commercial hygrometers/humidity sensors lying around. I wonder if I filled an empty plastic bag (or trash bag) with air straight from the torch and then placed a sensor inside the sealed bag, if that would give me an accurate, objective measurement? Has anyone tried a test like that and gotten useful data?
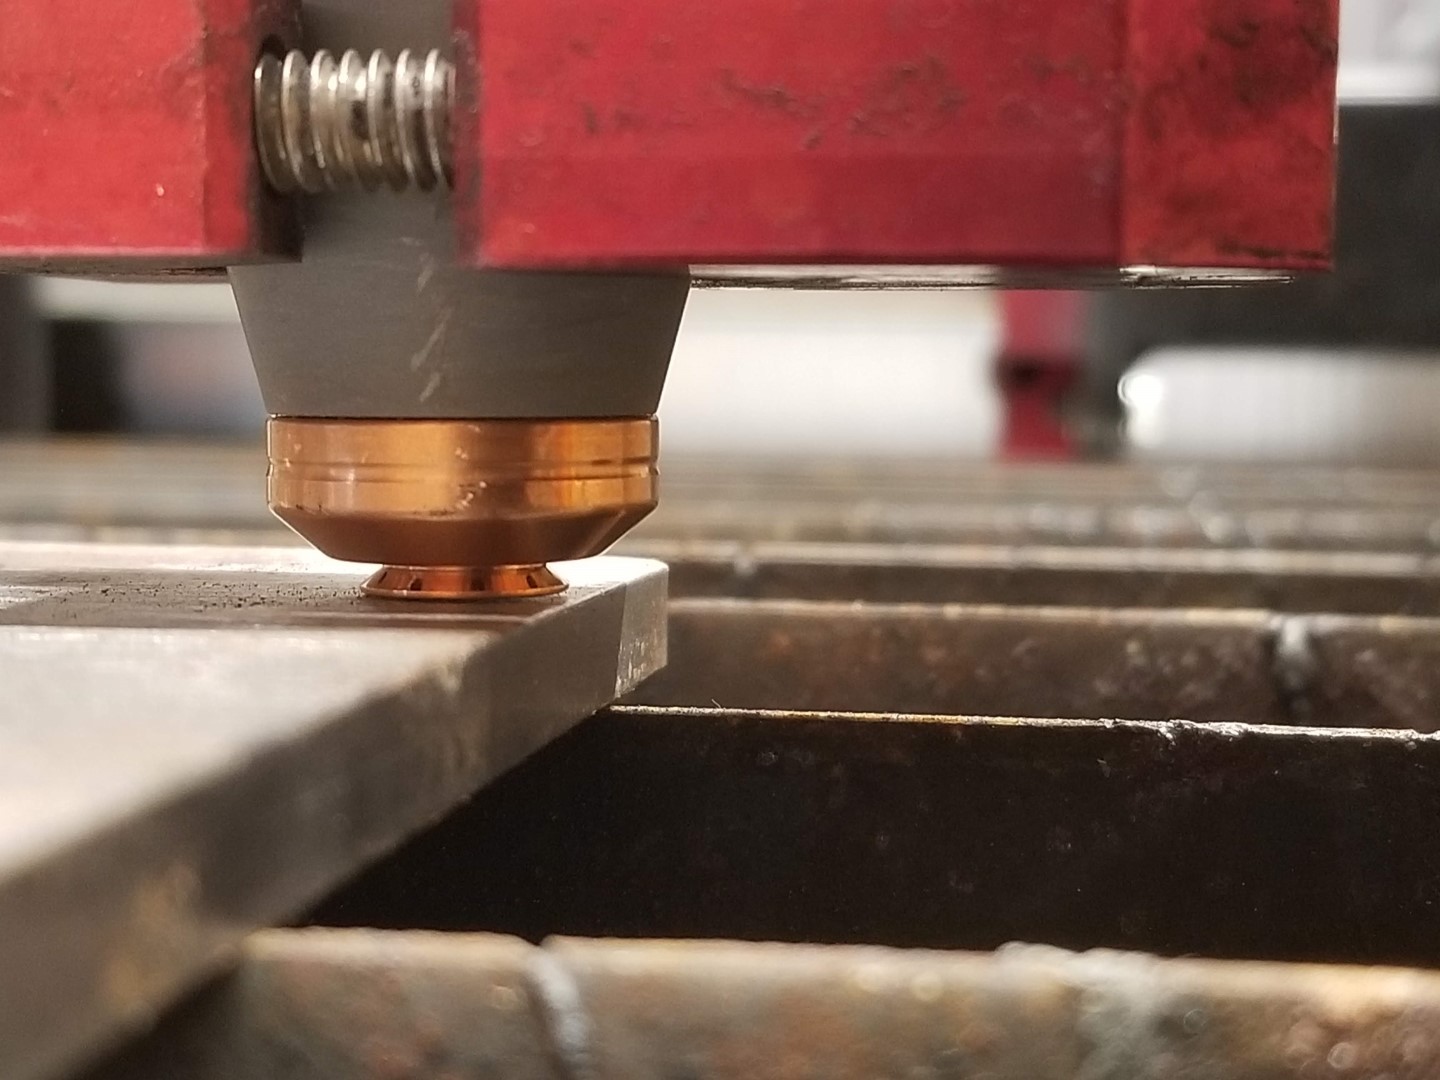
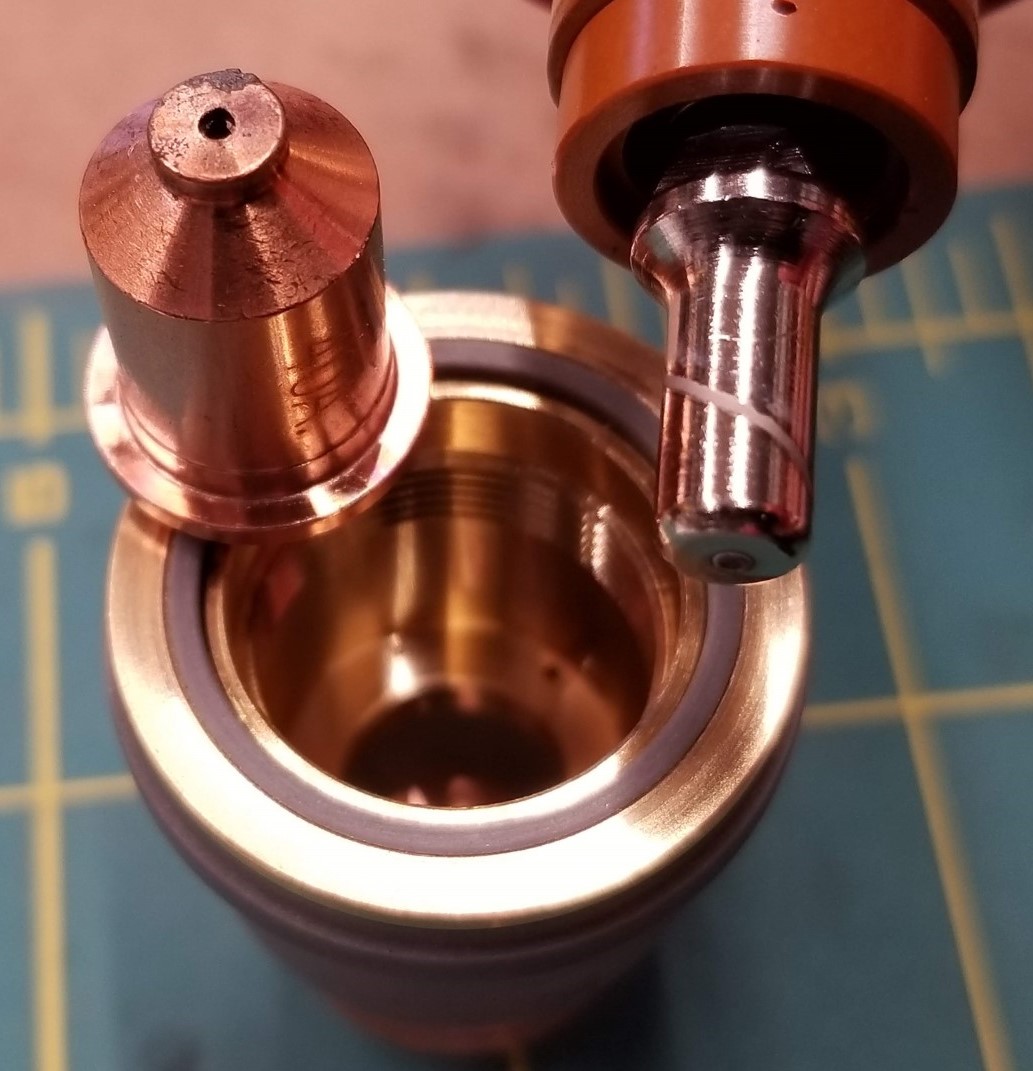
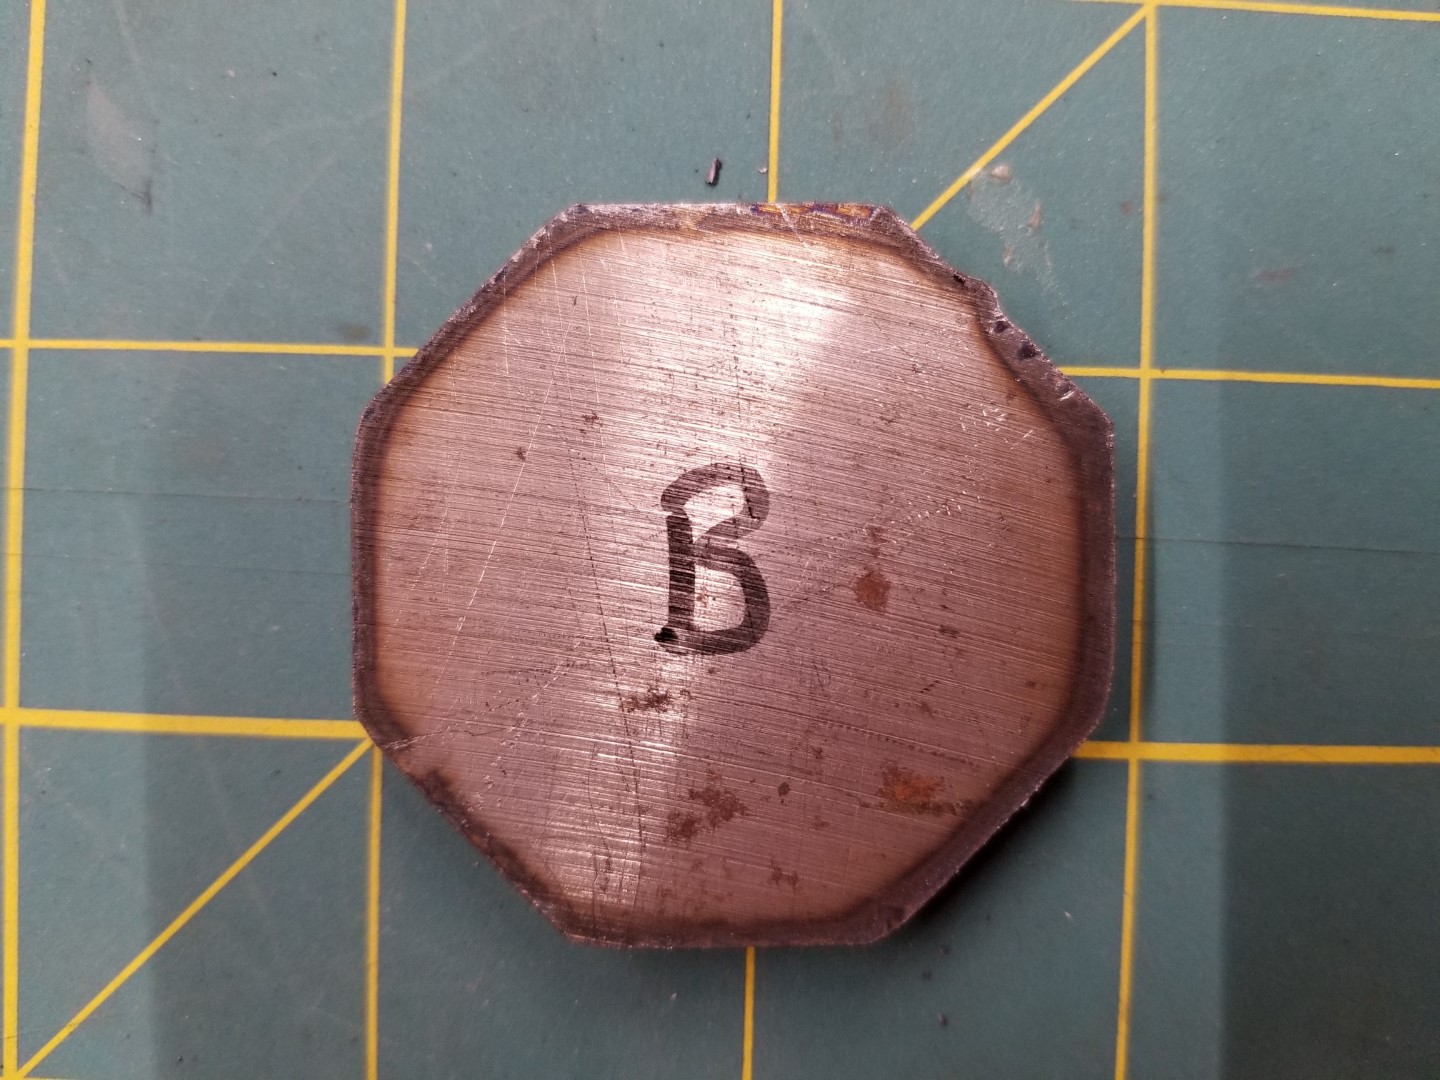
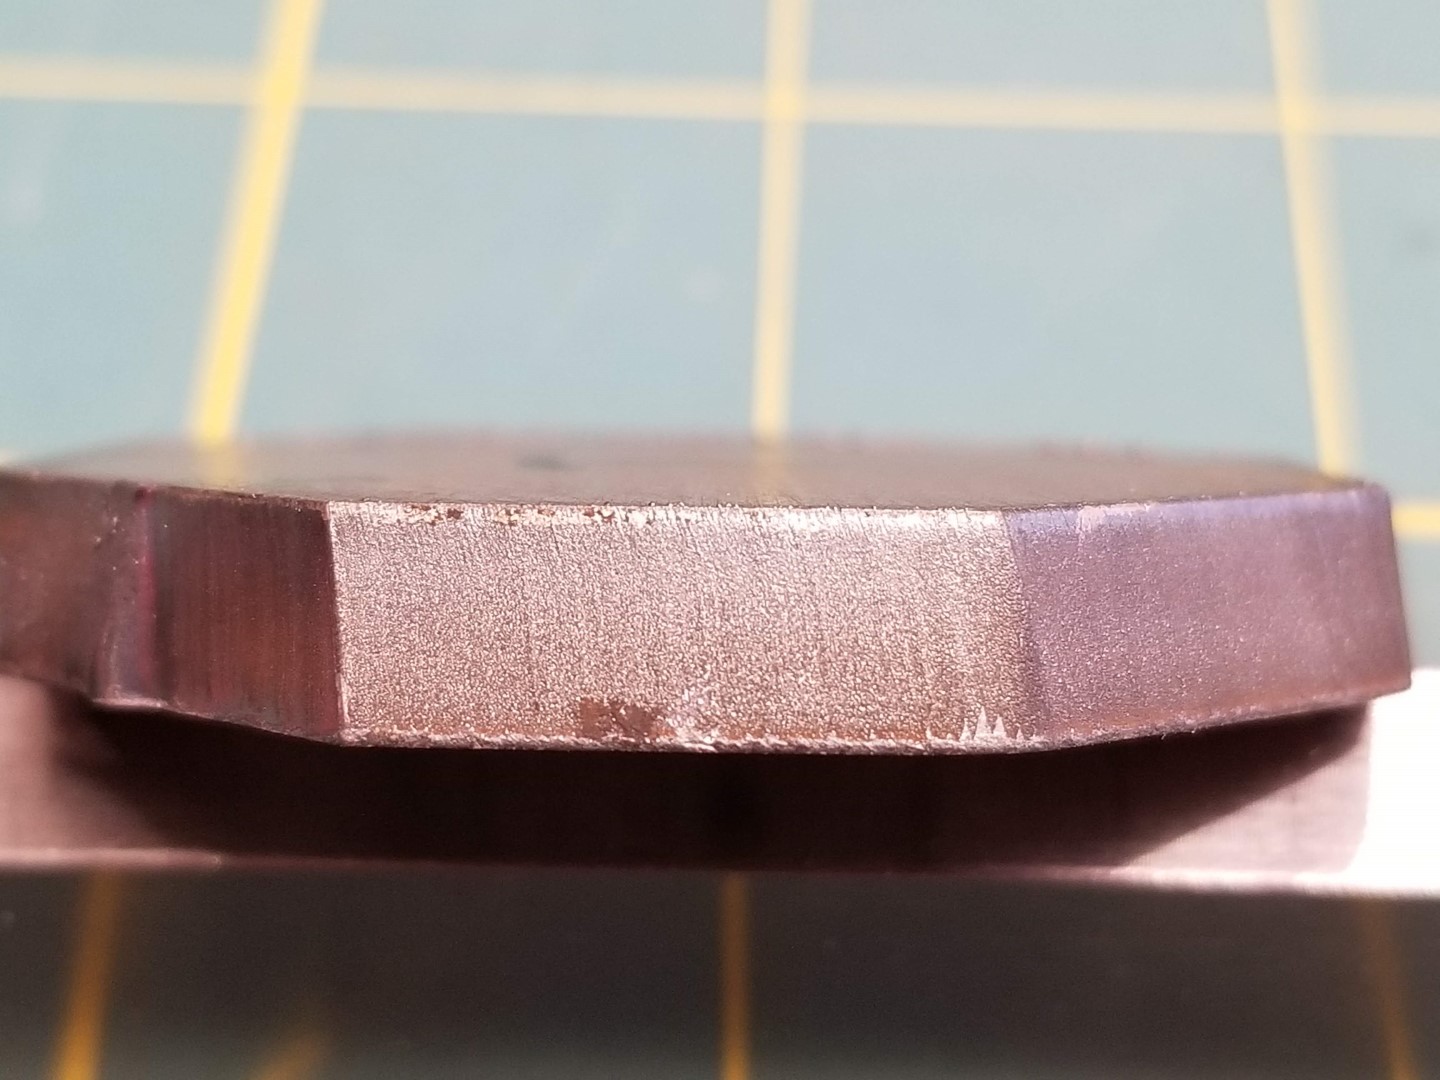
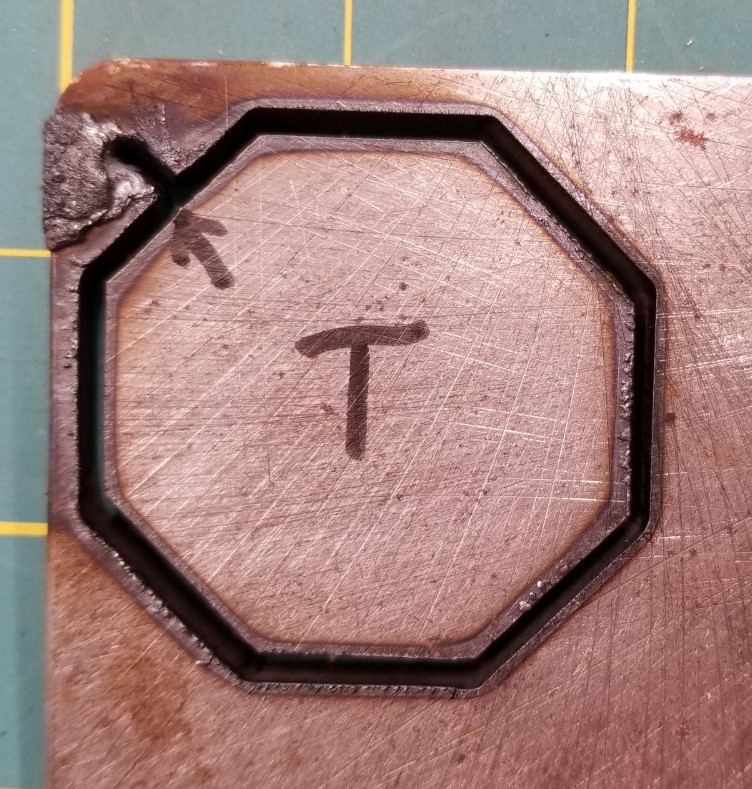
Okay, so I finally had time to install the new shielded tips from @mechanic416 and just ran a test cut on 1/4" steel. Unfortunately, the taper is as bad as ever. The cut quality looks good, and it seems to cut easily - clean edges and very little slag on top or bottom. I’m using a brand new shielded 40A tip, new electrode, and new swirl ring with the cutter set to 40A, 38IPM, and 65PSI.
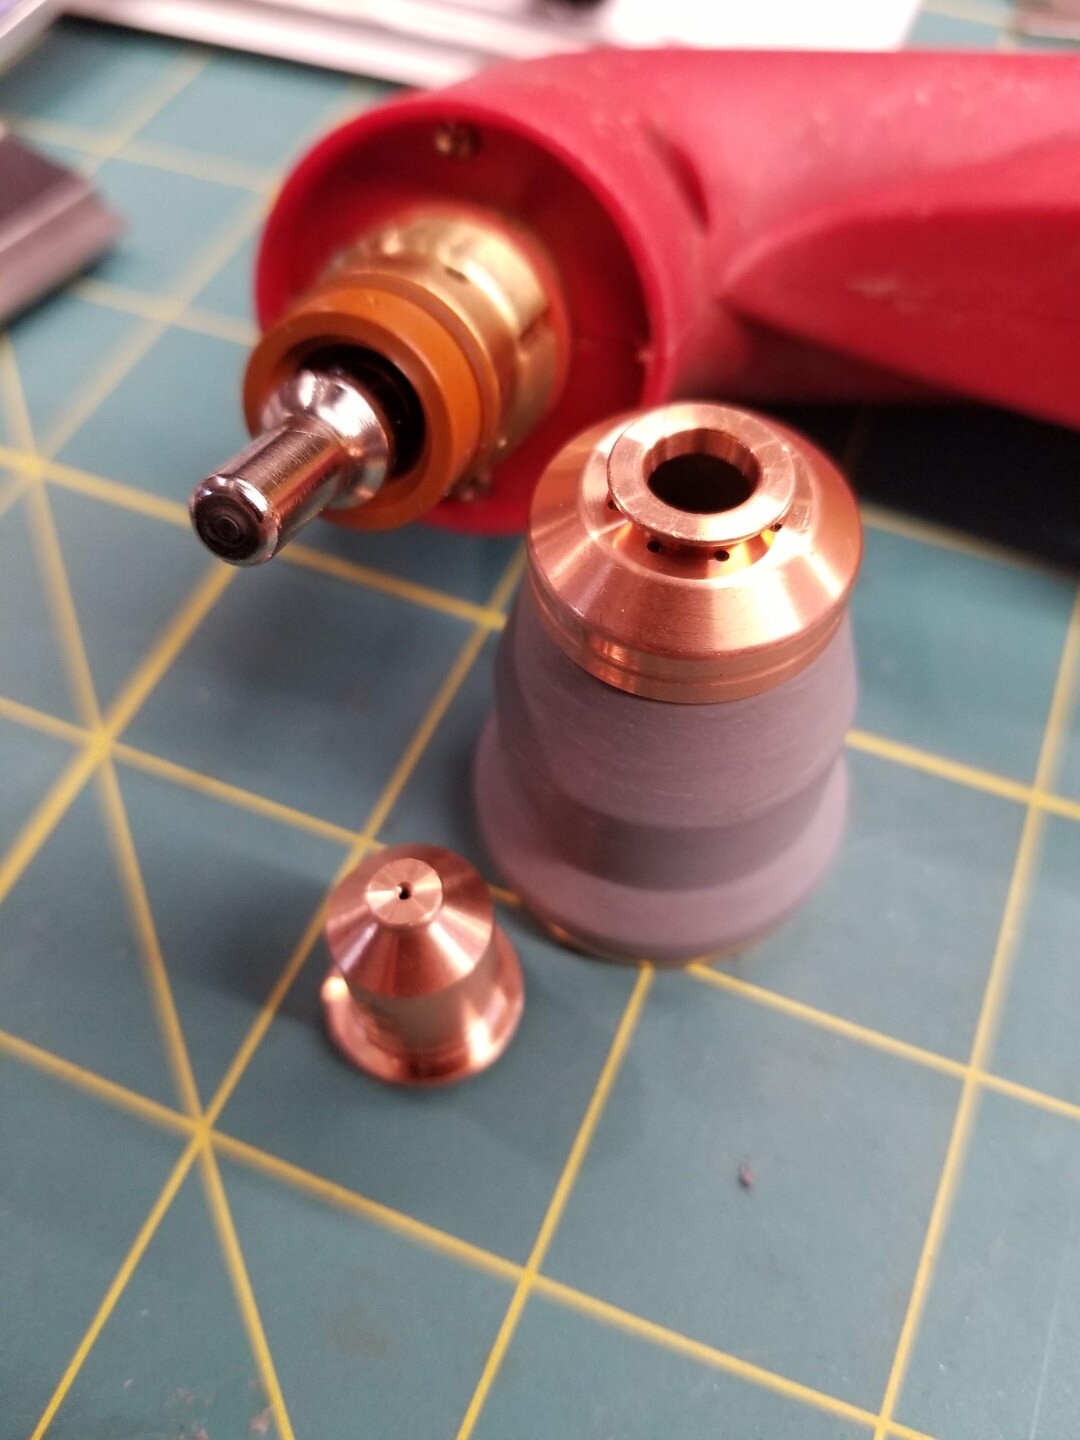
Here’s the new consumables from George that I used for the test.
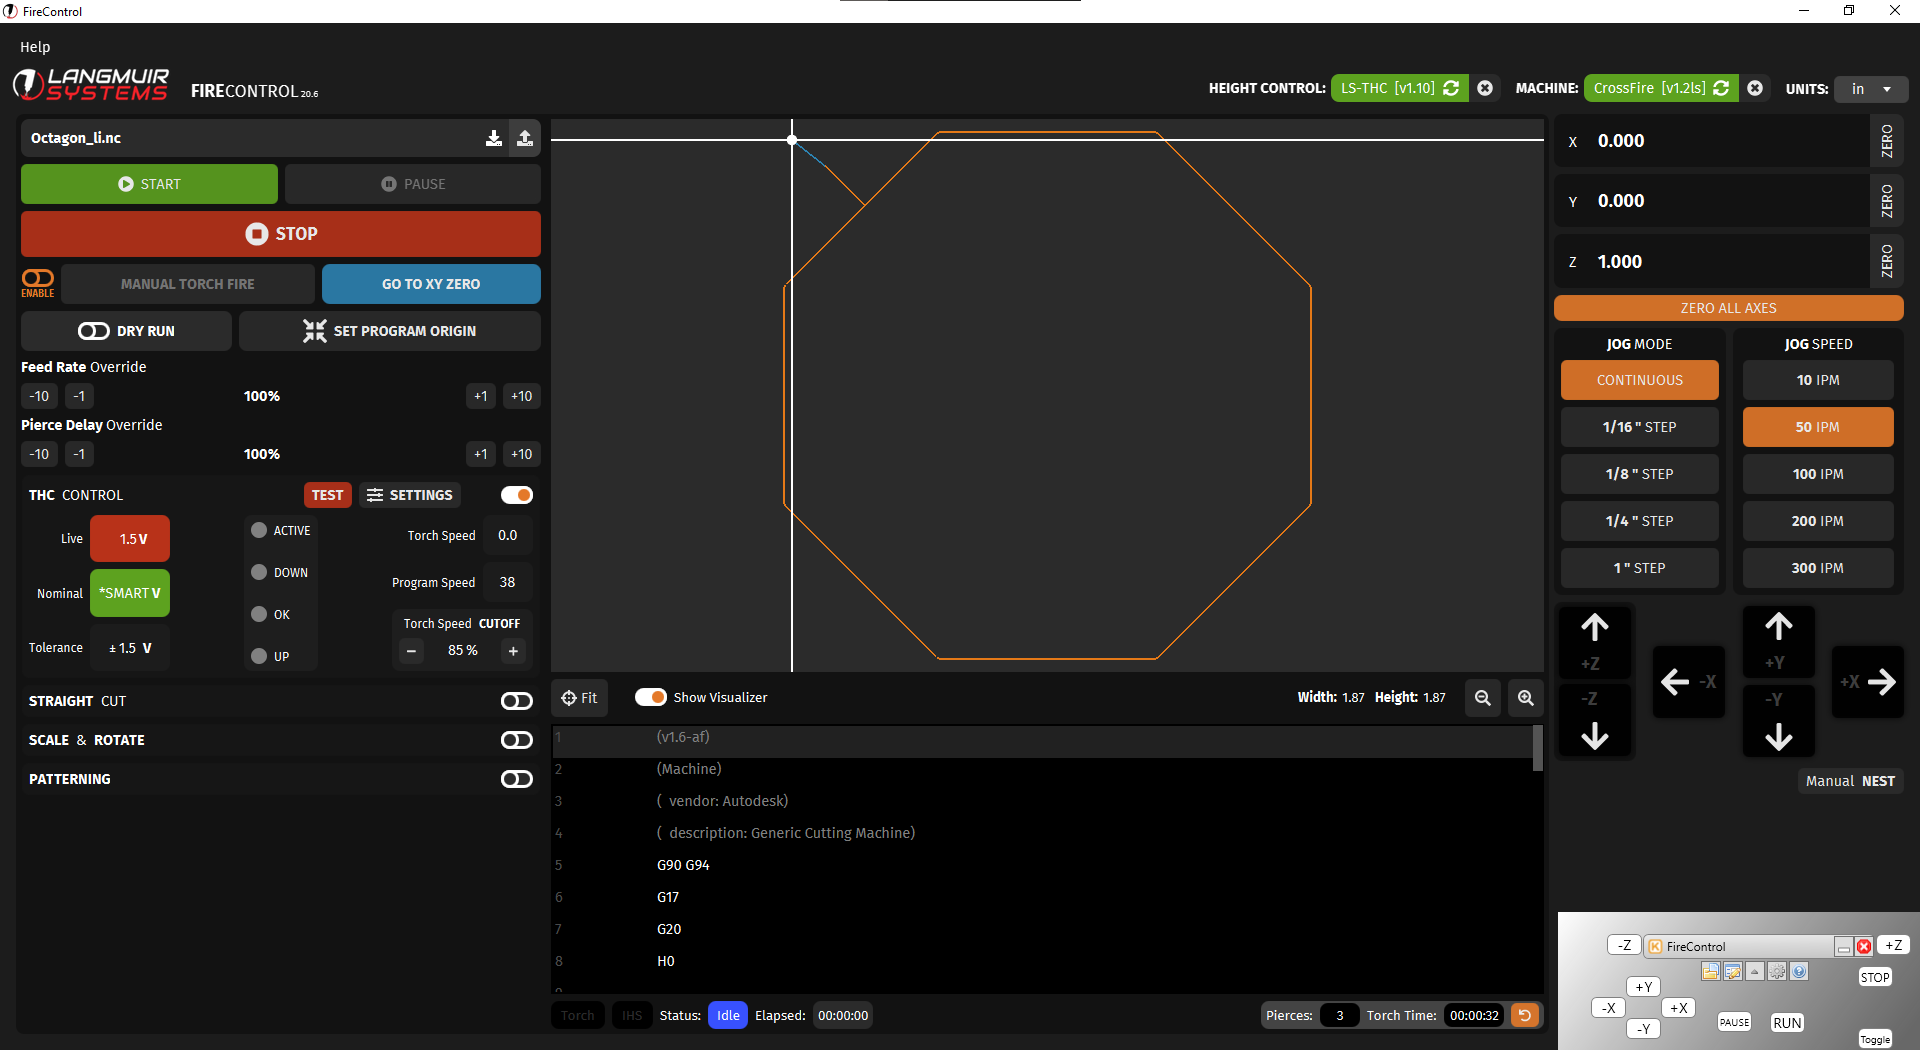
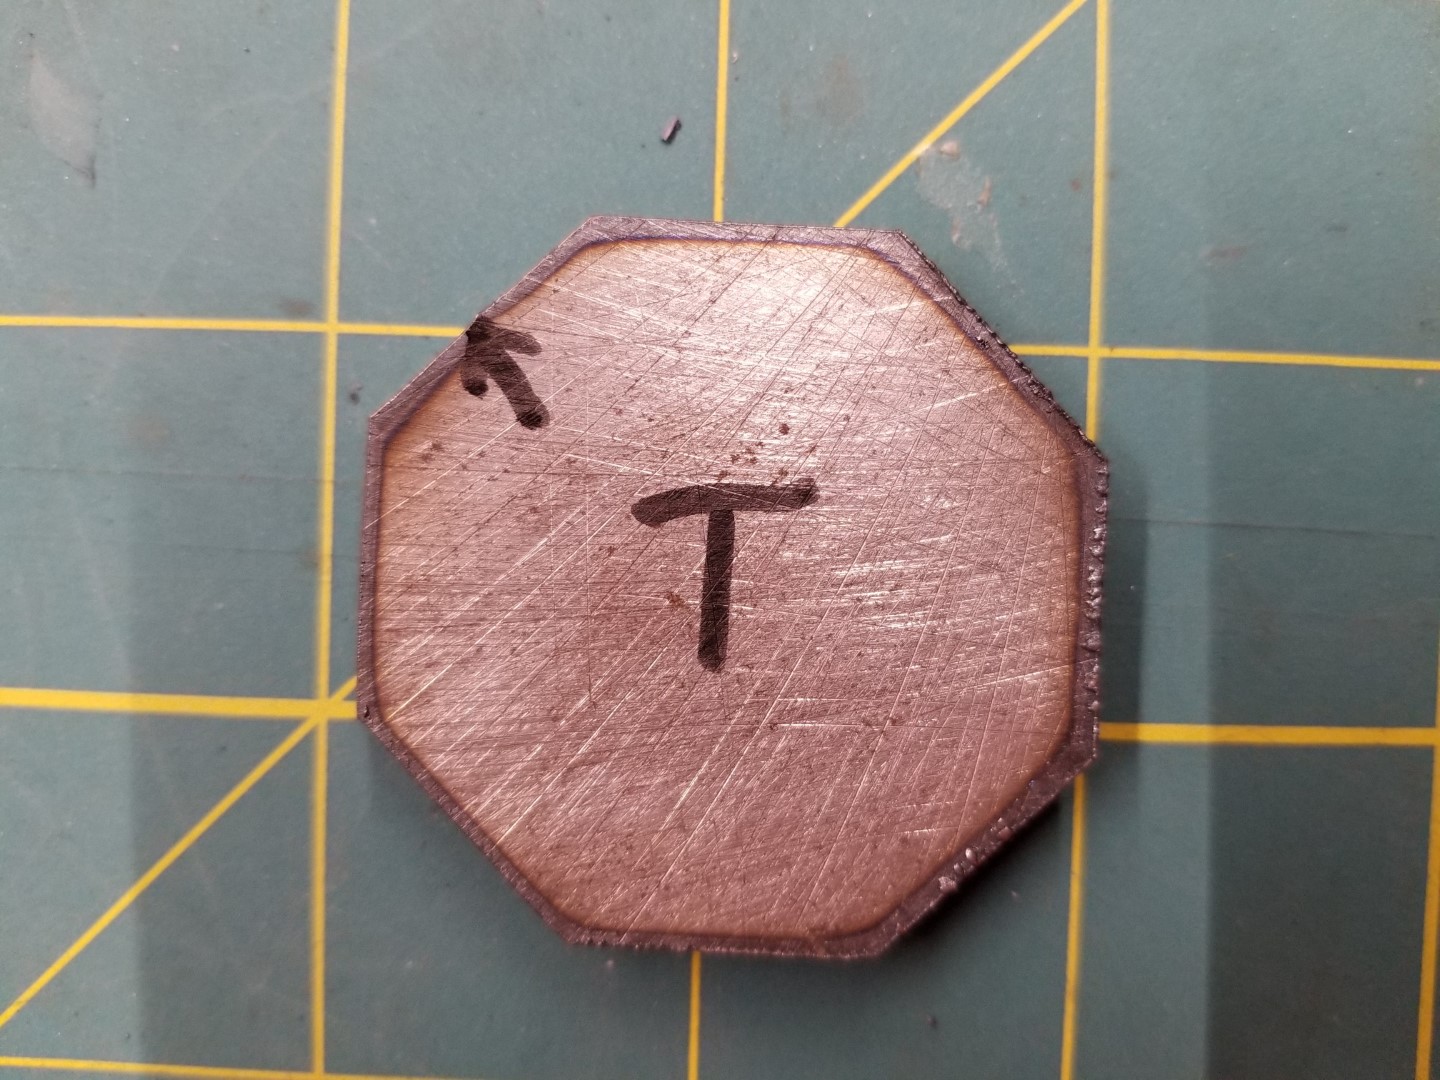
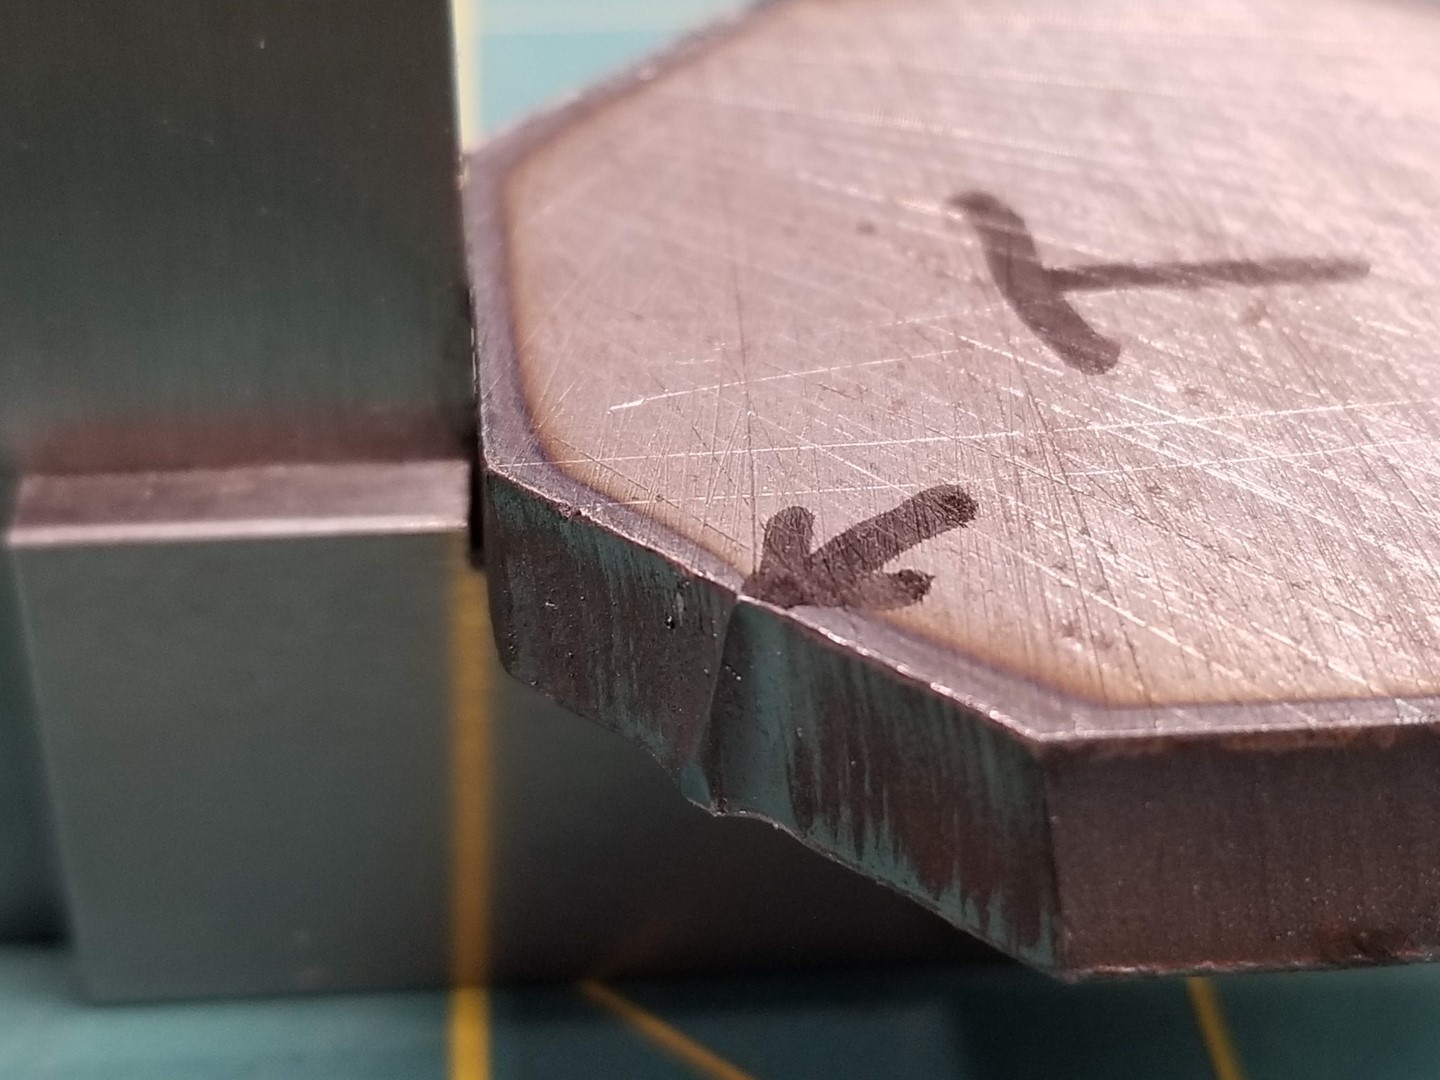
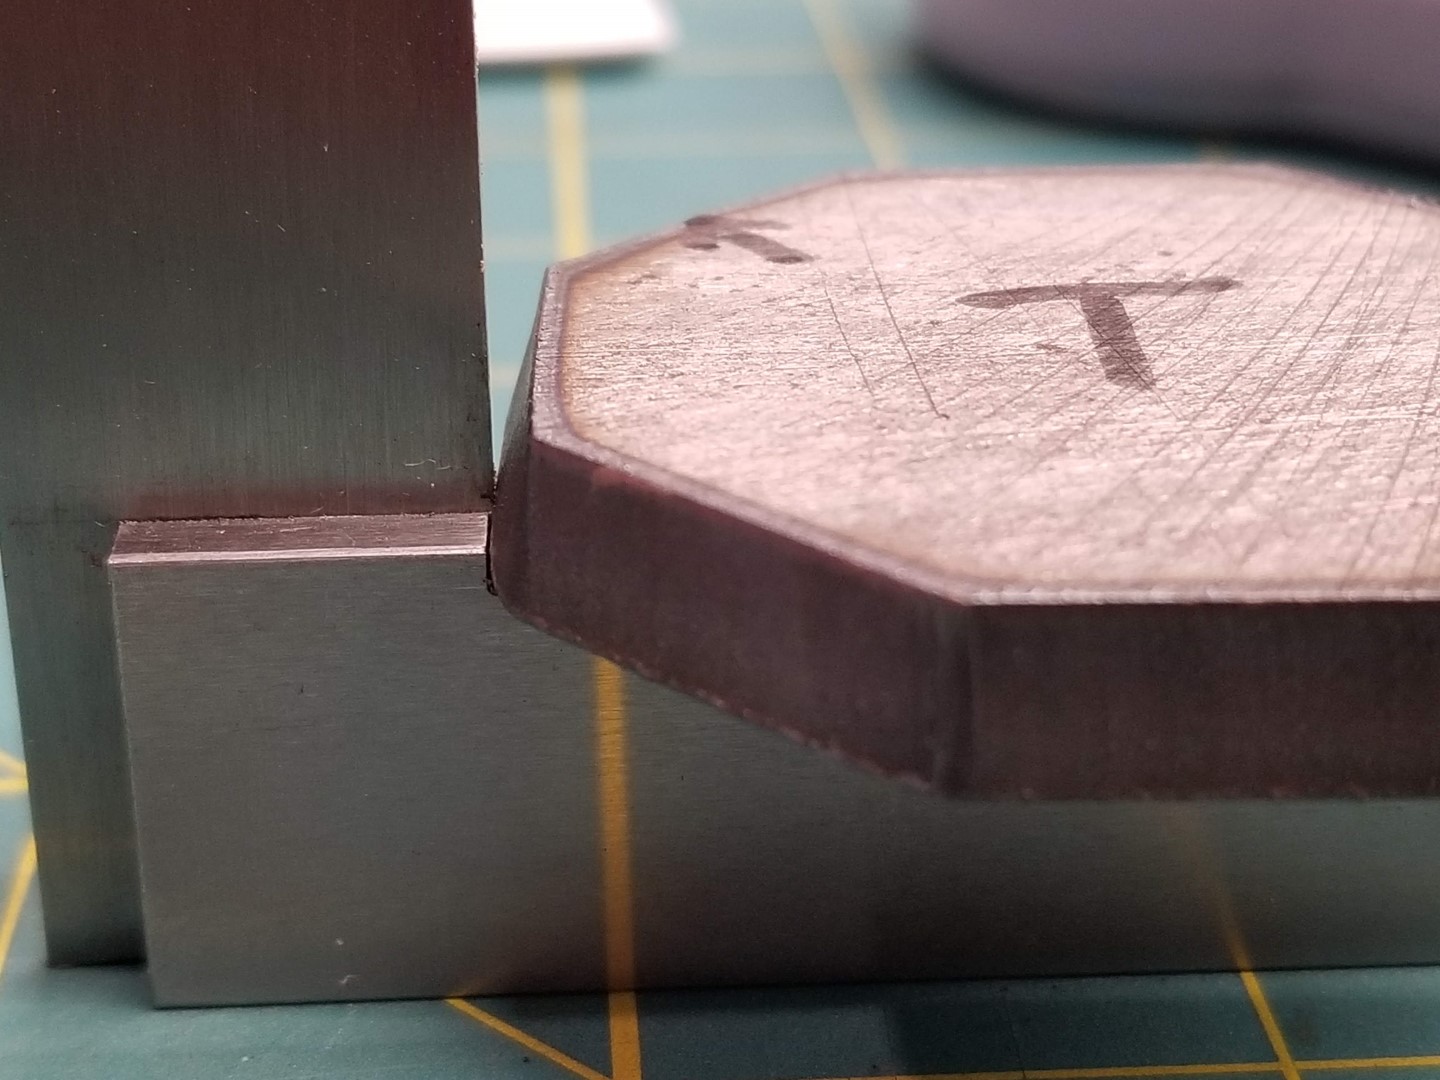
I cut out an octagon so that I could see if any particular direction was worse than others.
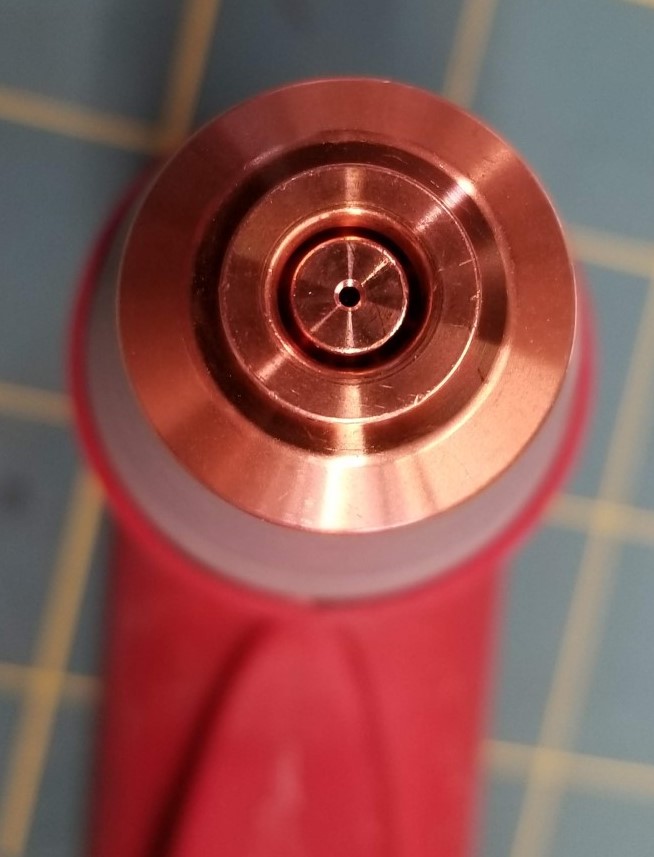
Here are the consumables after 3 pierces, and 32 seconds of cutting time (my first attempt I had the amperage set too low, then the lack of a lead-in made the part shift on the second try).
Finally, here’s a video showing each of the sides for comparison.
I was really, really hoping that the new consumables and re-squared table would solve the problem, but I’m stumped. I certainly appreciate any light that you smart people can shed on this issue!
Take the torch out and put something in the holder about 12" to 18" long with a point on the end put the point just off the metal. Then hold the top of the item and move it around left to right front to back, etc. and see how far the point is moving. If it moves at all then you need to adjust all the bearing to take out the play.
Also if you want you can call me tomorrow after 9 am.
Thank you for the suggestion, and the offer of further help! I’m tied up until tomorrow evening, but if I have any questions once I’ve gathered that additional information, I’ll reach out.
Man, that’s a crazy problem. You originally said it moves with torch rotation. So you can rule out anything on the machine setup. Plasma follows the airflow… its gotta be in the air. I know you changed put consumables, but what if your handle has an obstruction on one side of the air input, so your swirl is exaggerated and exiting the nozzle at an angle. Physics is showing what I Think may be uneven pressure in nozzle…
I apologize if I missed this in the thread, but have you compared cuts with THC on and off? I ask because on thicker material my Cut 60 created interference problems that caused loss of height control and excessive positive bevel.
maybe you have tried already but for a test try bypassing the dryer setup and running an airline directly to the plasma cutter from the compressor tank. ran into a problem like this in the past where i had sufficient pressure but not enough cfm at the actual plasma that caused similar results and ended up finding a restriction in the air system of the shop that was going to the plasma cutter. just a suggestion…
long lines runs from compressor to plasma cutter can induce water droplets back into air stream. The closer the air drying system is to the plasma cutter the beater.
Even if the pipe was permeable; your pressure difference between the inside of the pipe and outside of the pipe wouldn’t allow a fluid to move to the high pressure area.
In the scenario we’re talking about all the air drying has already been accomplished before the length of pipe. Where does the new moisture come from?
The only disadvantage I can see from long pipe runs is pressure drop.
I only bring up the question because I’m legitimately fascinated with
Psychrometrics and pressure dew point.
EDIT: I’m an idiot and misread @MechanicJon to say closer to the compressor. He is correct that water removal will be more effective the closer it is to the point of use, since the air will be cooler. The cooler it is, the less vapor it can hold and the more will condense.
The minimum pipe length is to let the air cool off from what I understand.
The pre treated air is never completely dry there’s always some moisture left. No one on this forum has the type of air treatment system to get all the moisture out. The cost for that is excessive. Pressure drops and temperature changes in long runs can separate the moisture left in the air under certain circumstances. Similar to the up and down air piping loops used to dry air. Treatment of air at the compressor is the recommended design. That keeps the bulk of the moisture out of the air system. A point of use desiccant dryer and a motor-gaurd filter also would be ideal.
Have you tried lowering your cut height? I found that mine cuts much better at .050". One of the guys on YouTube ran a bunch of tests with his Pro table and found .040" cut the best in terms of bevel.
I spent more time looking at your pics… your corners are rounded on the octagon because your cut speed it’s too fast for the vector change. Remember the bottom of cut trails behind. Your trail lag is almost half the thickness of the material.
A clean cut has much to do about the metal. So just because there is minimal dross doesn’t mean you’re getting accurate cuts. Your octagon example shows the over speed issue very well.
Focus on one variable at a time. Slow your cut speed WAY down and check your edges. Turn up your pressure…I saw 65 psi posted… you may be getting vortex generation out of the nozzle tip at the psi… bump it to 90, see if it’s more vertical. Throw the guide book of cut speeds out the window… there’s a difference between cutting through something and precision cutting. I see you’re looking for precise cuts…
I’ve got my PRO dialed in with kerf offset, psi, and power settings so it will repeatedly cut 1" 10g steel test squares within a thousandth everytime… but its cutting slower, lower power, higher psi than what it would normally need to just “cut” it.
If it’s still FUBAR’d with halving your cut speed, ditch that hand unit and get a proper machine torch.
Just throwing out another idea as I was having the same issue as you were on a different brand plasma cutter I was using. Try raising your z axis all the way up, then manually fire the torch and look at how the arc looks when on. Is it perfectly vertical or is the arc shooting out to one side? Obviously do this while wearing proper eye protection