Air operated water table fill/drain system

Here’s my all pneumatic operated fill/drain system. Had built something similar for my last torchmate and decided to incorporate pneumatic switches into this one. Take about 8 minutes to fill and about 15 minutes to drain.


5 Likes

it kinda blows…then again it sucks…but it works…ahahahahah

cool!

3 Likes

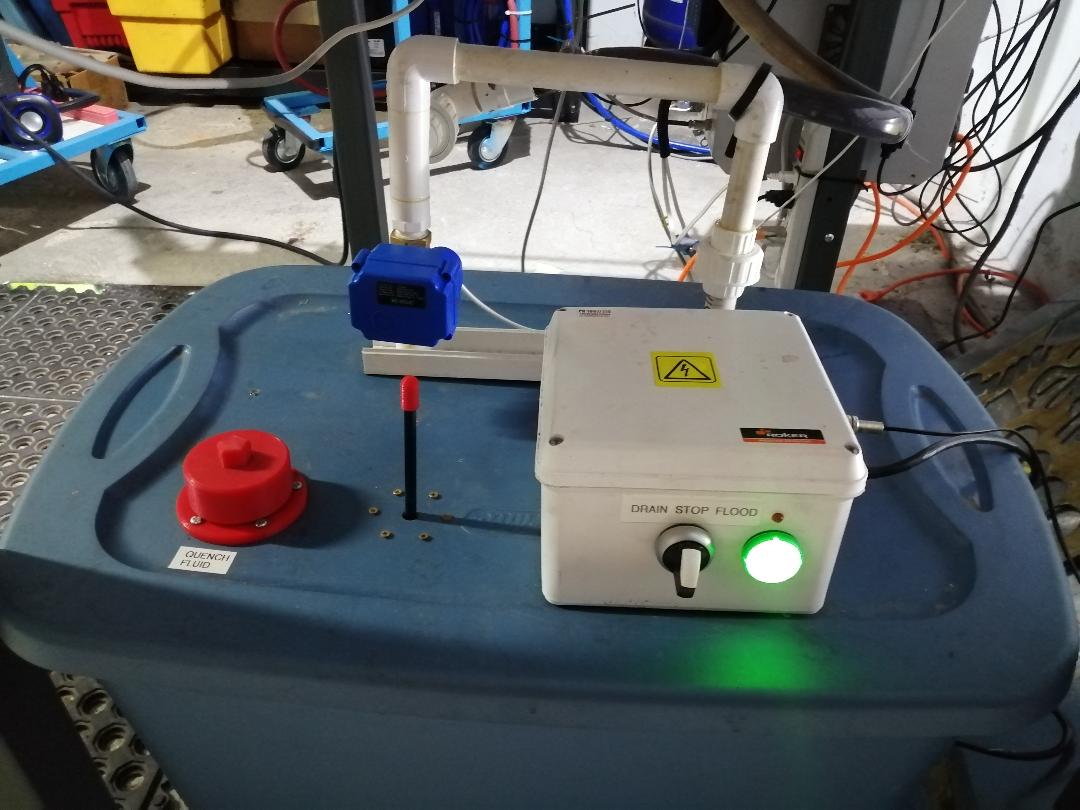
Still happy with my bilge pump water rig. Only change made was an electrically actuated ball valve from amazon. Takes about a minute to fill and about 3 minutes to drain.

https://www.amazon.com/gp/product/B06XCZ35NB/ref=ppx_yo_dt_b_search_asin_title?ie=UTF8&psc=1

3 Likes

Wife cut me out a sticker to finish the project off right!

4 Likes

I managed to pick up 3 of the same55 gallon drums as you are showing in the pictures for my xr today. By any chance do you have the time to add a list of other needed parts and steps to replicate your setup?

I have no problem building the frame to support them, but do not know what is need for the plumbing side of things.

I’m not sure the 55 gallon drums will fit. I used 3 30 gallon. I took inspiration from a YouTube video. Just made the necessary changes to accommodate 3 drums instead of 1.

As far is the air plumbing I used these switches and just plain push lock 1/4" tubing feeding from a cheap regulator.

Baomain Pneumatic Knob Switch… https://www.amazon.com/dp/B01D2SKOI4?ref=ppx_pop_mob_ap_share

Hromee Air Line Tubing Kit, 1/4… https://www.amazon.com/dp/B08BLC8PZ2?ref=ppx_pop_mob_ap_share

1 Like

So how full does the 30 gallon barrels get?

Well table holds estimated 65 gallons. I have potentially 90 gallons to work with. I just filled table, drained into drums, then added some more to account for evaporation/spray/spillage/etc.

1 Like

How did you plumb the pneumatic switches?

This admittedly took me waaaayyyy longer than I wanted to figure out. Here is a simple schematic to understand.

Close… but there actually is a reason behind the 2 switches… but to be honest the three way switches were used just cause they were on sale. I actually plugged one of the ports in the feed switch cause it wasn’t needed and a 2 way would have worked better. I wanted to be able to shut air supply off when not needed to the tanks and shut off the drain circuit independently. That way the water would sit at the level I wanted. The way your schematic would work you either fill or drain… there’s no way to stop either circuit. Sorry I didn’t clarify I can draw up a schematic if people really need one.

1 Like

If you don’t mind I’d like to see a schematic of the pneumatic system. I’m about to start my water system. My 75 gallon rv water holding tank showed up today


I wanted options. Mines set up with a switch to add air and a switch to let the air pressure exhaust from tanks. I also added a manual shutoff valve where I can open and close tank if it’s gonna have water up top for a while I will close manual valve and let air out of tanks so it doesn’t sit there pressurized. If I’m just cutting a quick part I will fill tank and just keep the pressure in the tanks to hold level till I am done. I drain my tank every day back to the storage tanks and close the manual valve to keep evaporation to a minimum. Another reason for the main manual valve. Hope this clarifies. You could do it the way Nicholas A Rogers drew with if you added the main manual shut off valve as long as when you closed the switch shop air didn’t have a way to vent openly and the exhaust side had a place to exit unobstructed.

Another reason for the main valve is that if you need to work on the plumbing below the table, you simply put the fluid into the table and close the valve. Than allows you to work on everything below the valve without draining the tank or discarding the fluid. I also think the redundancy is worthwhile if you’re going to use electric solenoid valves.

2 Likes