Well, I’m on a journey to find out just exactly what all my 3D printers can do for me and my Titan. I’ve made a few larger radius dies, that’s not any new ground, other guys here have made some as well if memory serves me correctly.
This is the start of testing out embossing dies, and combinations of dies and materials to create them. Usually I’m practical and want a useful project to be something I learn on, but this time I chose something I just thought would be cool.
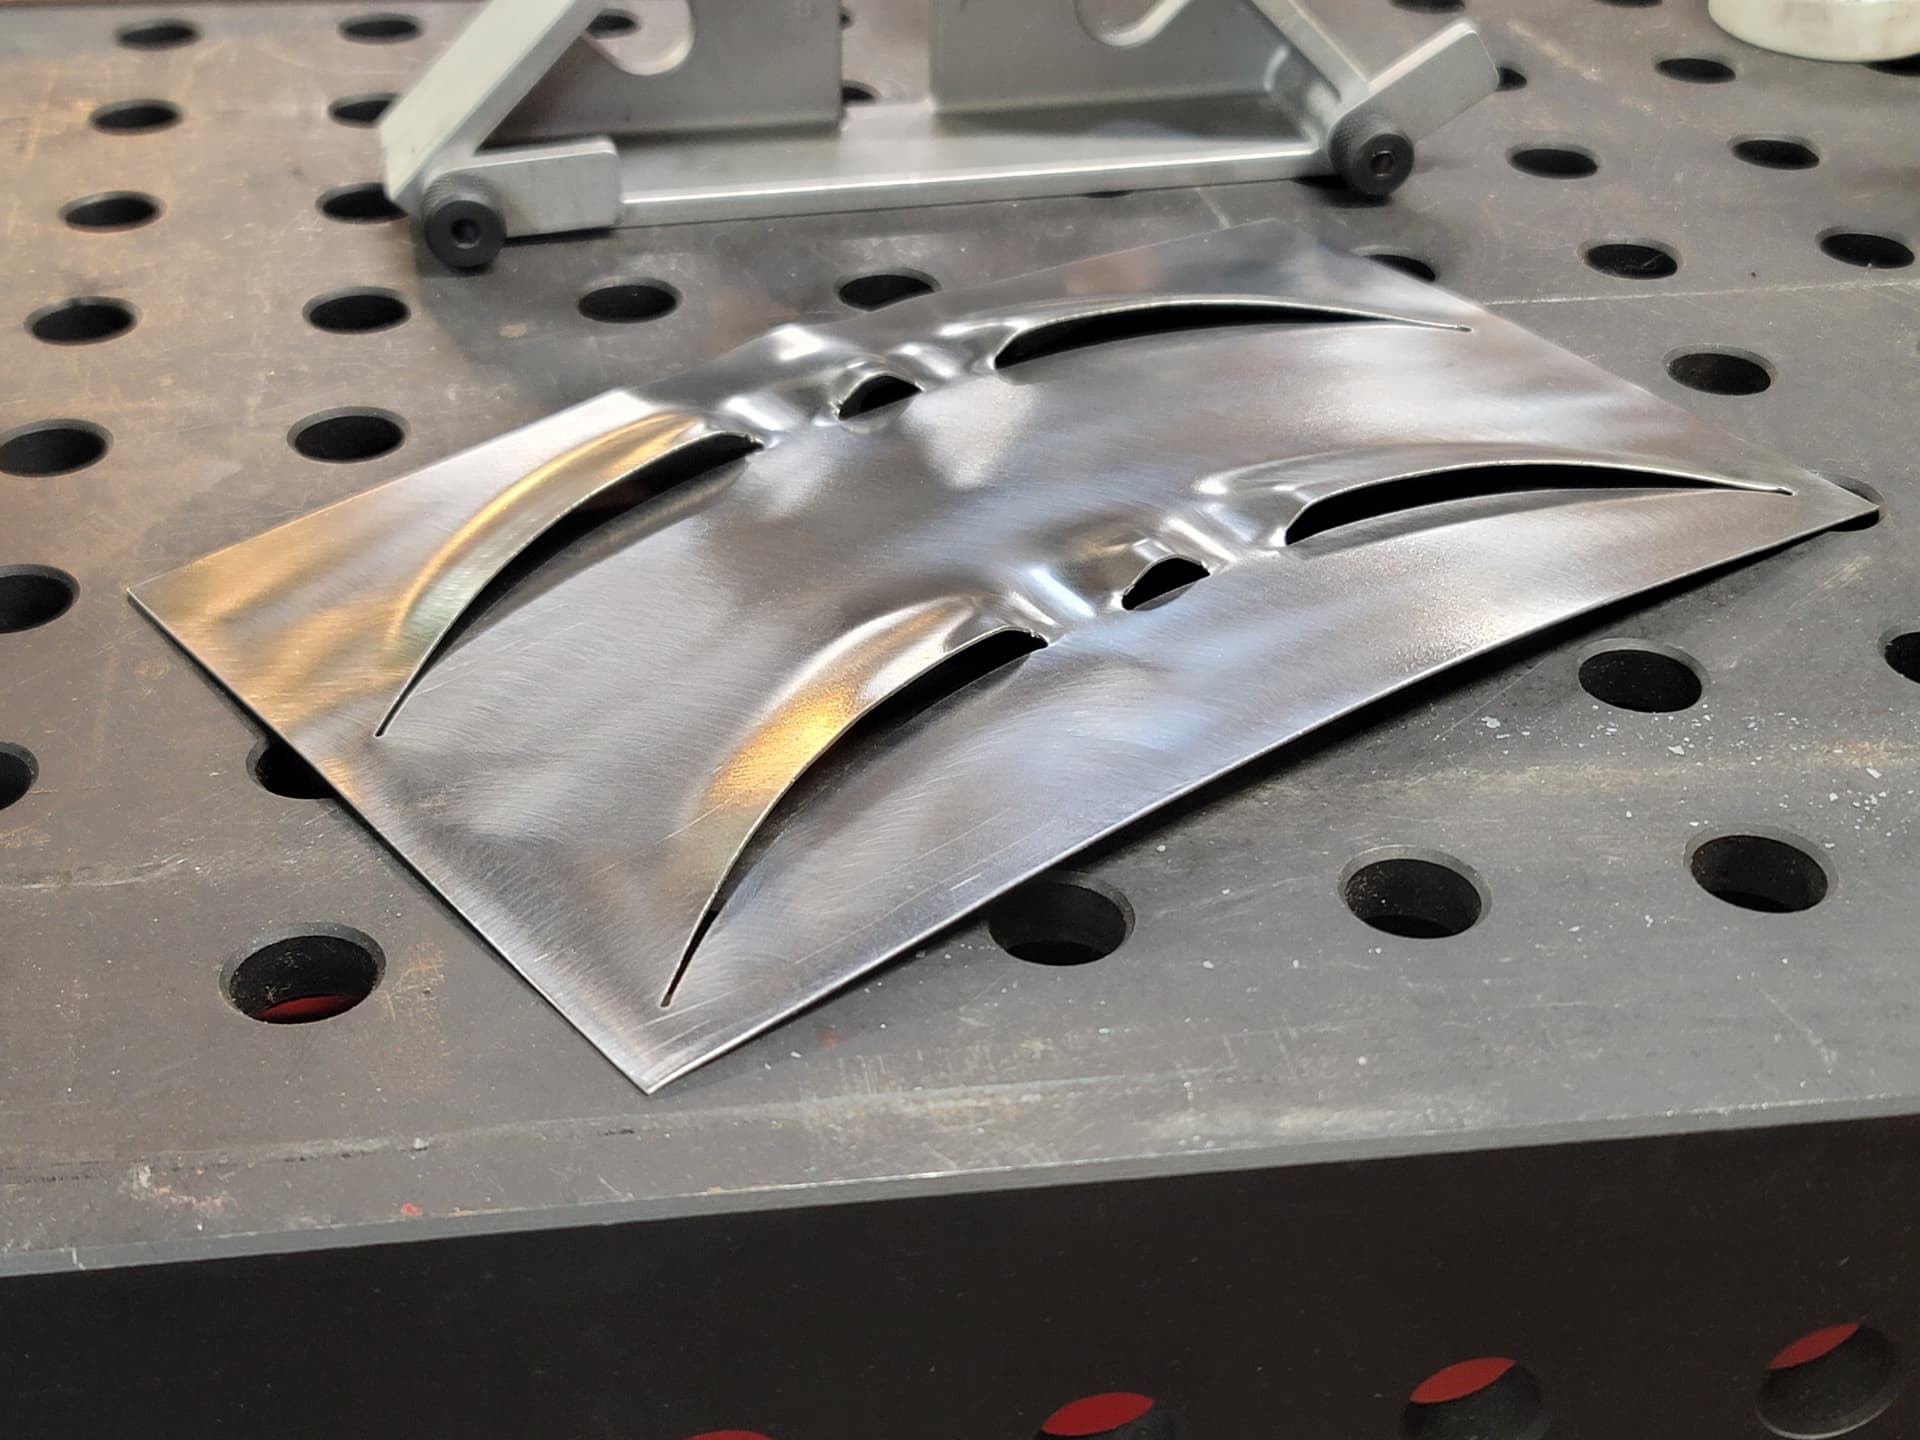
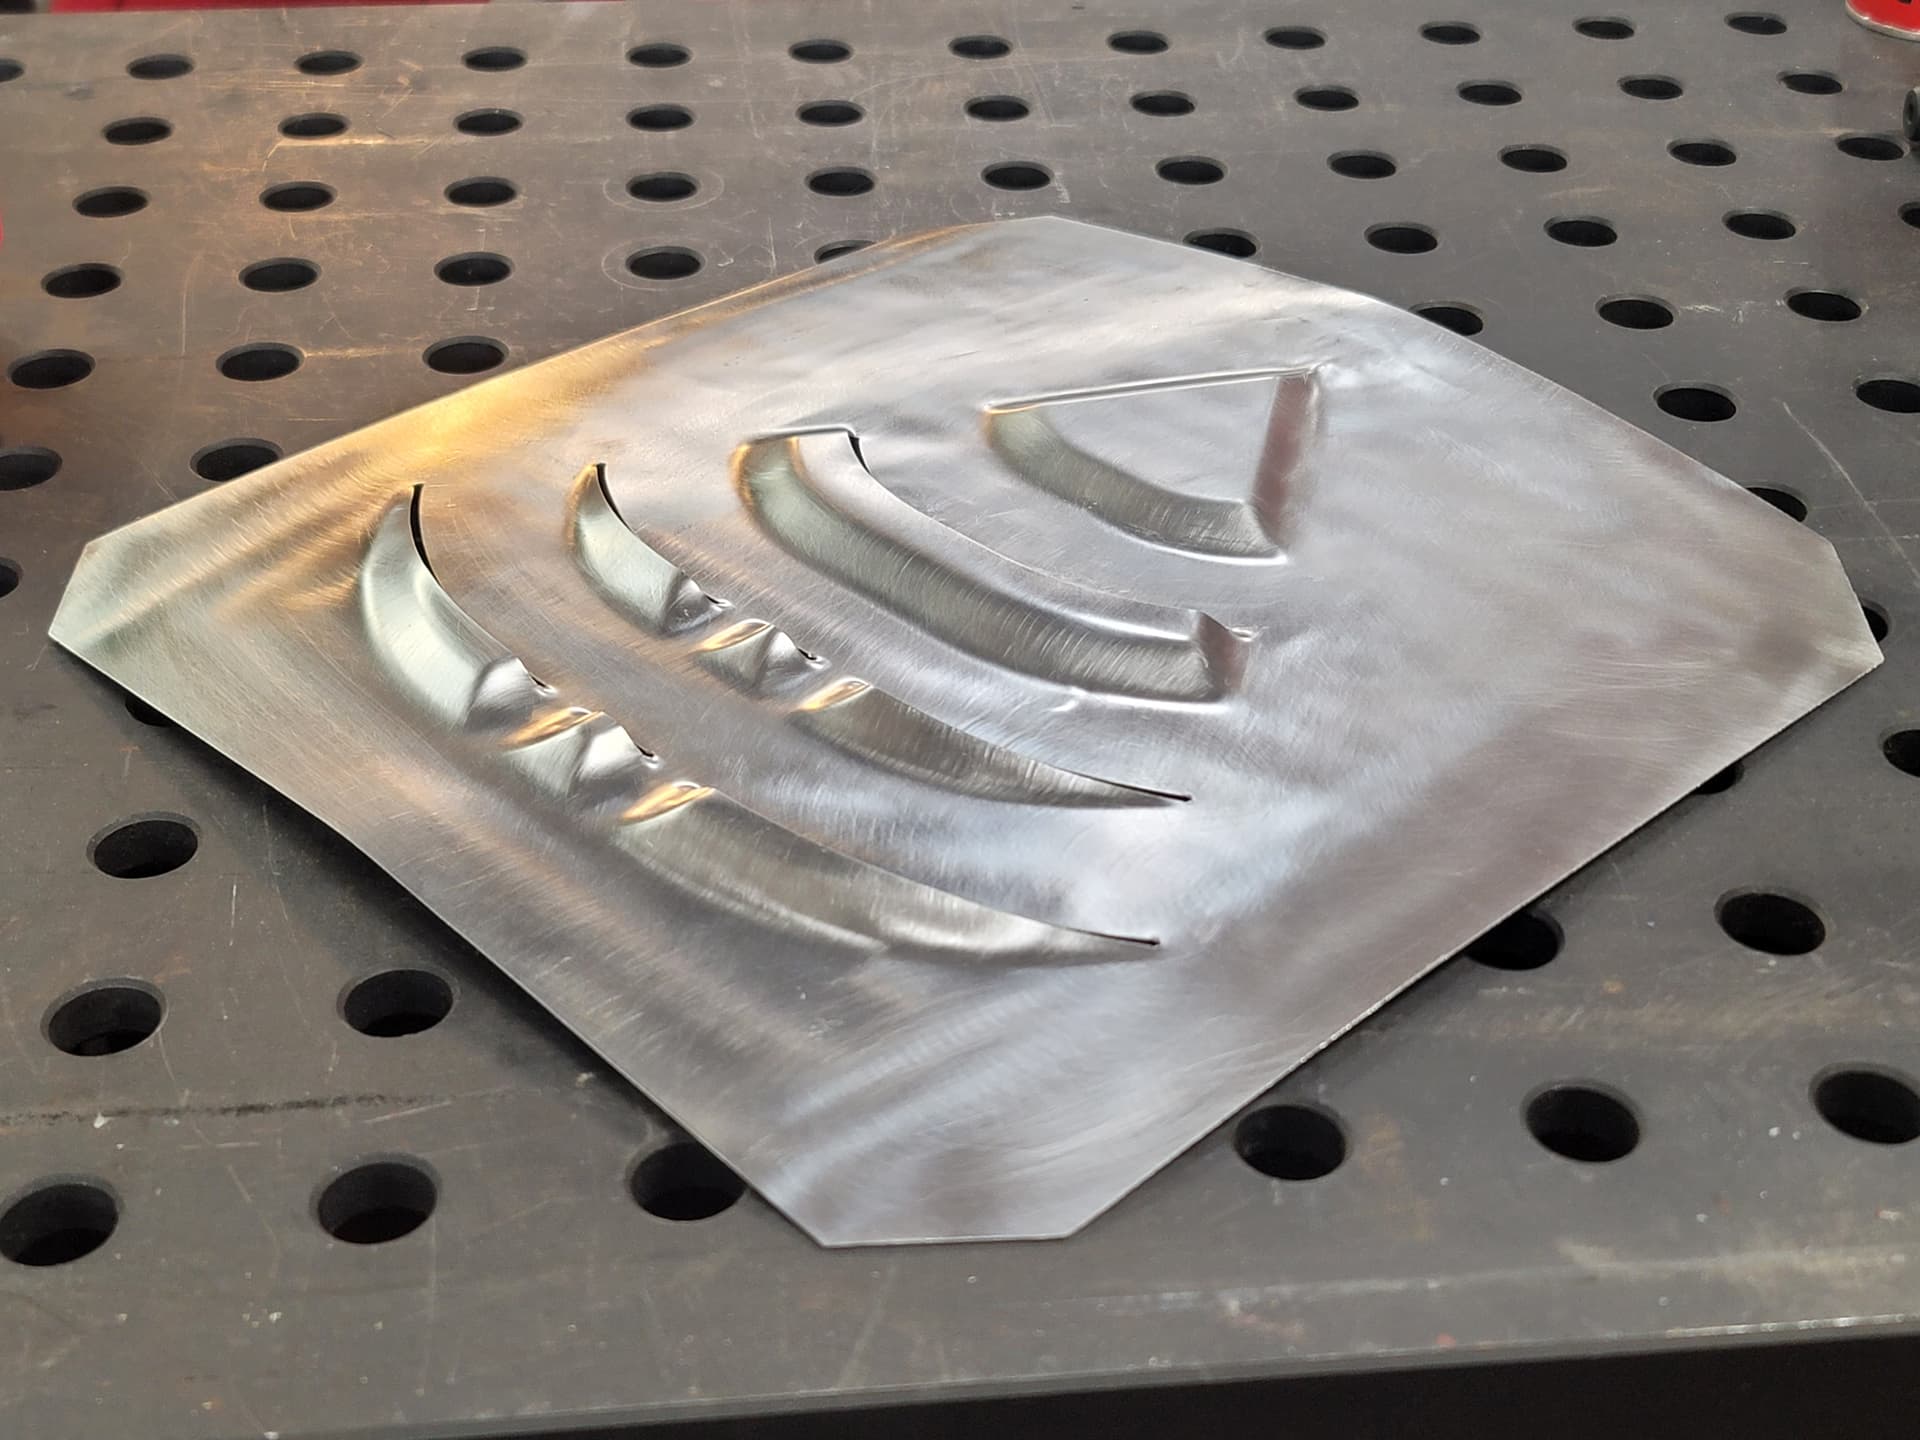
A louver idea I had when I was daydreaming about building a street legal kart. Once I find the combination of clearances, materials, and steps that produces the finished result I’m happiest with, this test louver will evolve a bit to an even neater final design I have in my head (in my opinion, yours may differ).
I chose to try a pretty bare bones tooling setup for test #1. 2 passes, first to about 85-90% depth, and final pass to what I’m calling full depth. There’s some wiggle room in that number due to the flexible nature of plastic tooling.
Here’s a video of the first pressing and the louvers after 1 pass each.
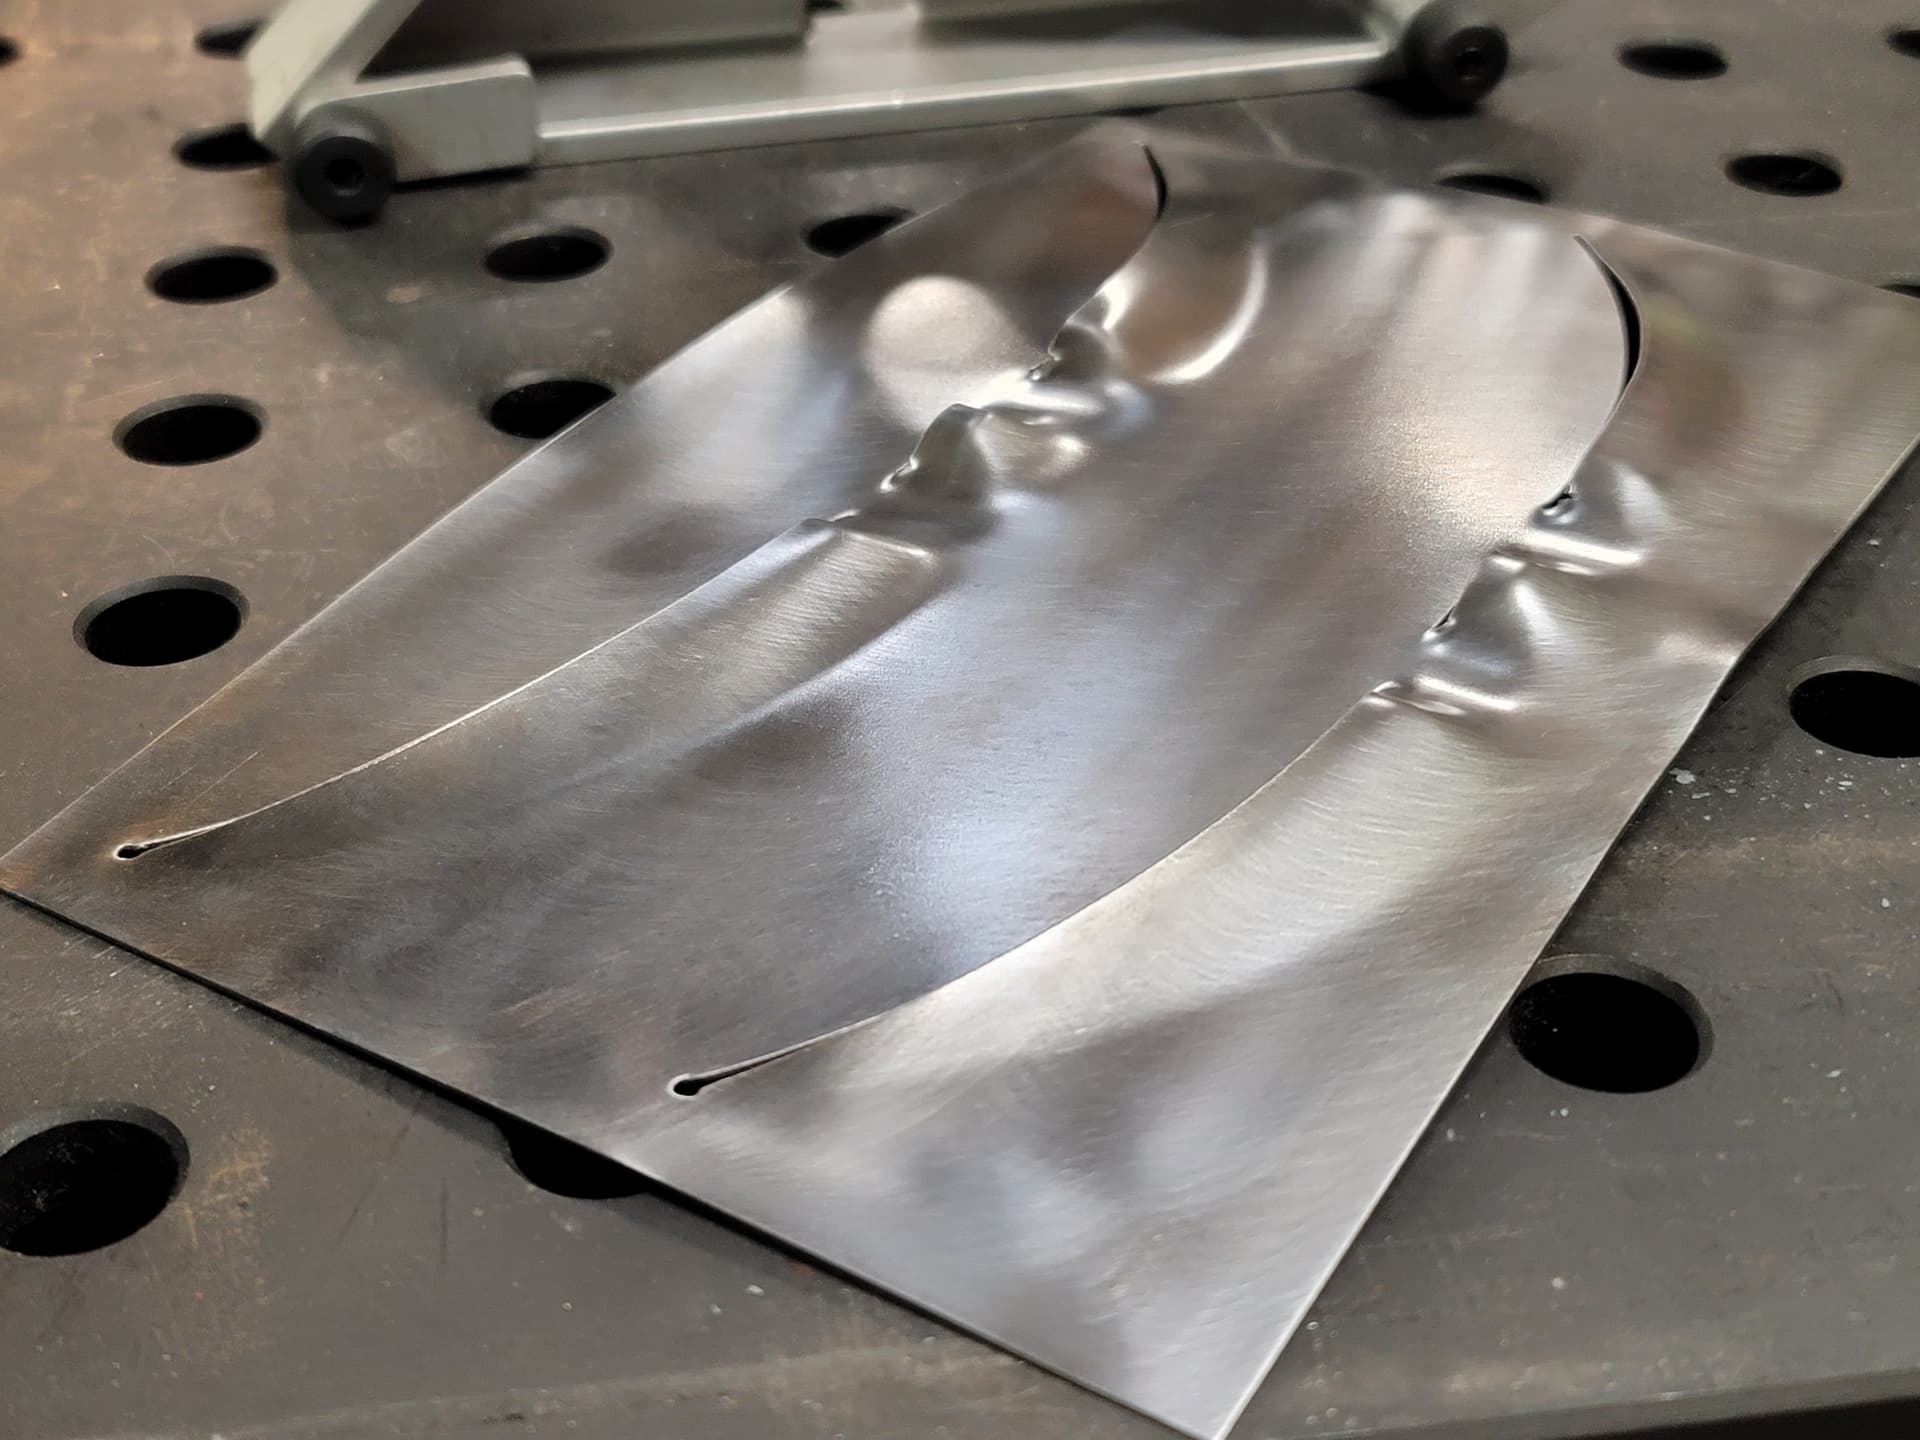
The next test coupon I cut will have the slots full length rather than truncated 0.05" on each end, and I’ll make it a slot wide enough to hide the pierce point, as that seems to be the failure mode for it tearing, plus it just looks bad.
I’ve seen a few yt vids of people 3d printing dies for embossing - brass, aluminum, copper etc - print out a custom logo or graphic and form it on the press very cool louver style you have there! Taking the 85 year old standard hotrod louvre up a serious notch is on the cutting edge for sure -
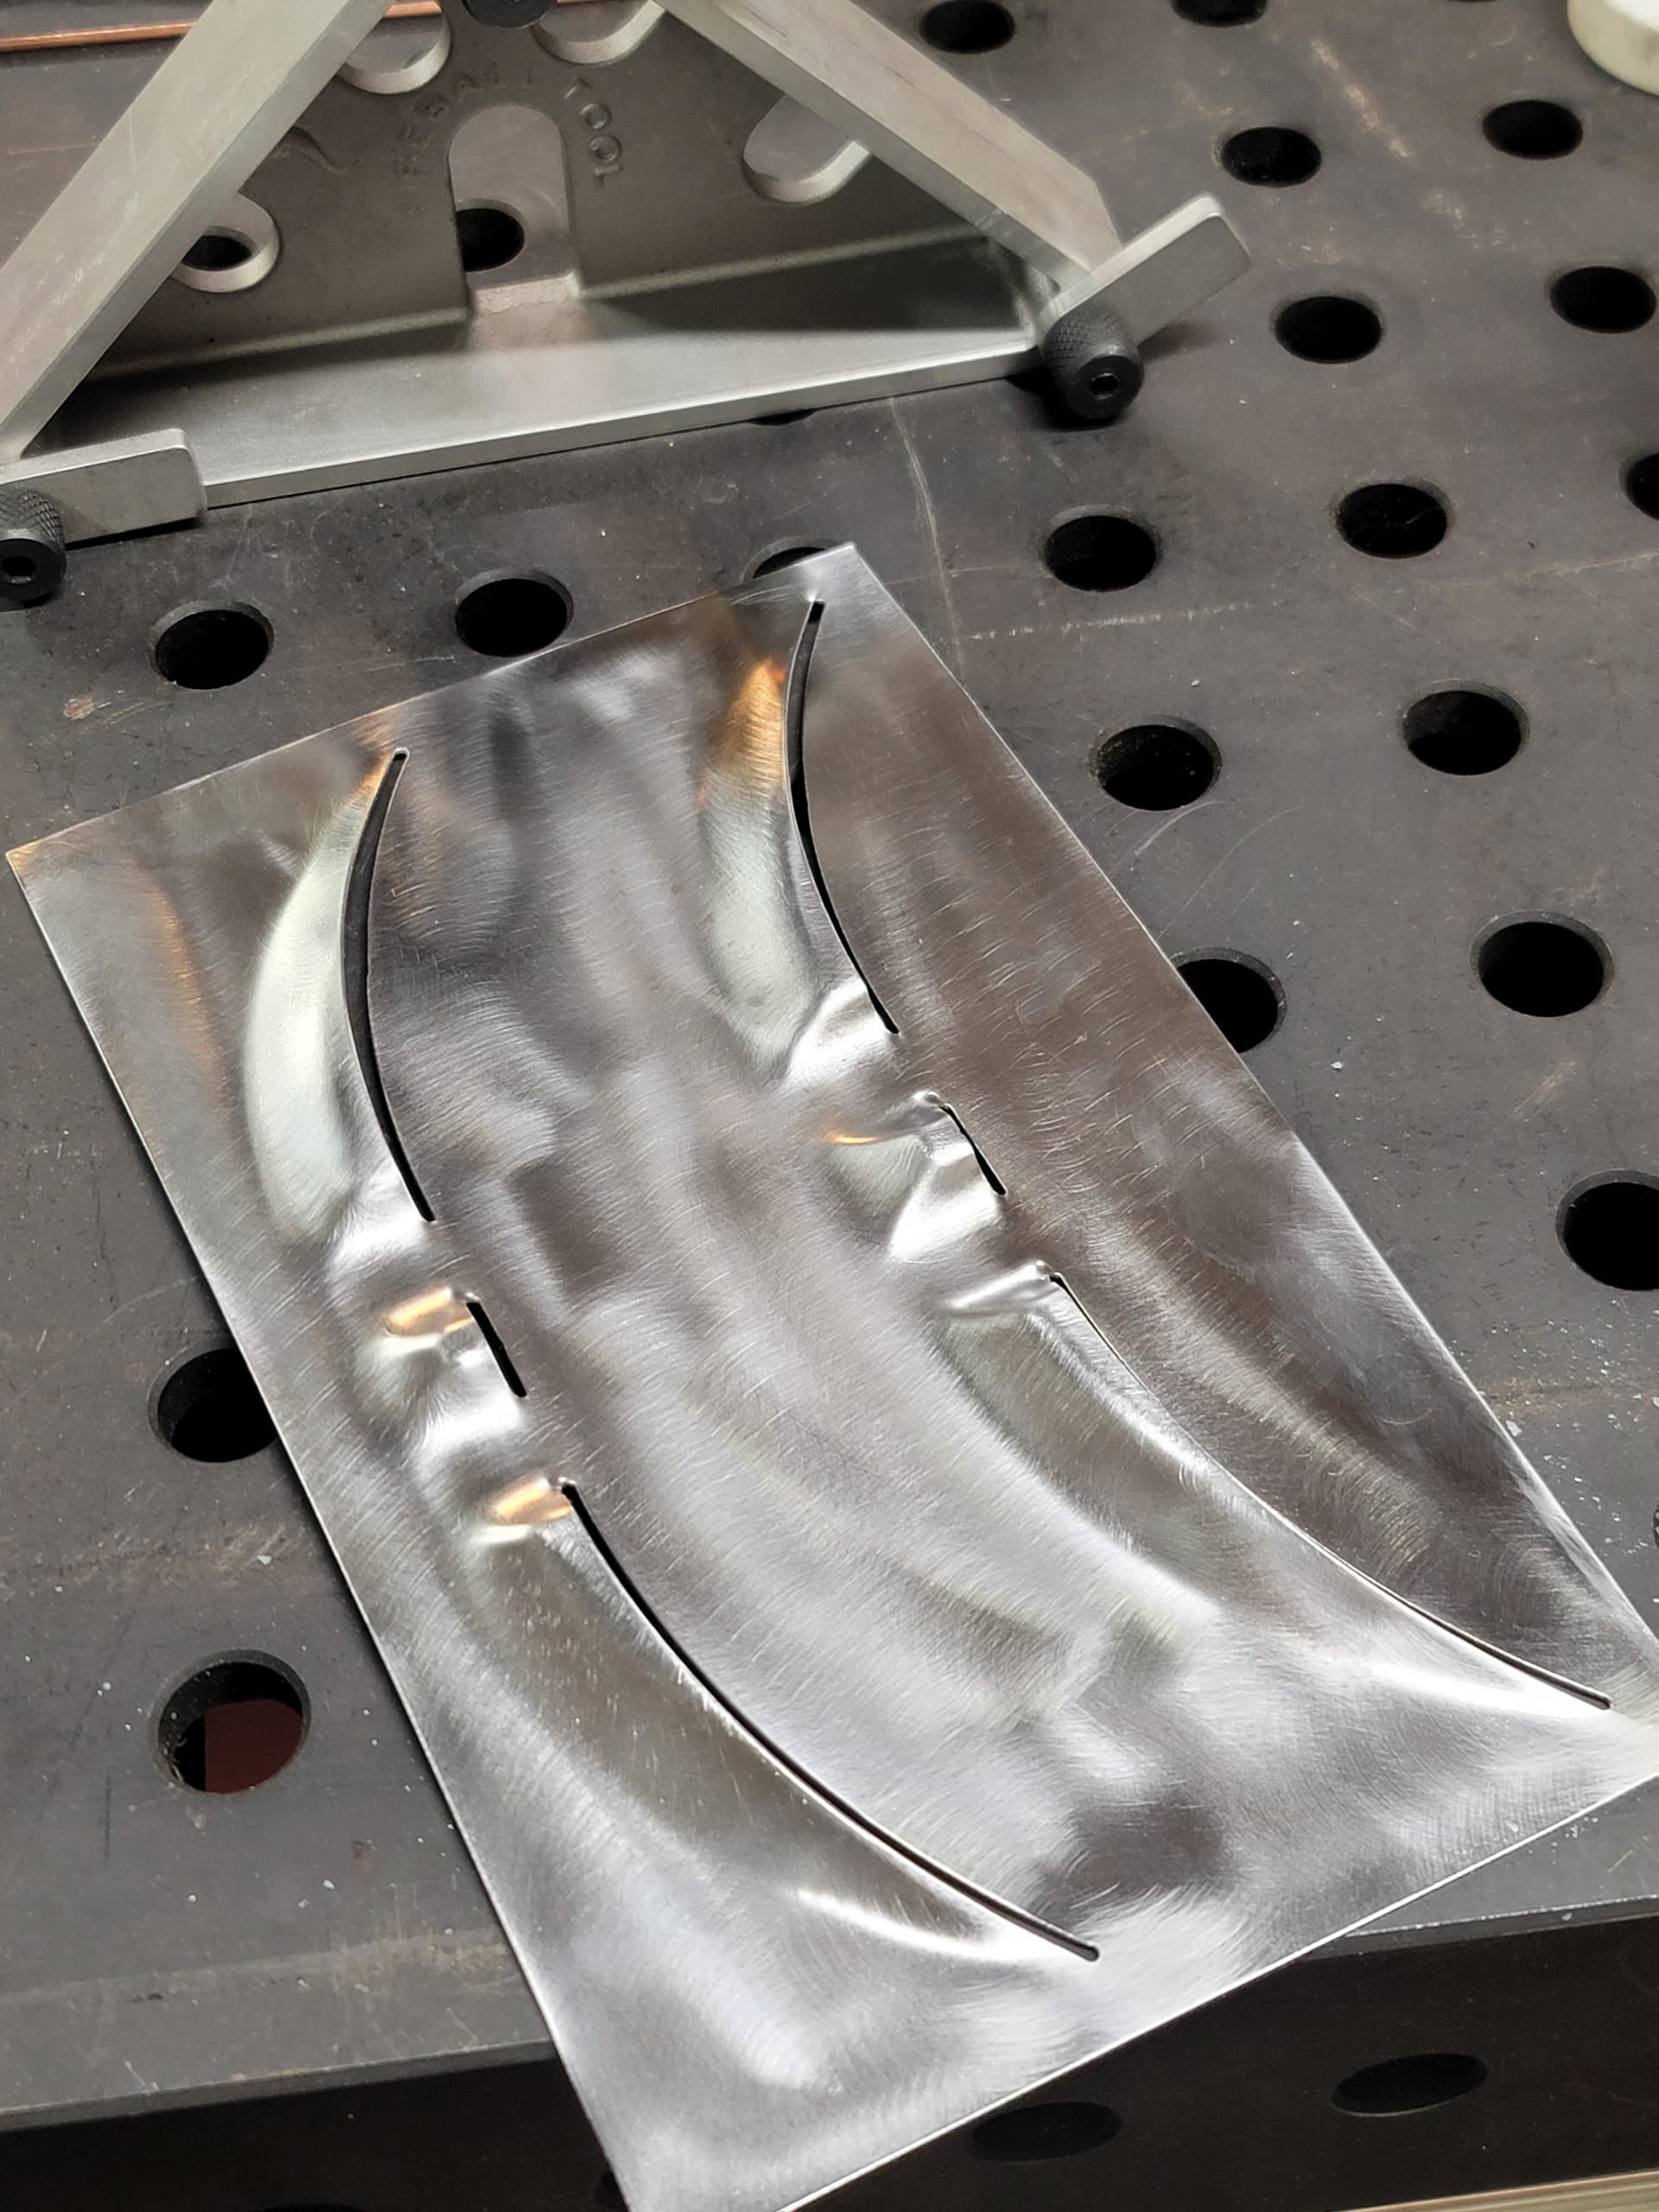
Thanks. The second one turned out even better, all I did was make it a 0.09" slot instead of a single line cut, and being a little less timid and pressing that bit extra to set the form a bit more.
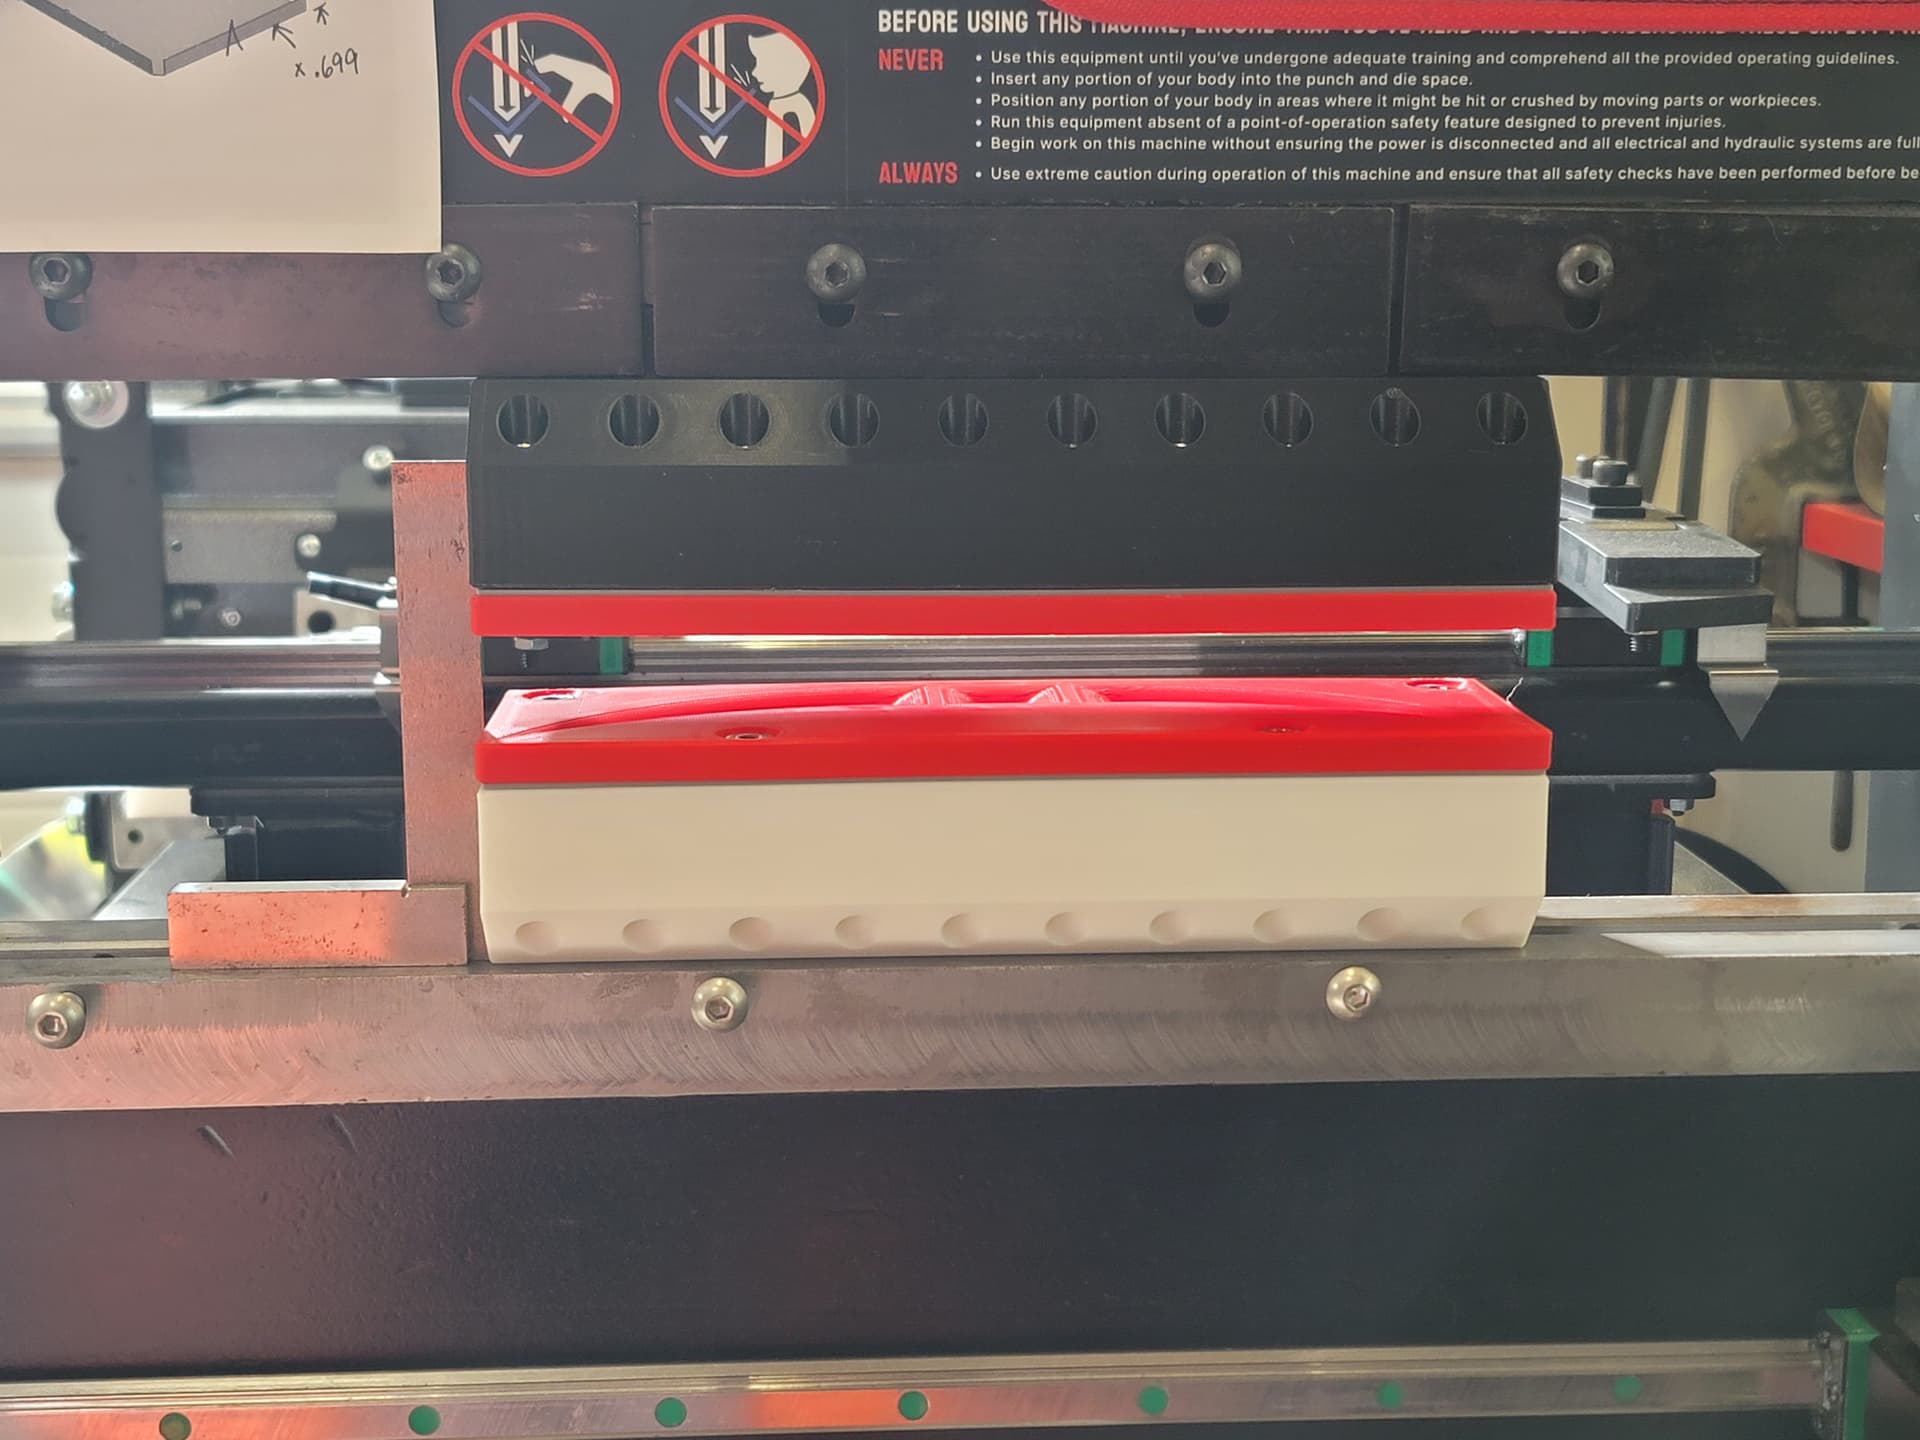
The second die in the progressive set is designed, along with some improvements for the original die set that got rolled in while I was making small adjustments. This is working out well enough that I may make a steel die plate holder at some point once I’m satisfied that I’m done iterating the design, that way I just have the much thinner and faster to print die plates to make, and I can press the parts harder and design wider plates than the 3" plates I feel limited to while I’m using a PLA plate holder.
That is what I figured your orange and white plastic design was - a large dedicated rigid holding block that fits the small thin die, that was it’s fast and easy to knock out a punch/die setup and quickly get a part in hand looking forward to what future designs come out of this
Easy as can be to align, just clamp the top punch holder in, put a square on the bed, touch lower die holder to the square and clamp in place. From there it’s just a matter of pressing and swapping out the die plates for each stage. I found a square clamped in the lower tooling slot using the grub screws works perfect as a side stop, just use 1-2-3 blocks and spacers to set spacing.
I learned a few things hammering out the waves in the material after finishing the pressing, the next panel will be even smoother, even without any real bodywork tools at my disposal… For now…
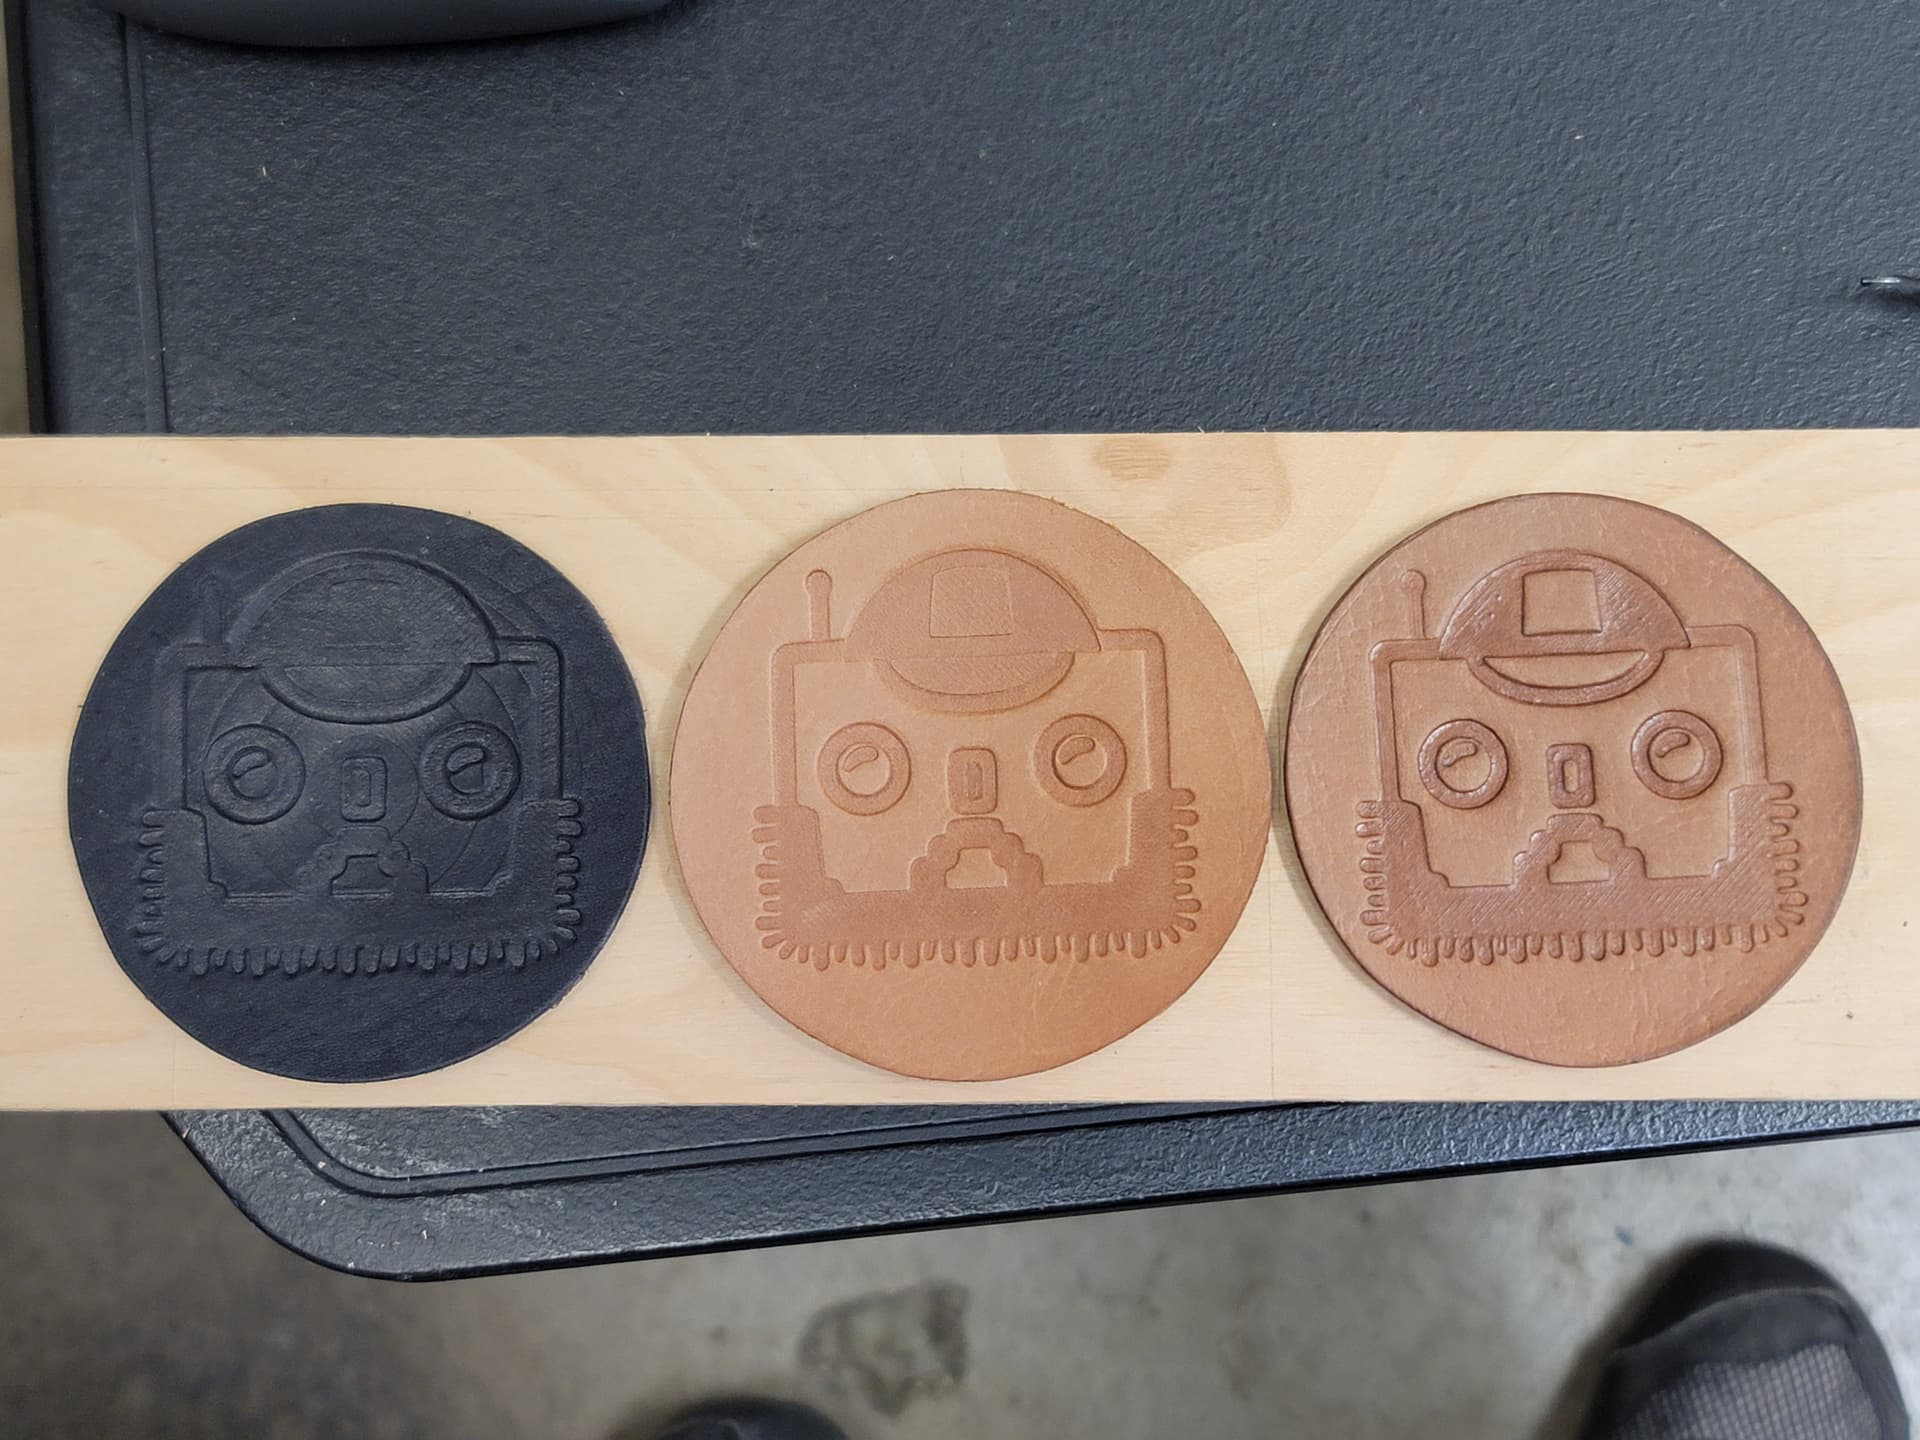
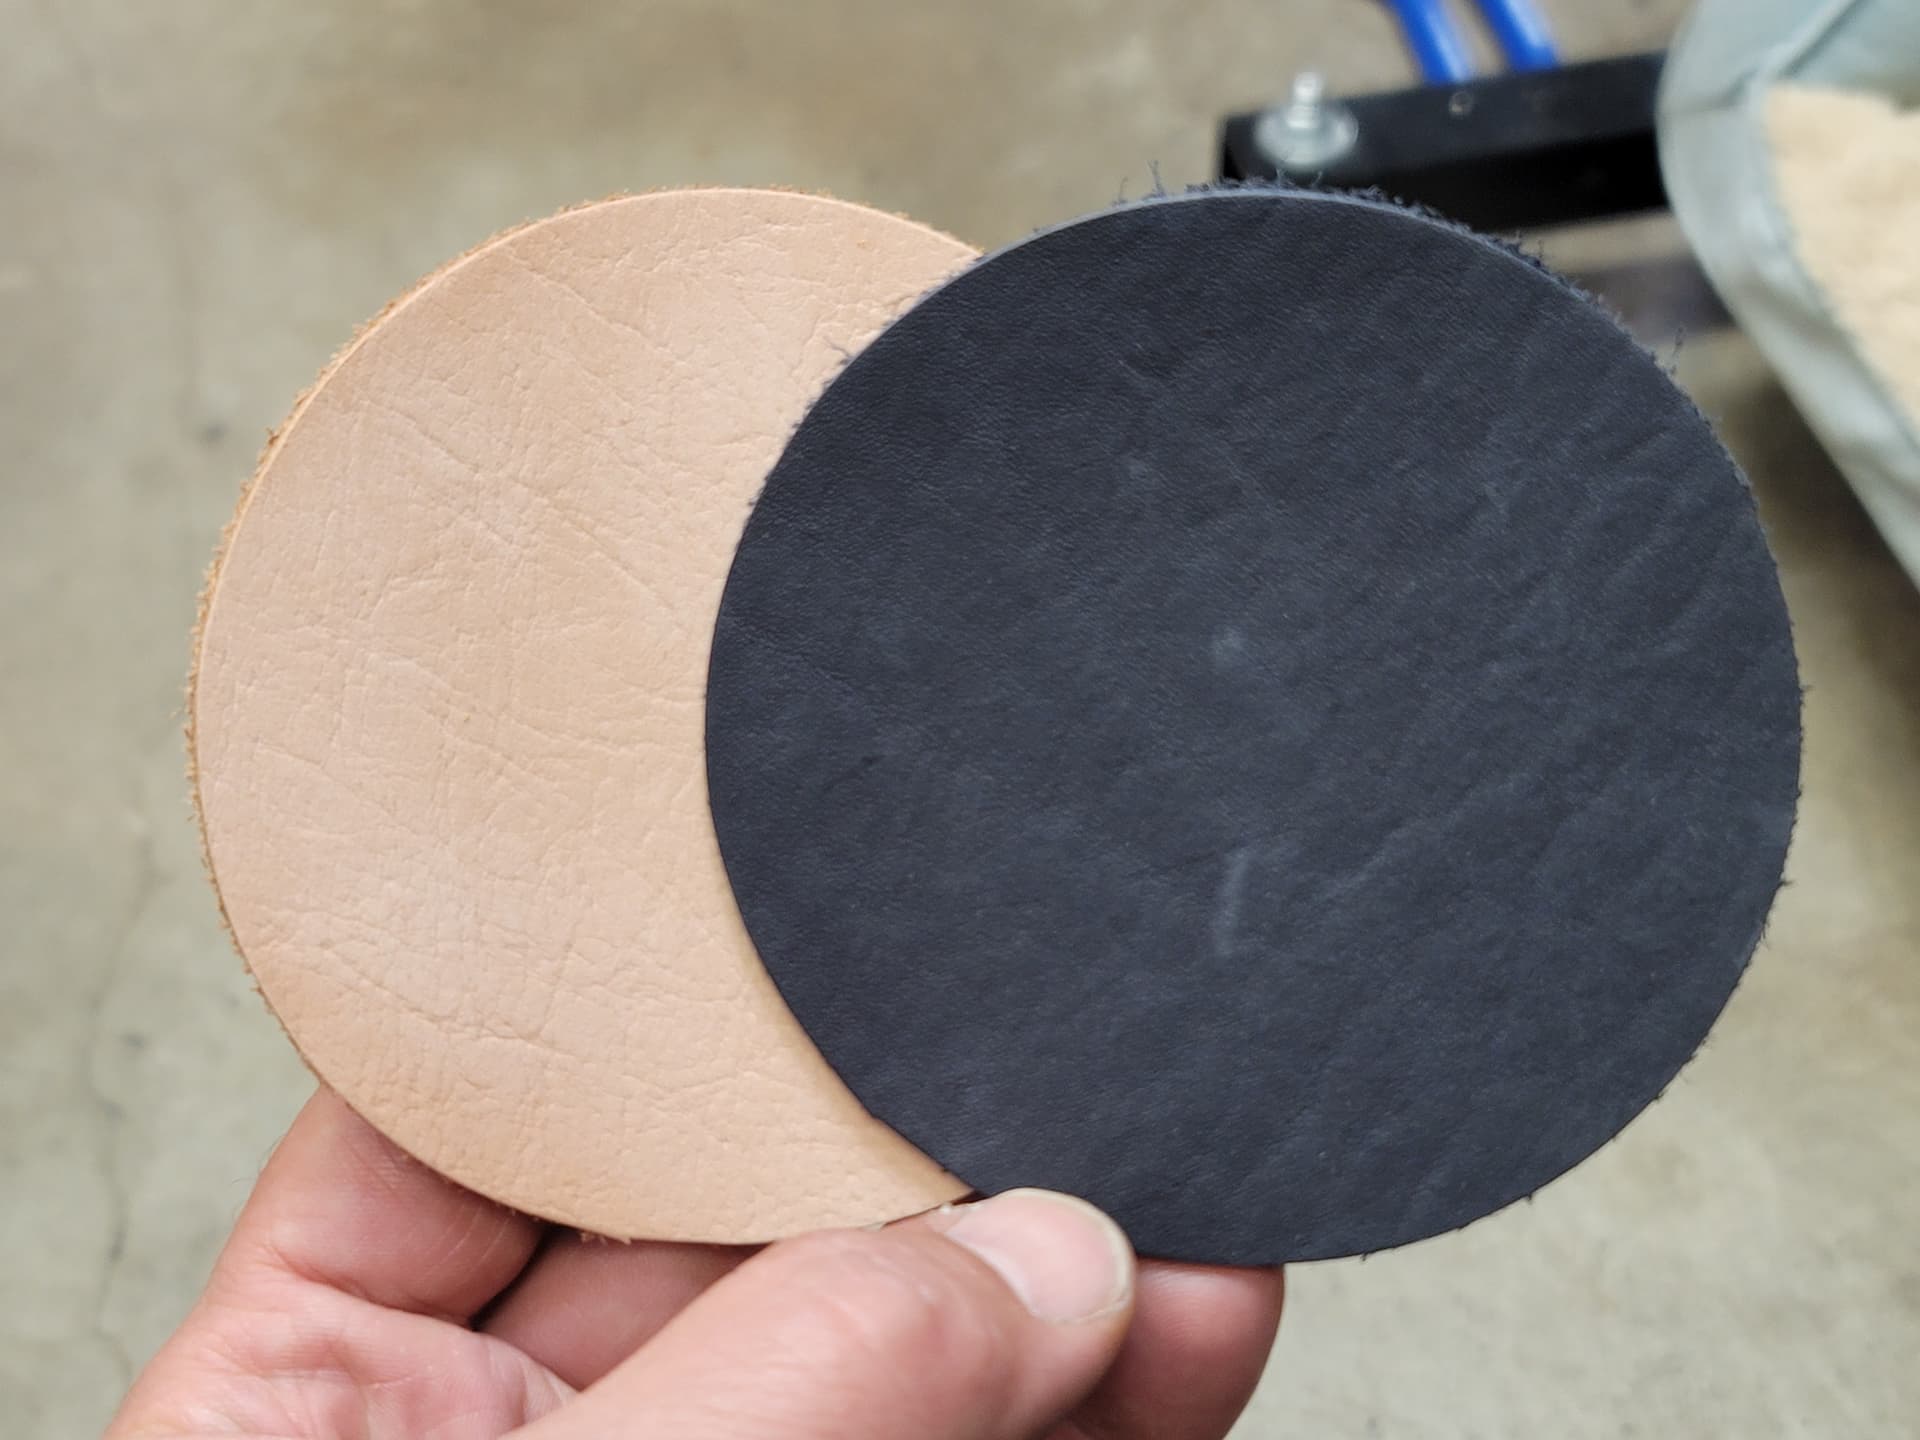
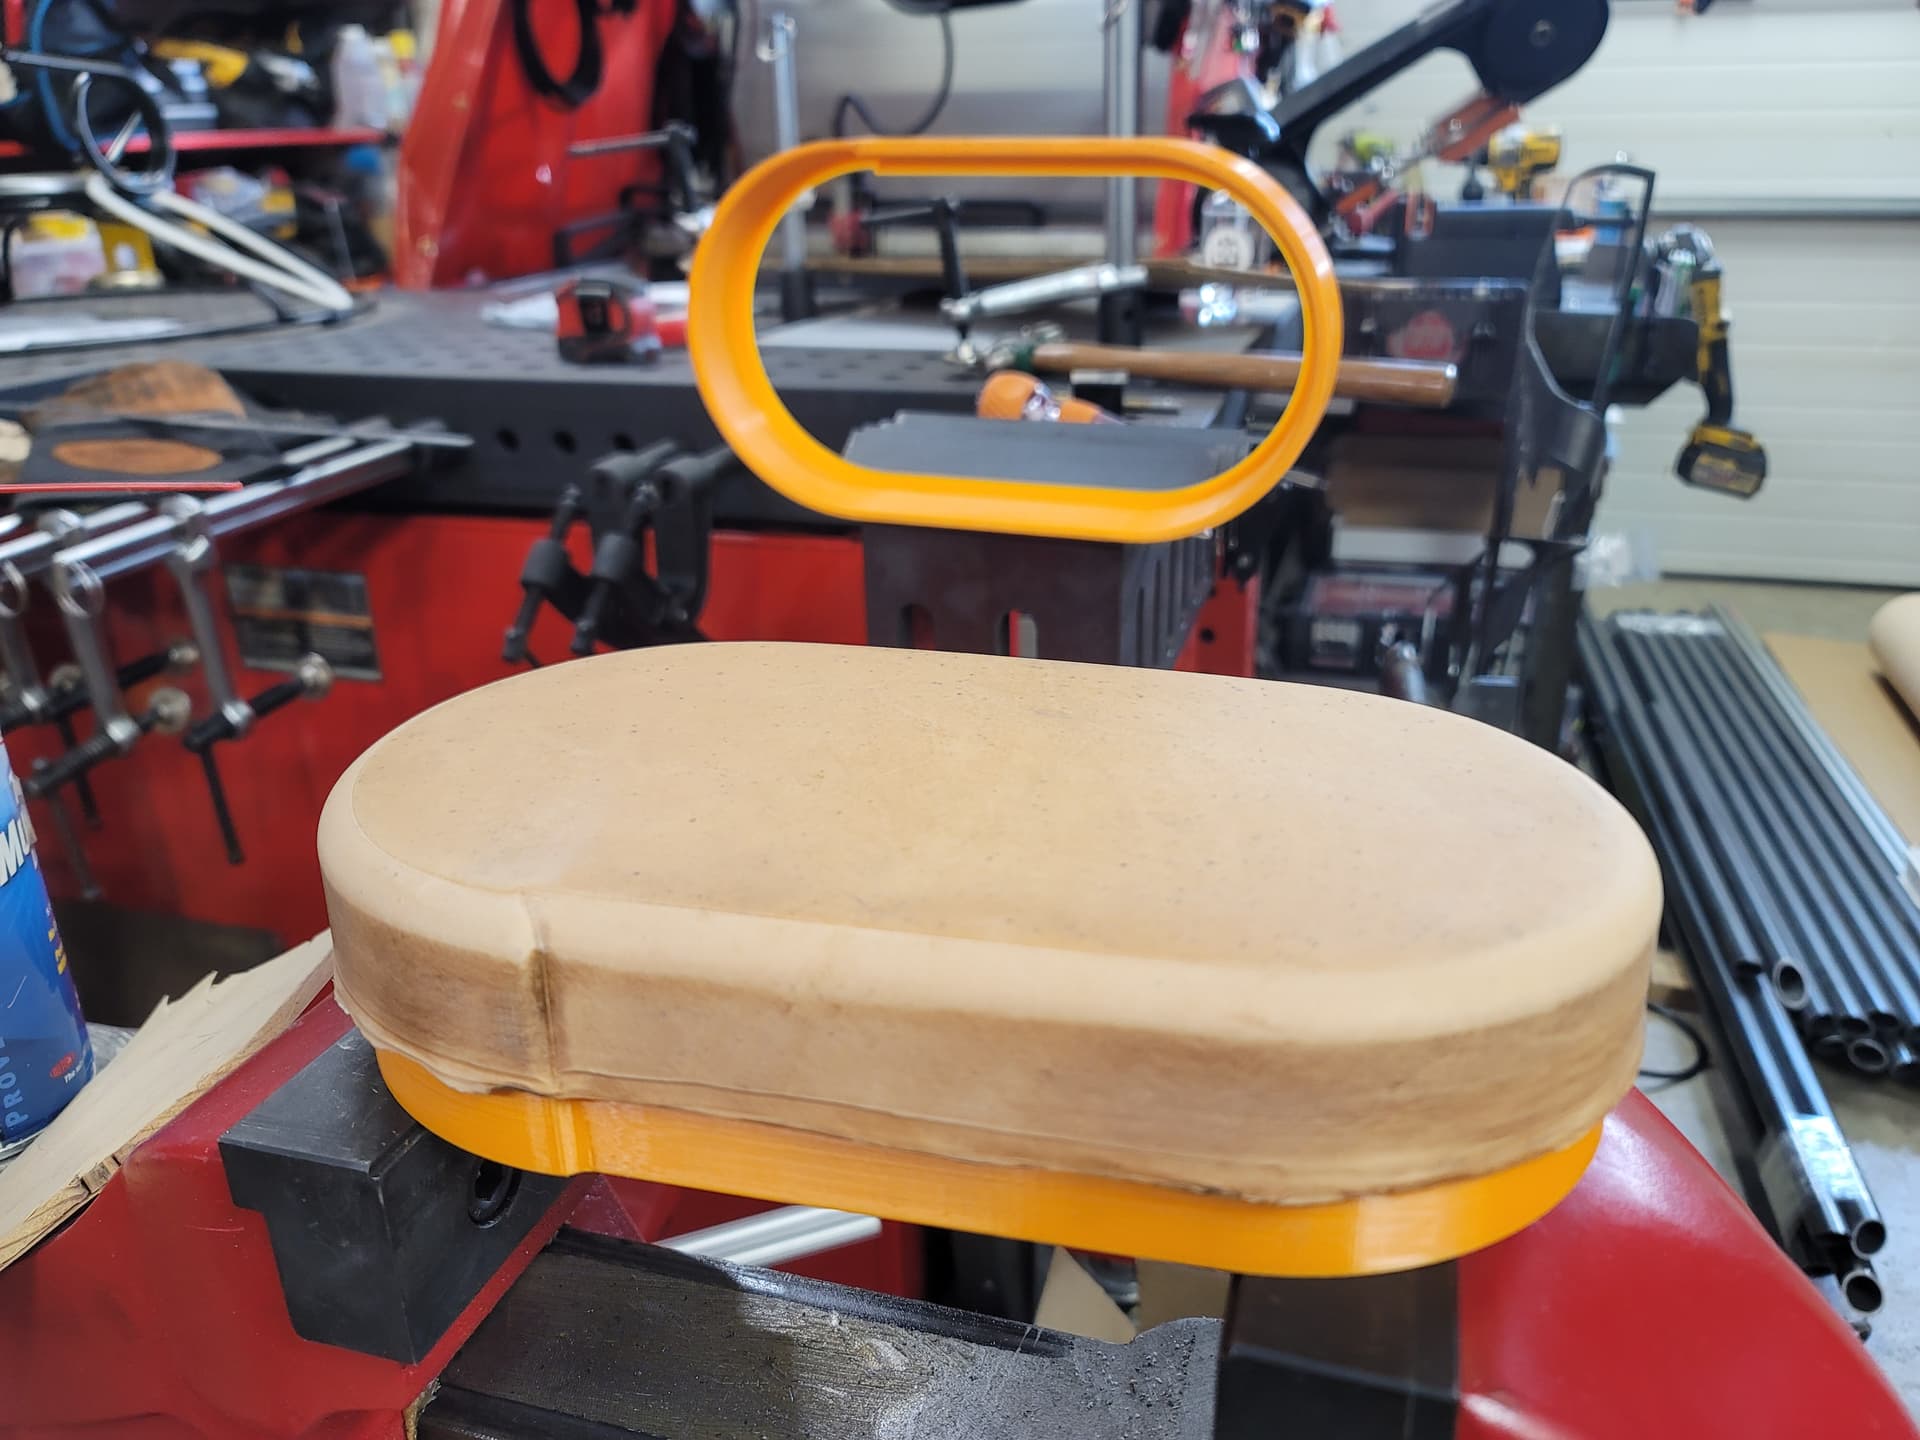
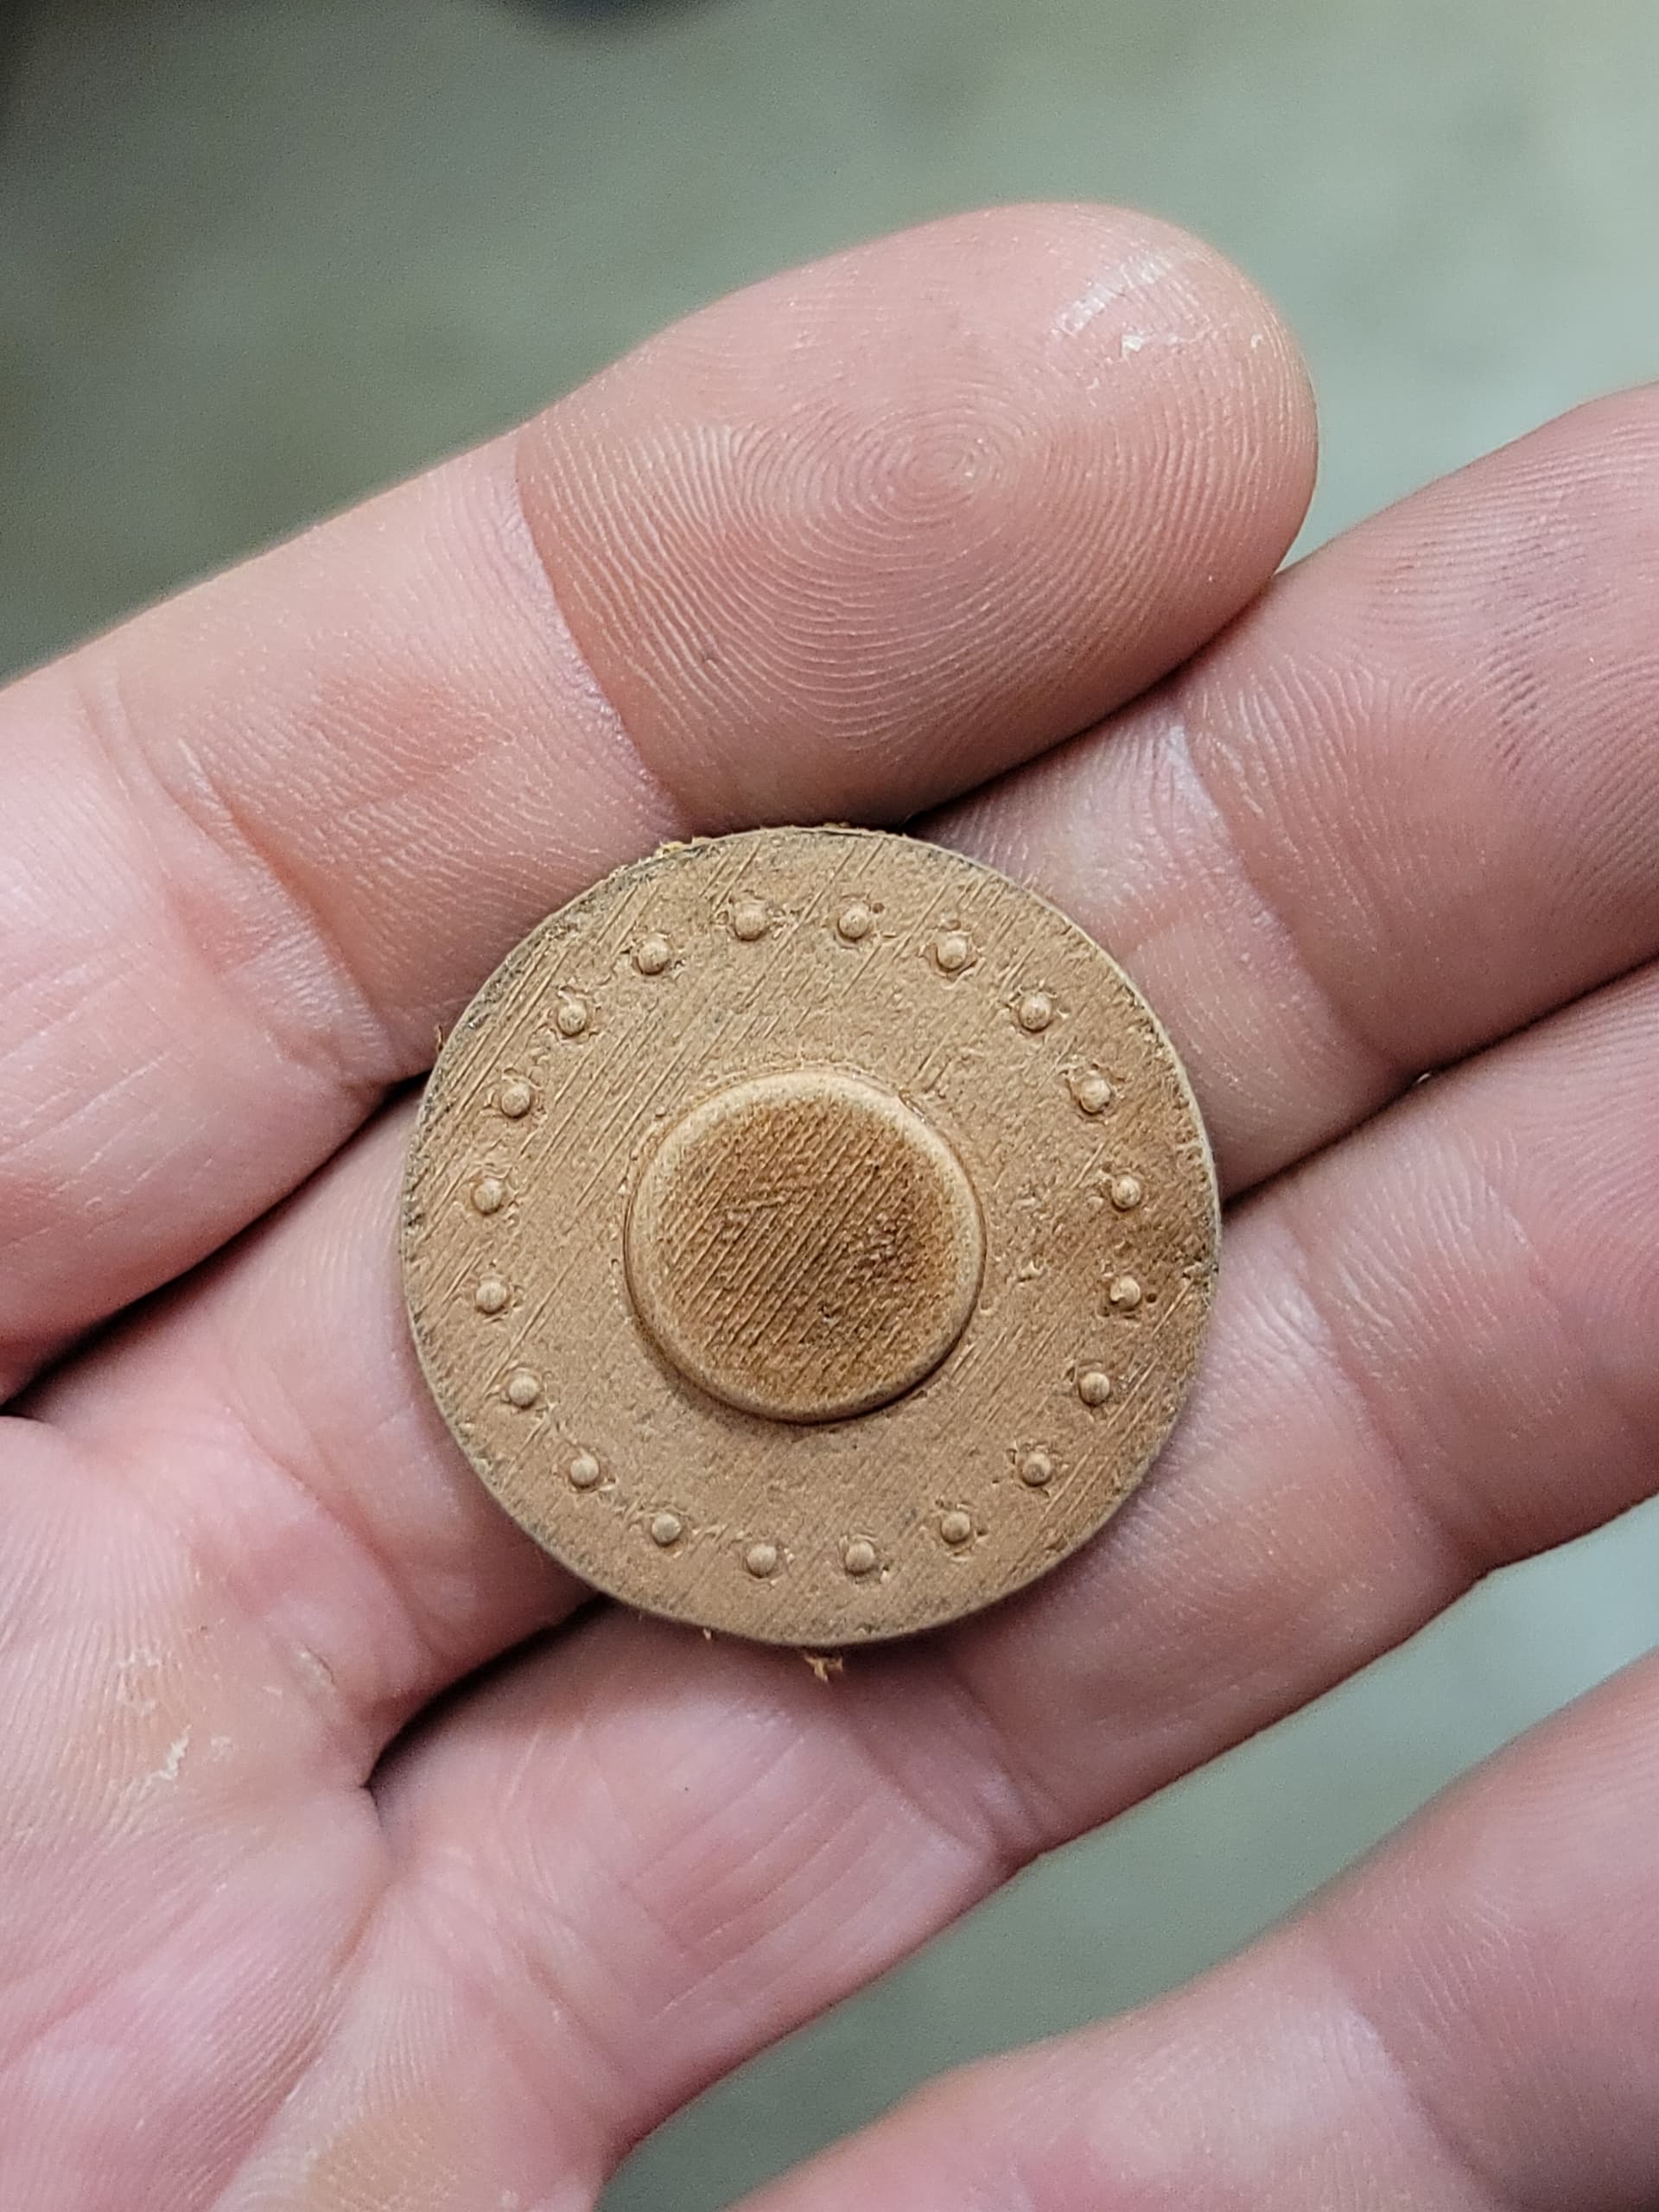
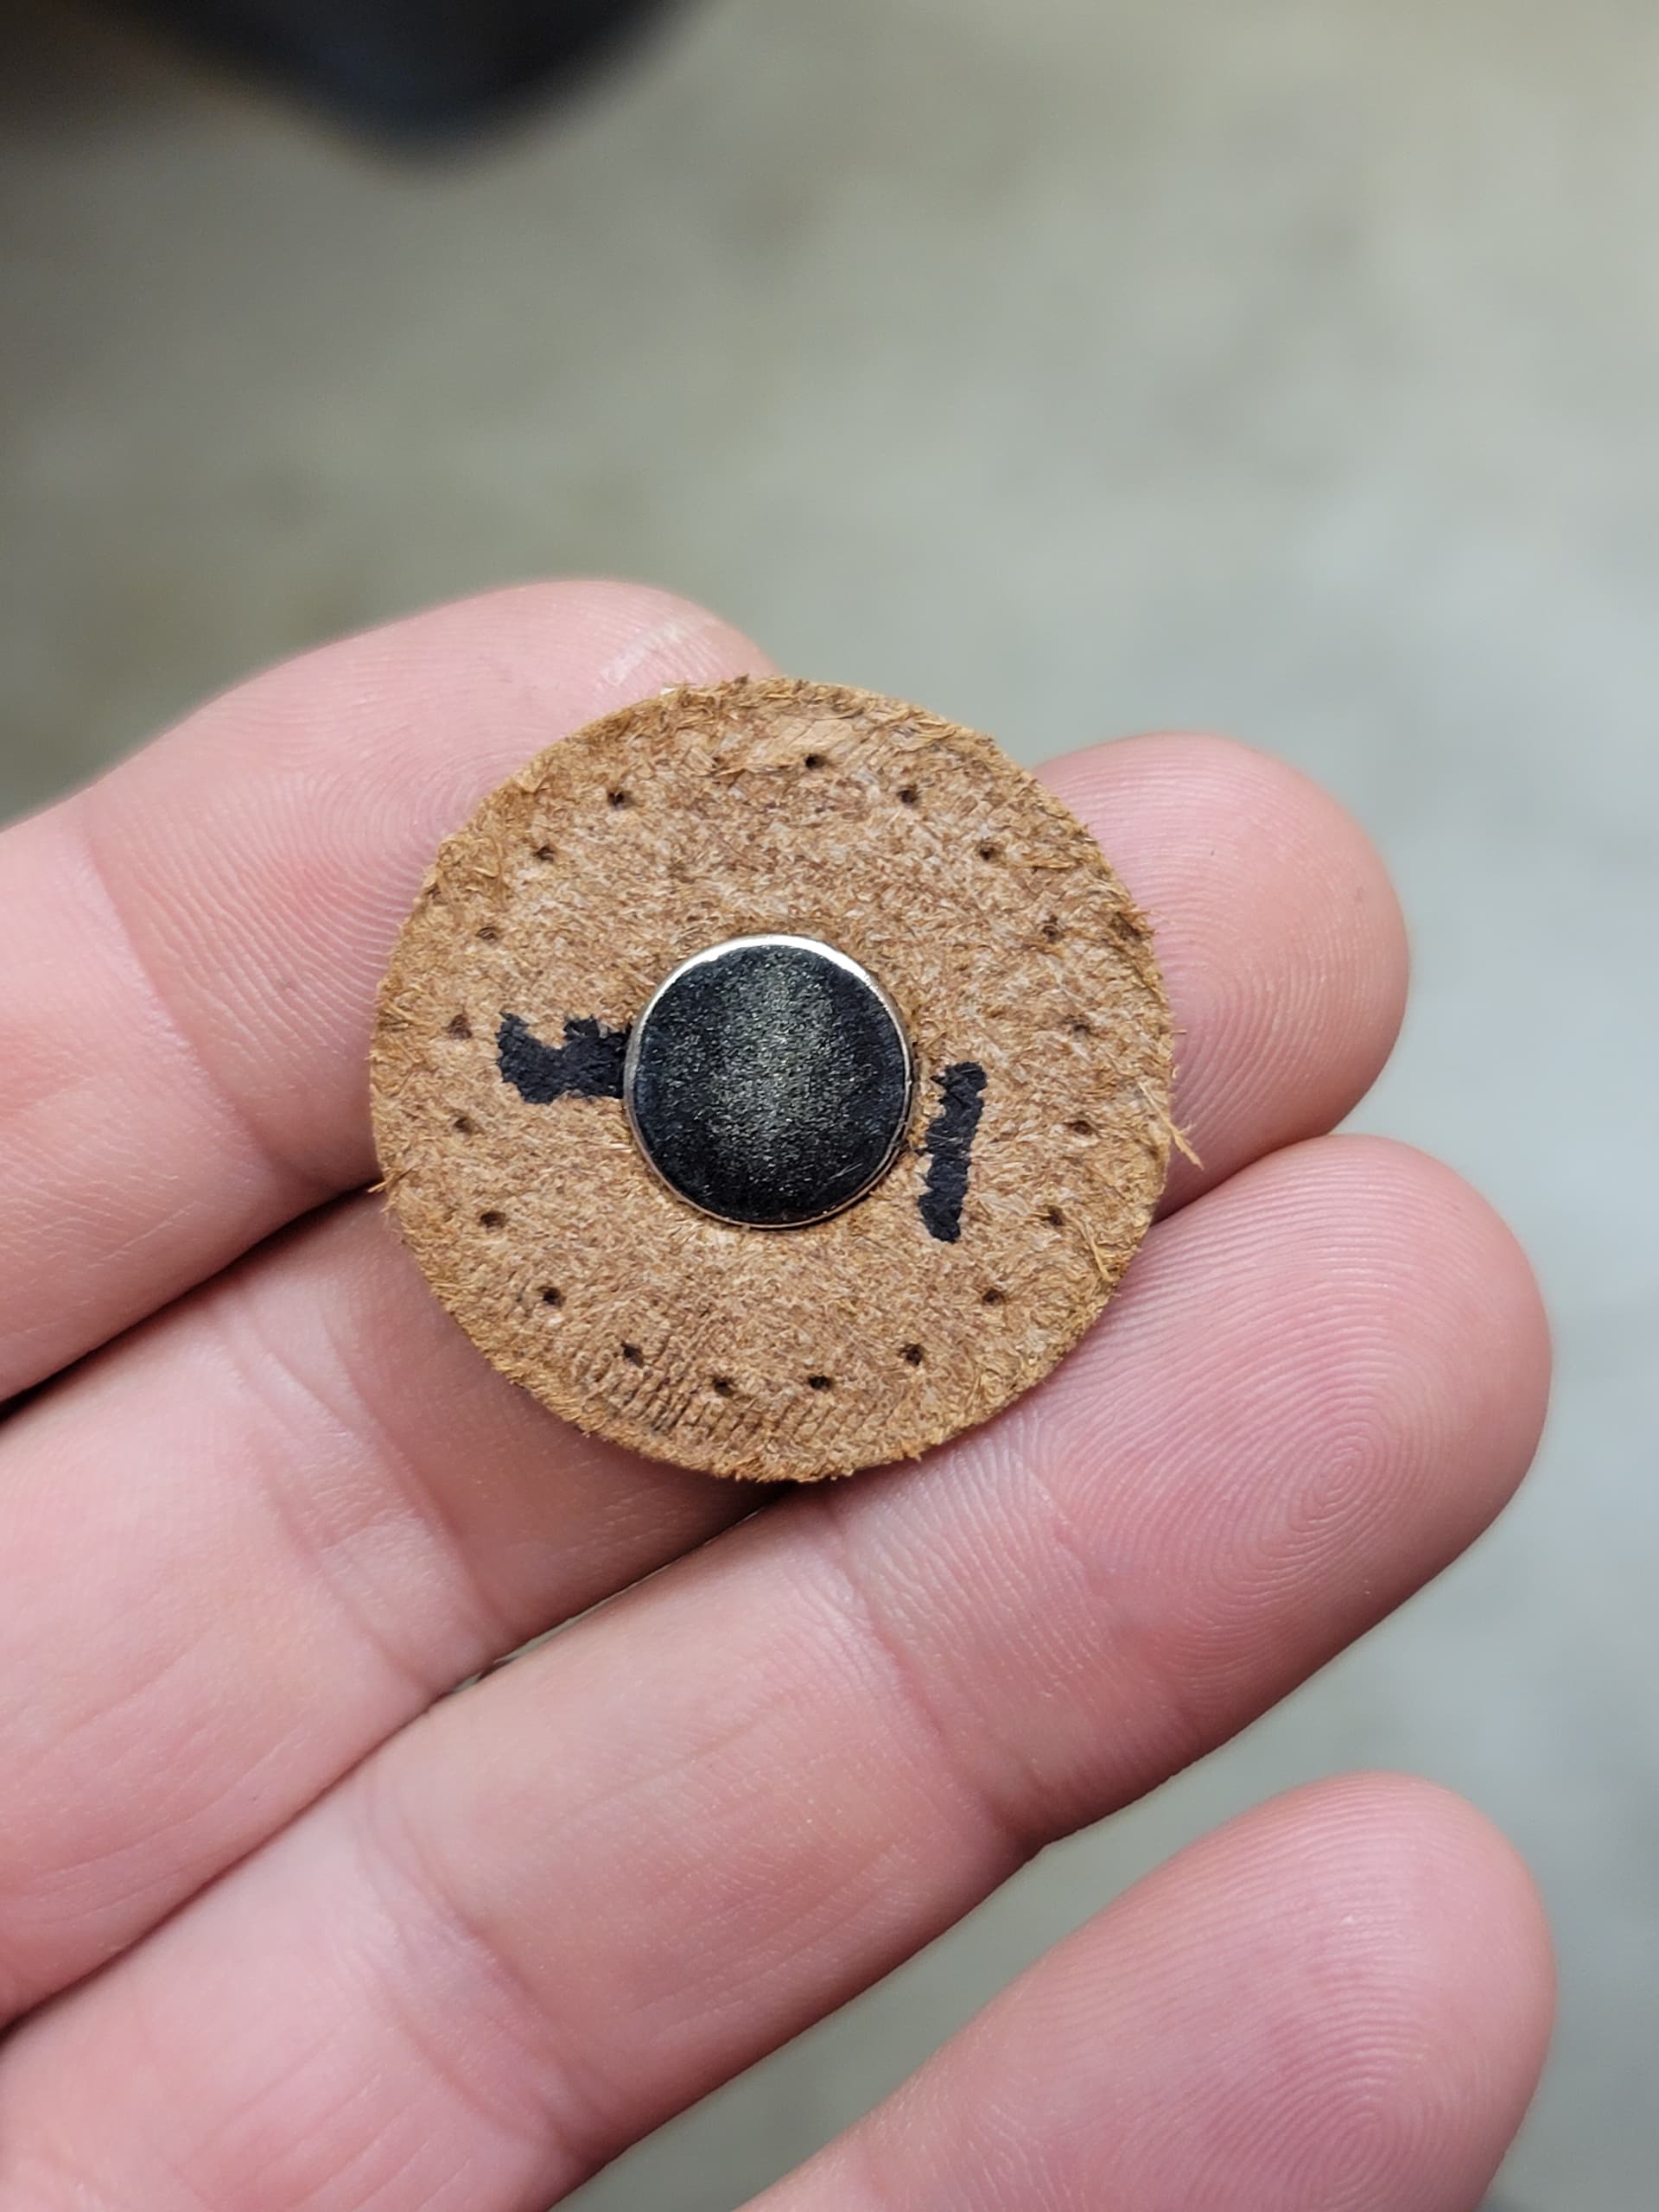
For the heck of it, I used a sample I printed for something else to emboss some leather, I liked it so much I made a revision to make it specifically for embossing and changed the color of leather, and I liked that so much I made one last revision. My truck is getting new custom cup holder coasters…
I ran the machine in manual mode. At first I set the tonnage limit low just to make sure the first die didn’t turn into a grenade (you can do this in the manual mode screen, but be aware you have to re-home the machine once it trips the tonnage limit). Once I was convinced the dies were going to be fine going after them with some real force I just came down on the first pressing of each die in steps and watched the tonnage and checked the gap as I snuck up on where I decided the final depth would be after running the first plate. Since they’re all the same thickness I knew the ballpark depth I was aiming for and just needed to make sure that nothing went south on me as I started to get close.
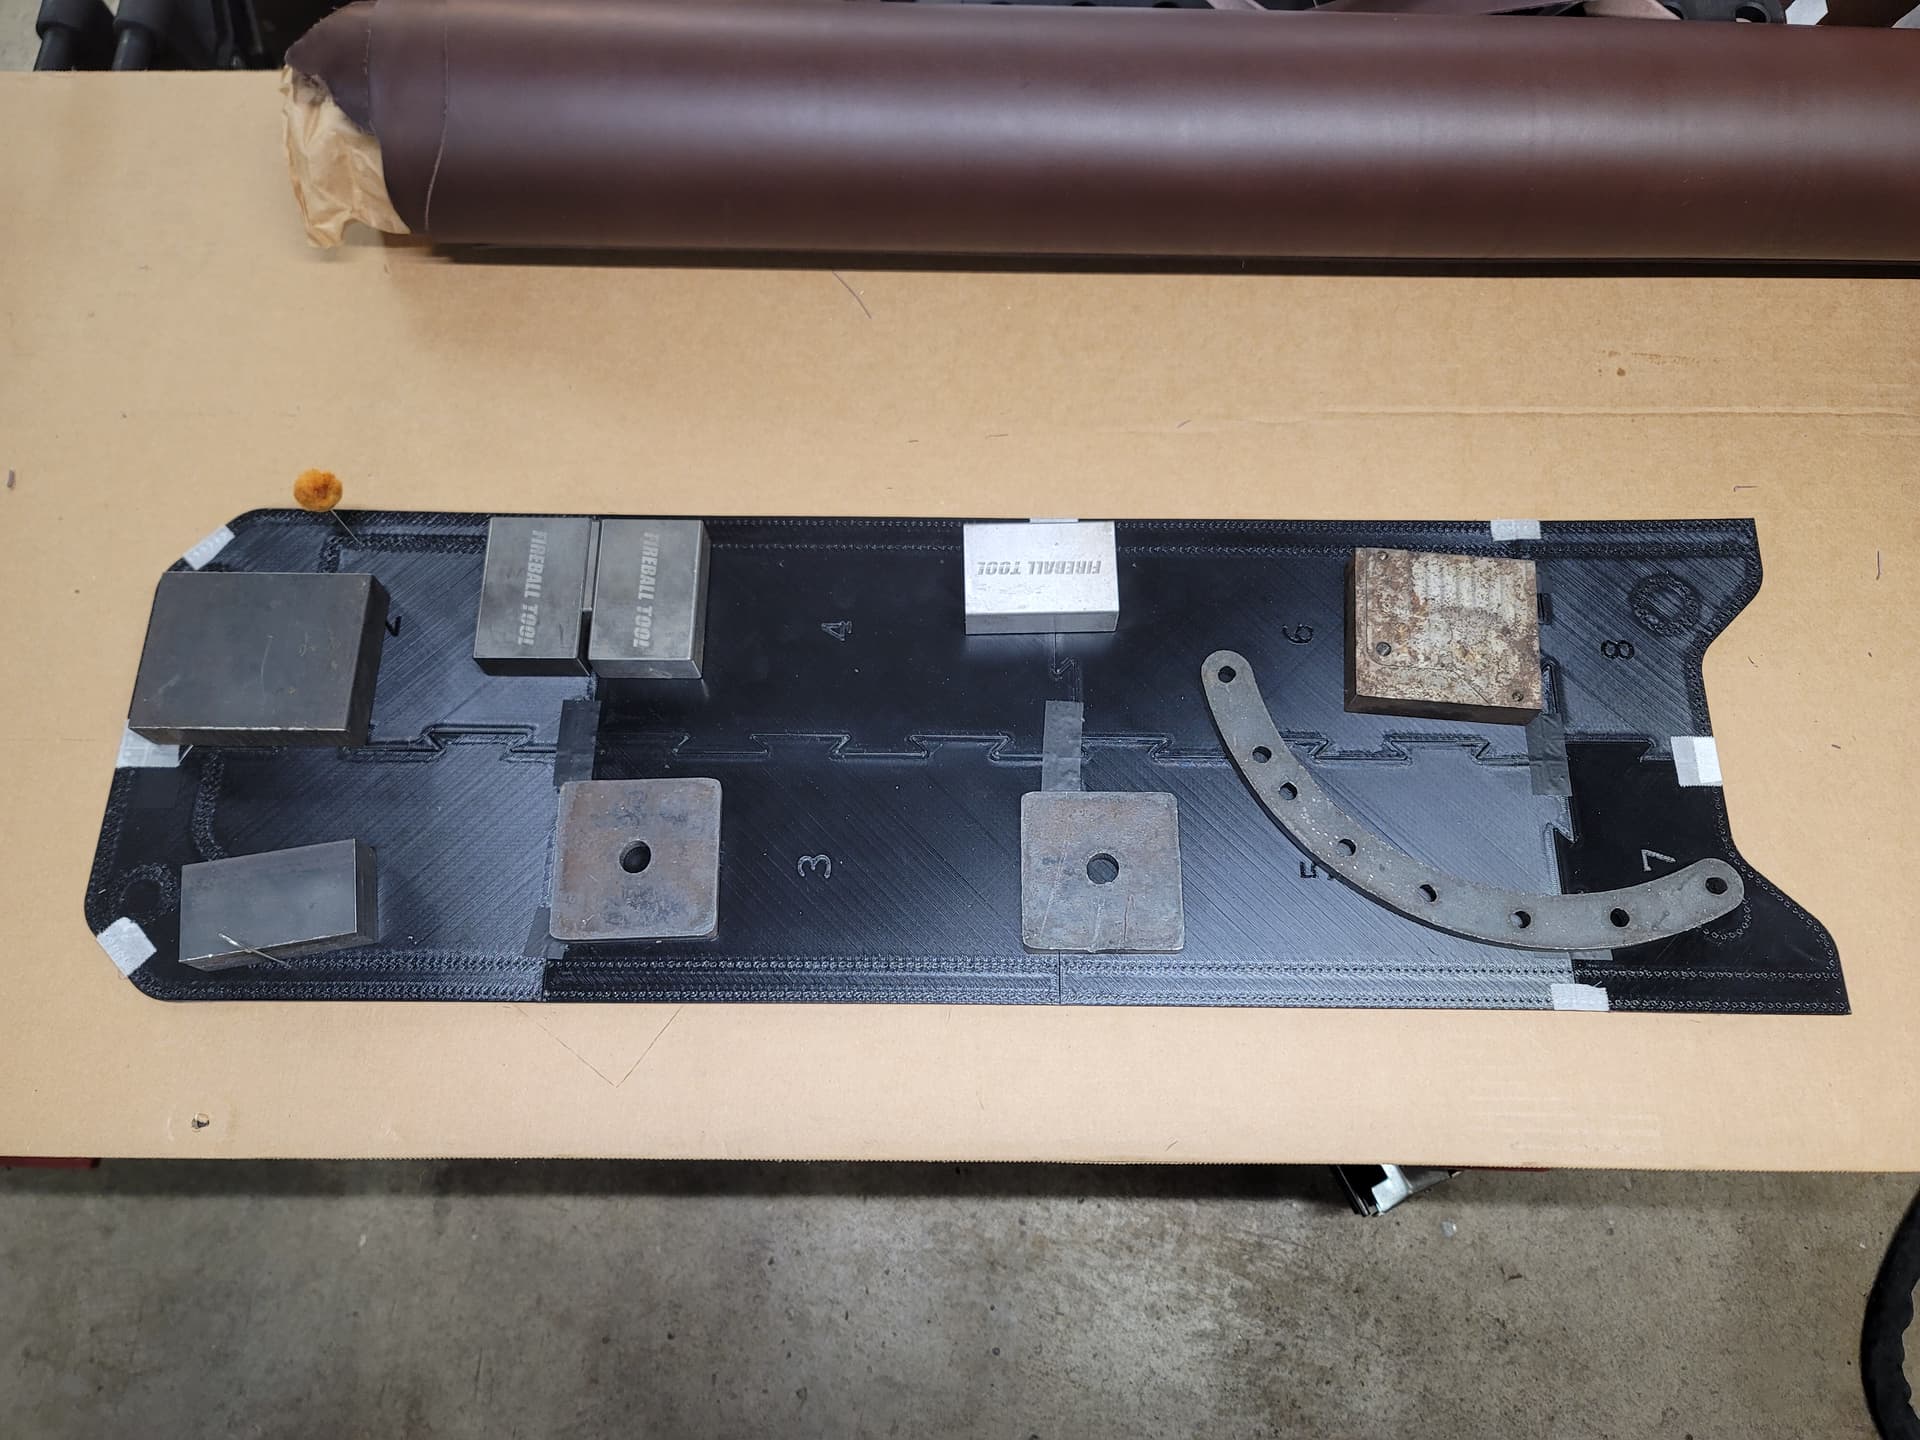
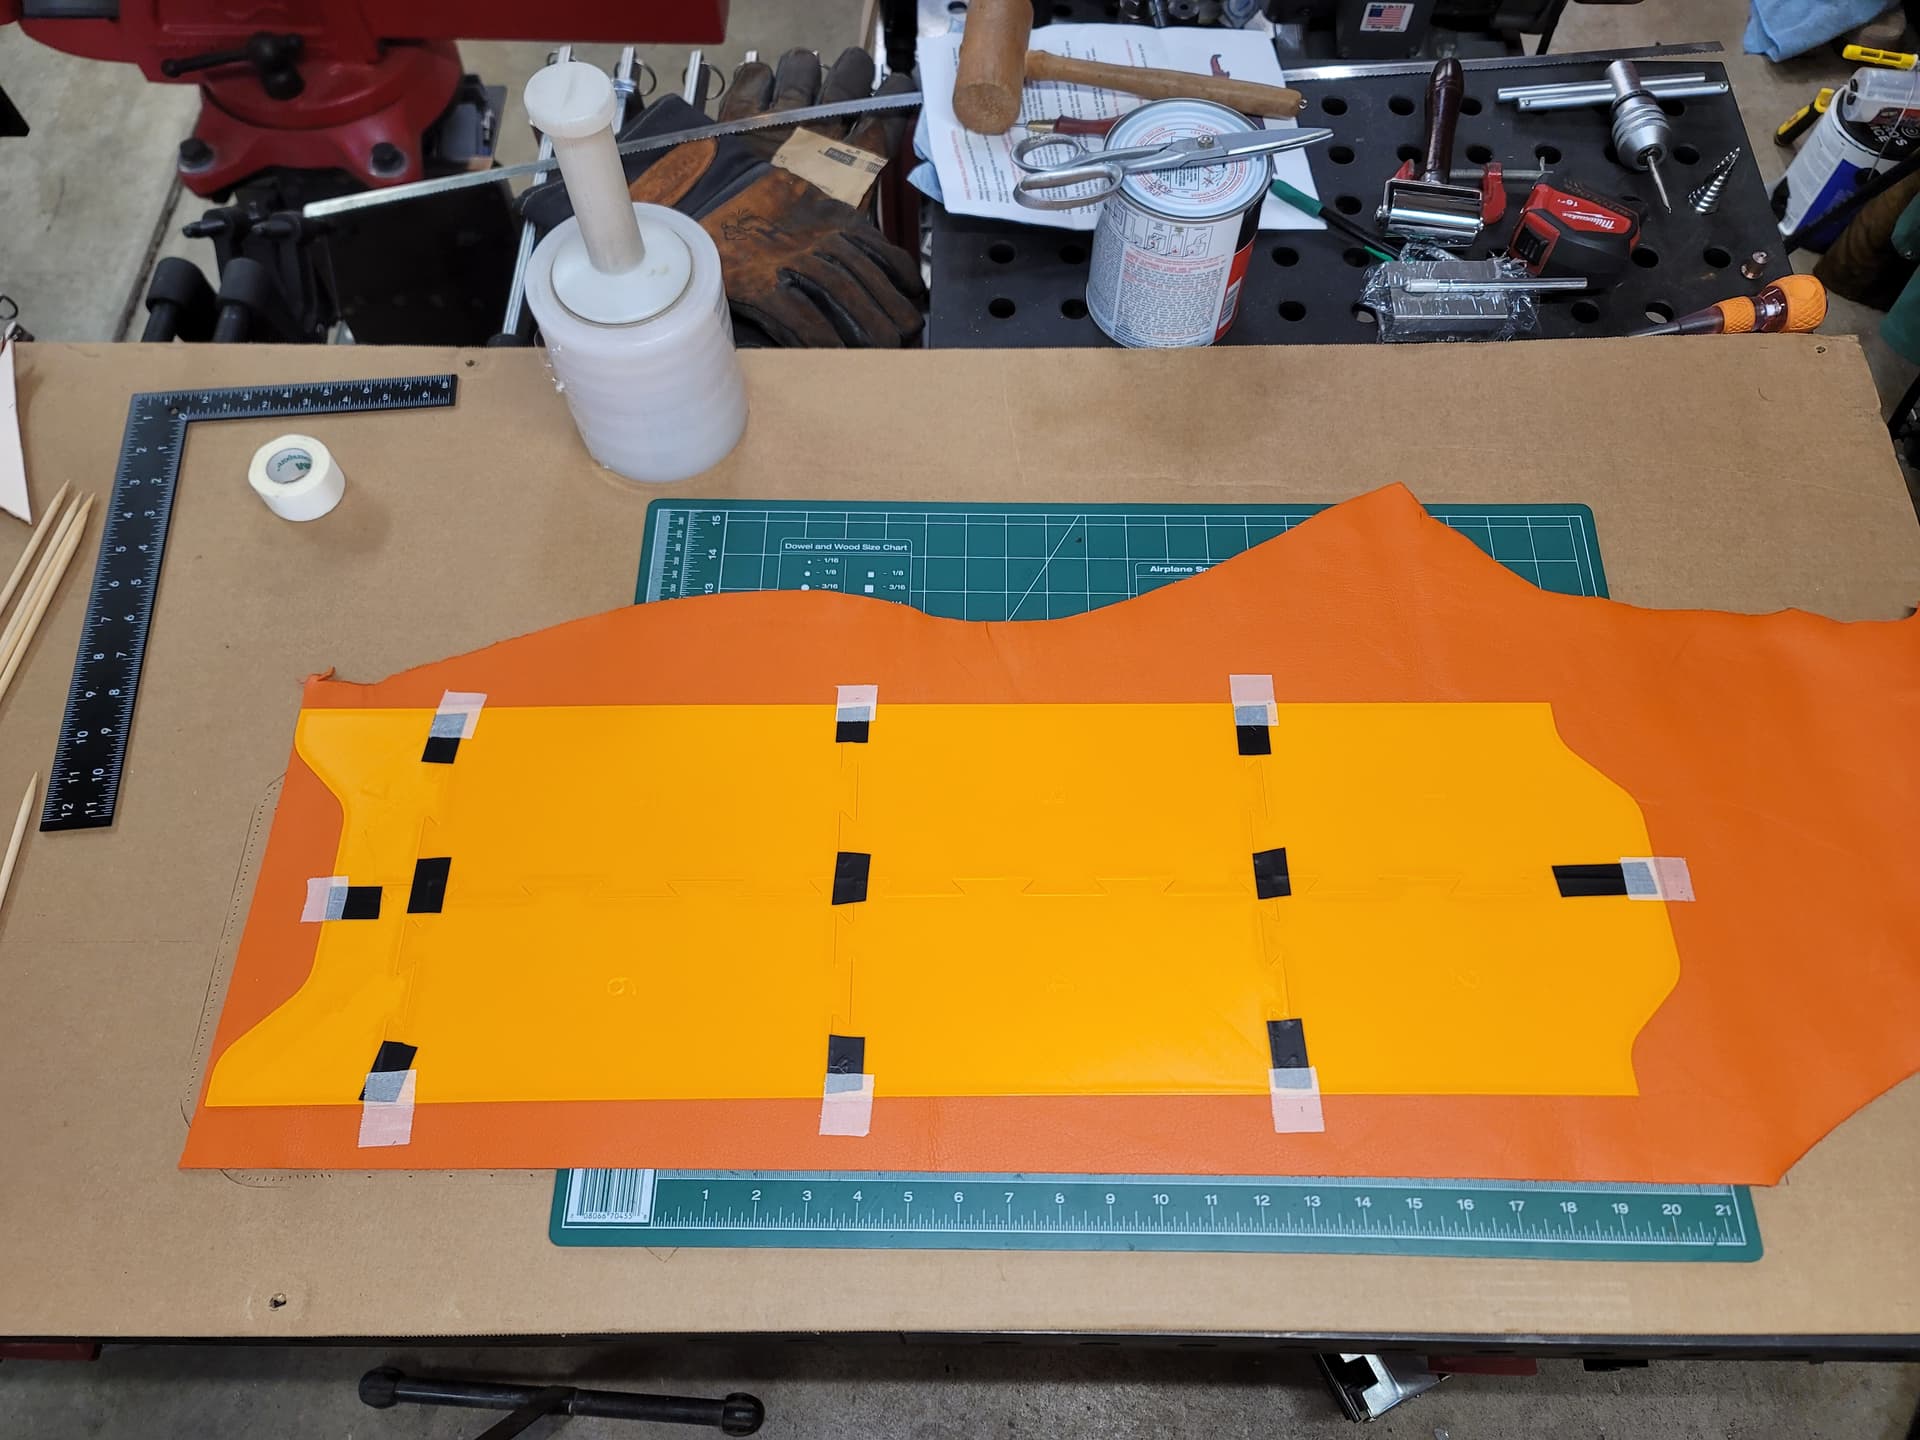
Aaaaand, now I’ve got a system for making die cut leather blanks. I decided I wanted more precision and faster than cutting them by hand.
At first I tried 3D printed dies, with the knowledge that they were unlikely to be up to the task. They did better than expected and actually were able to cut about 90% of the first parts perimeter, with rapidly degrading performance.
Deciding there was no point in persuing dies with a 3D printed edge I looked around the shop and found the perfect replacement in the metal scrap bin.
Redesigned the dies around the new cutting edge and mounted them in the riser block I machined out of a scrap part I scavenged from work years ago. I didn’t figure the block needed to be too beefy given that it’s just punching leather.
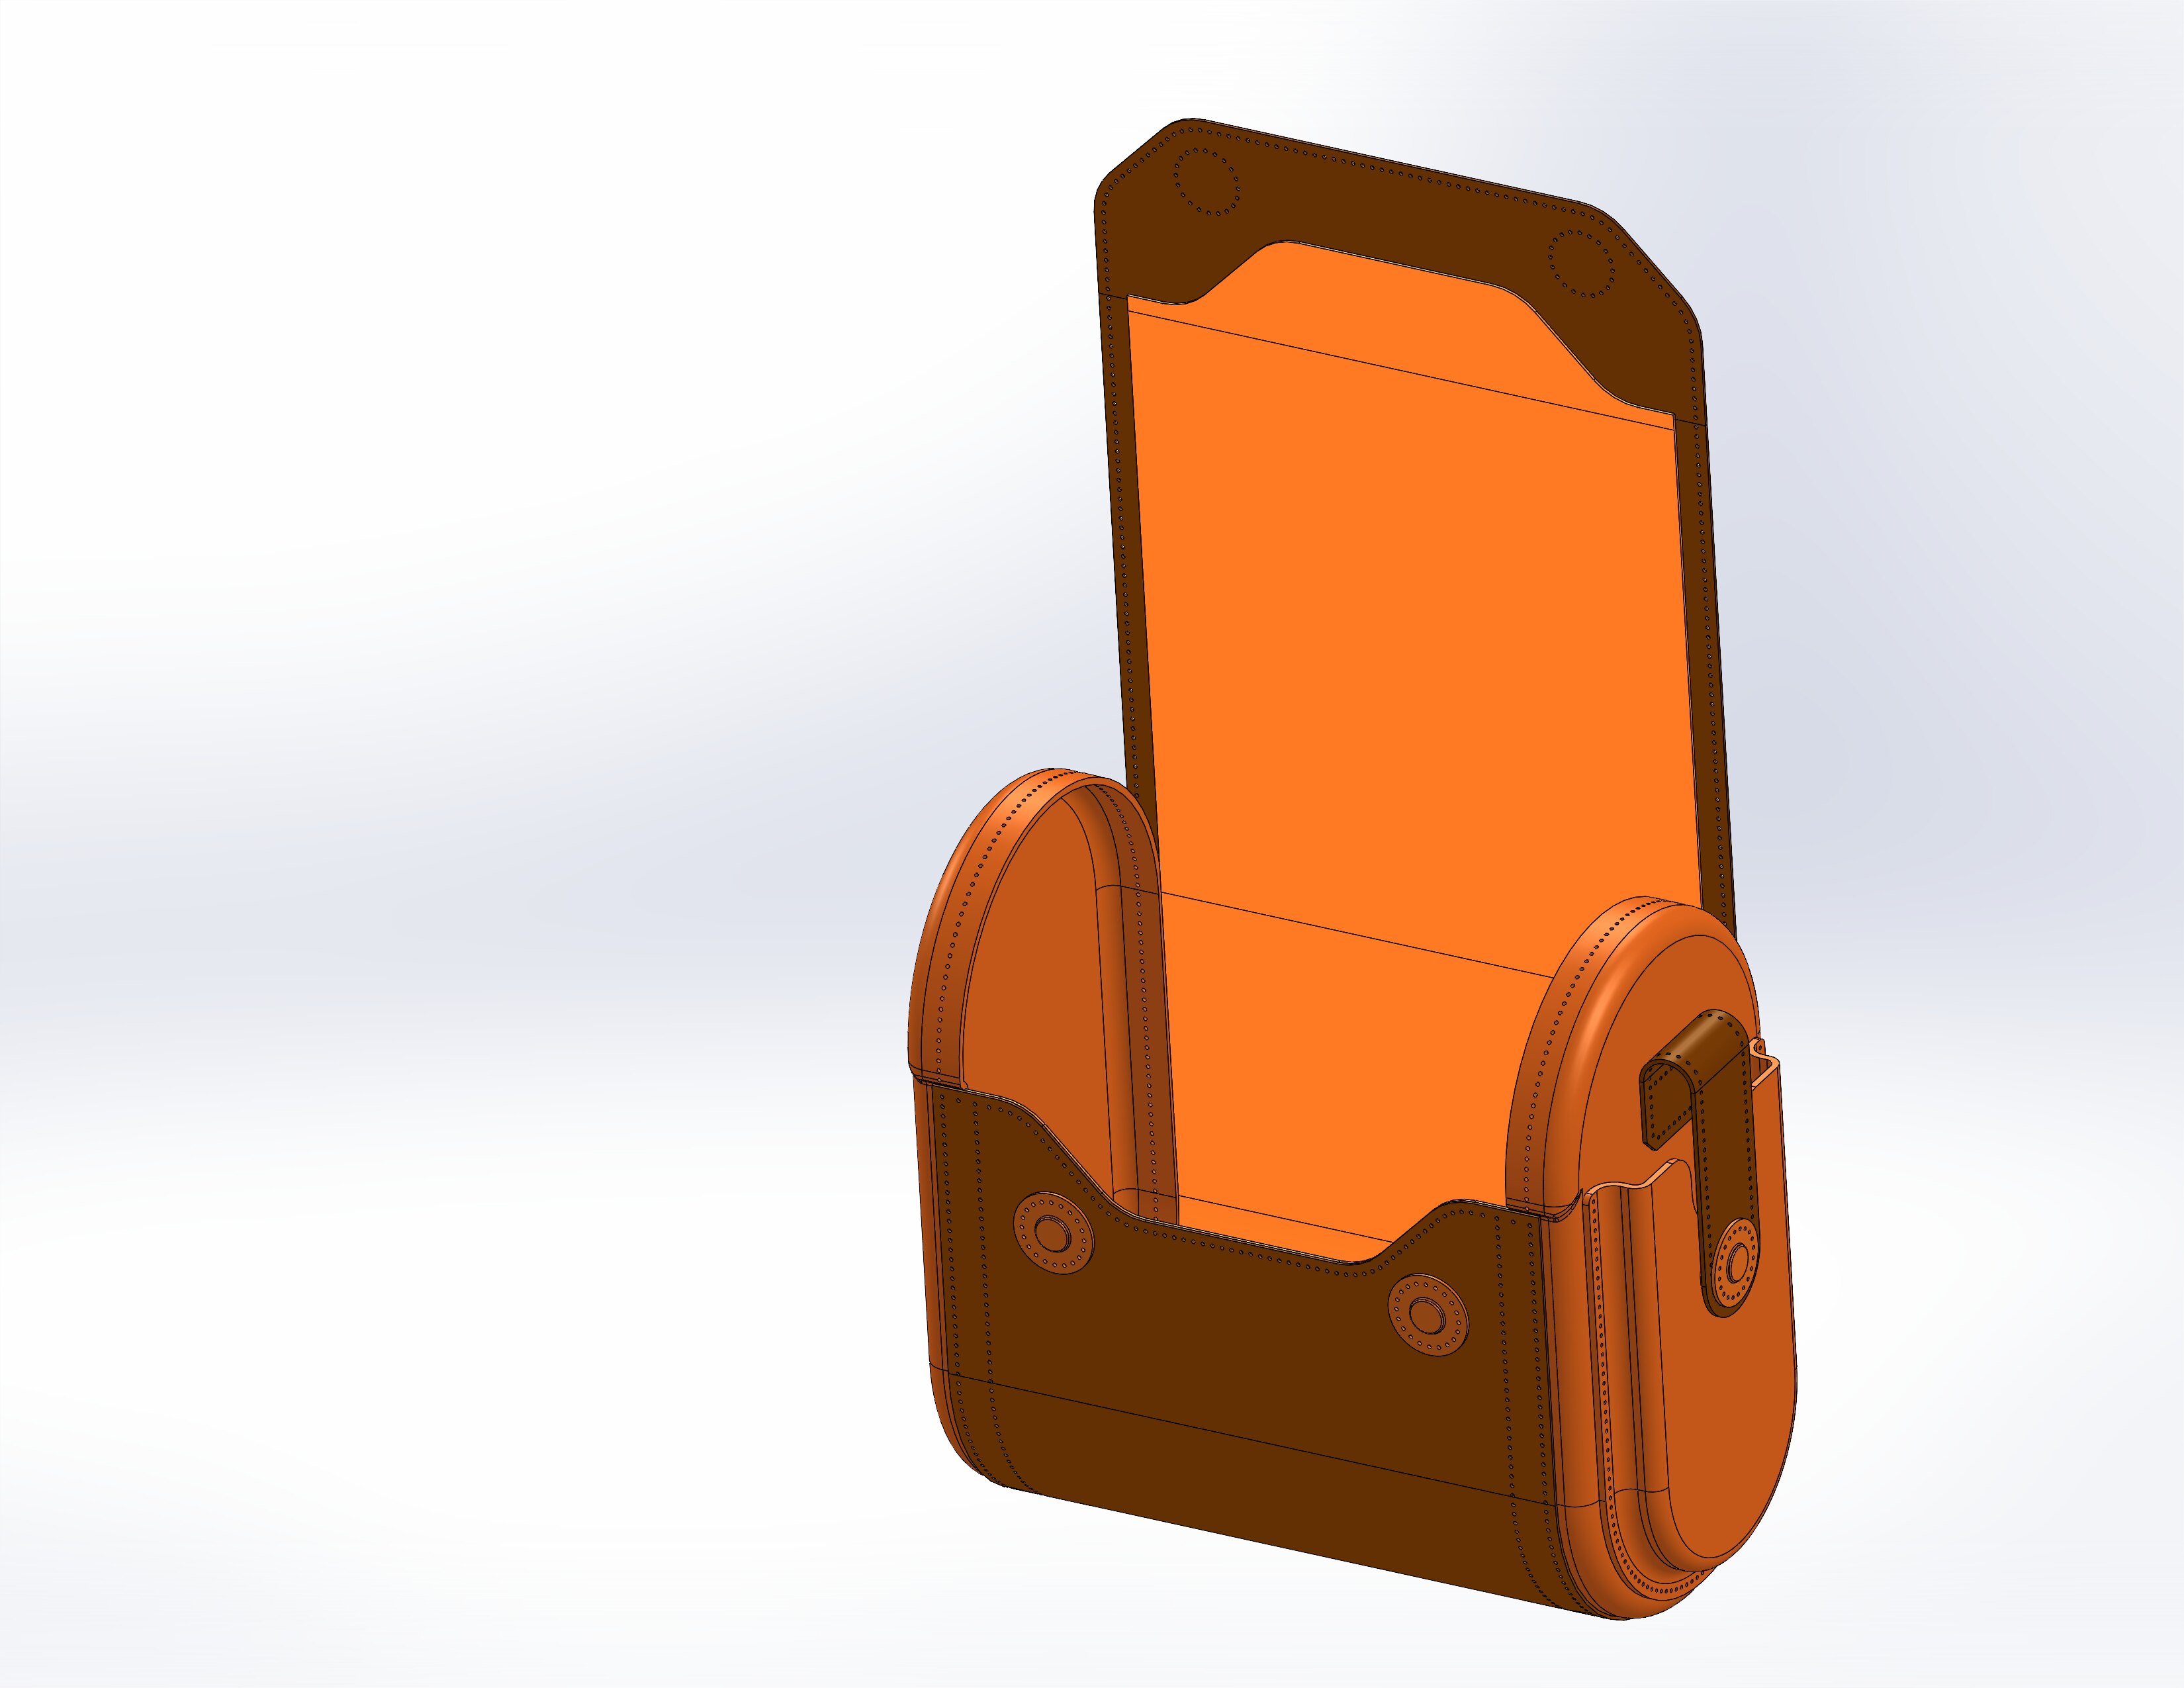
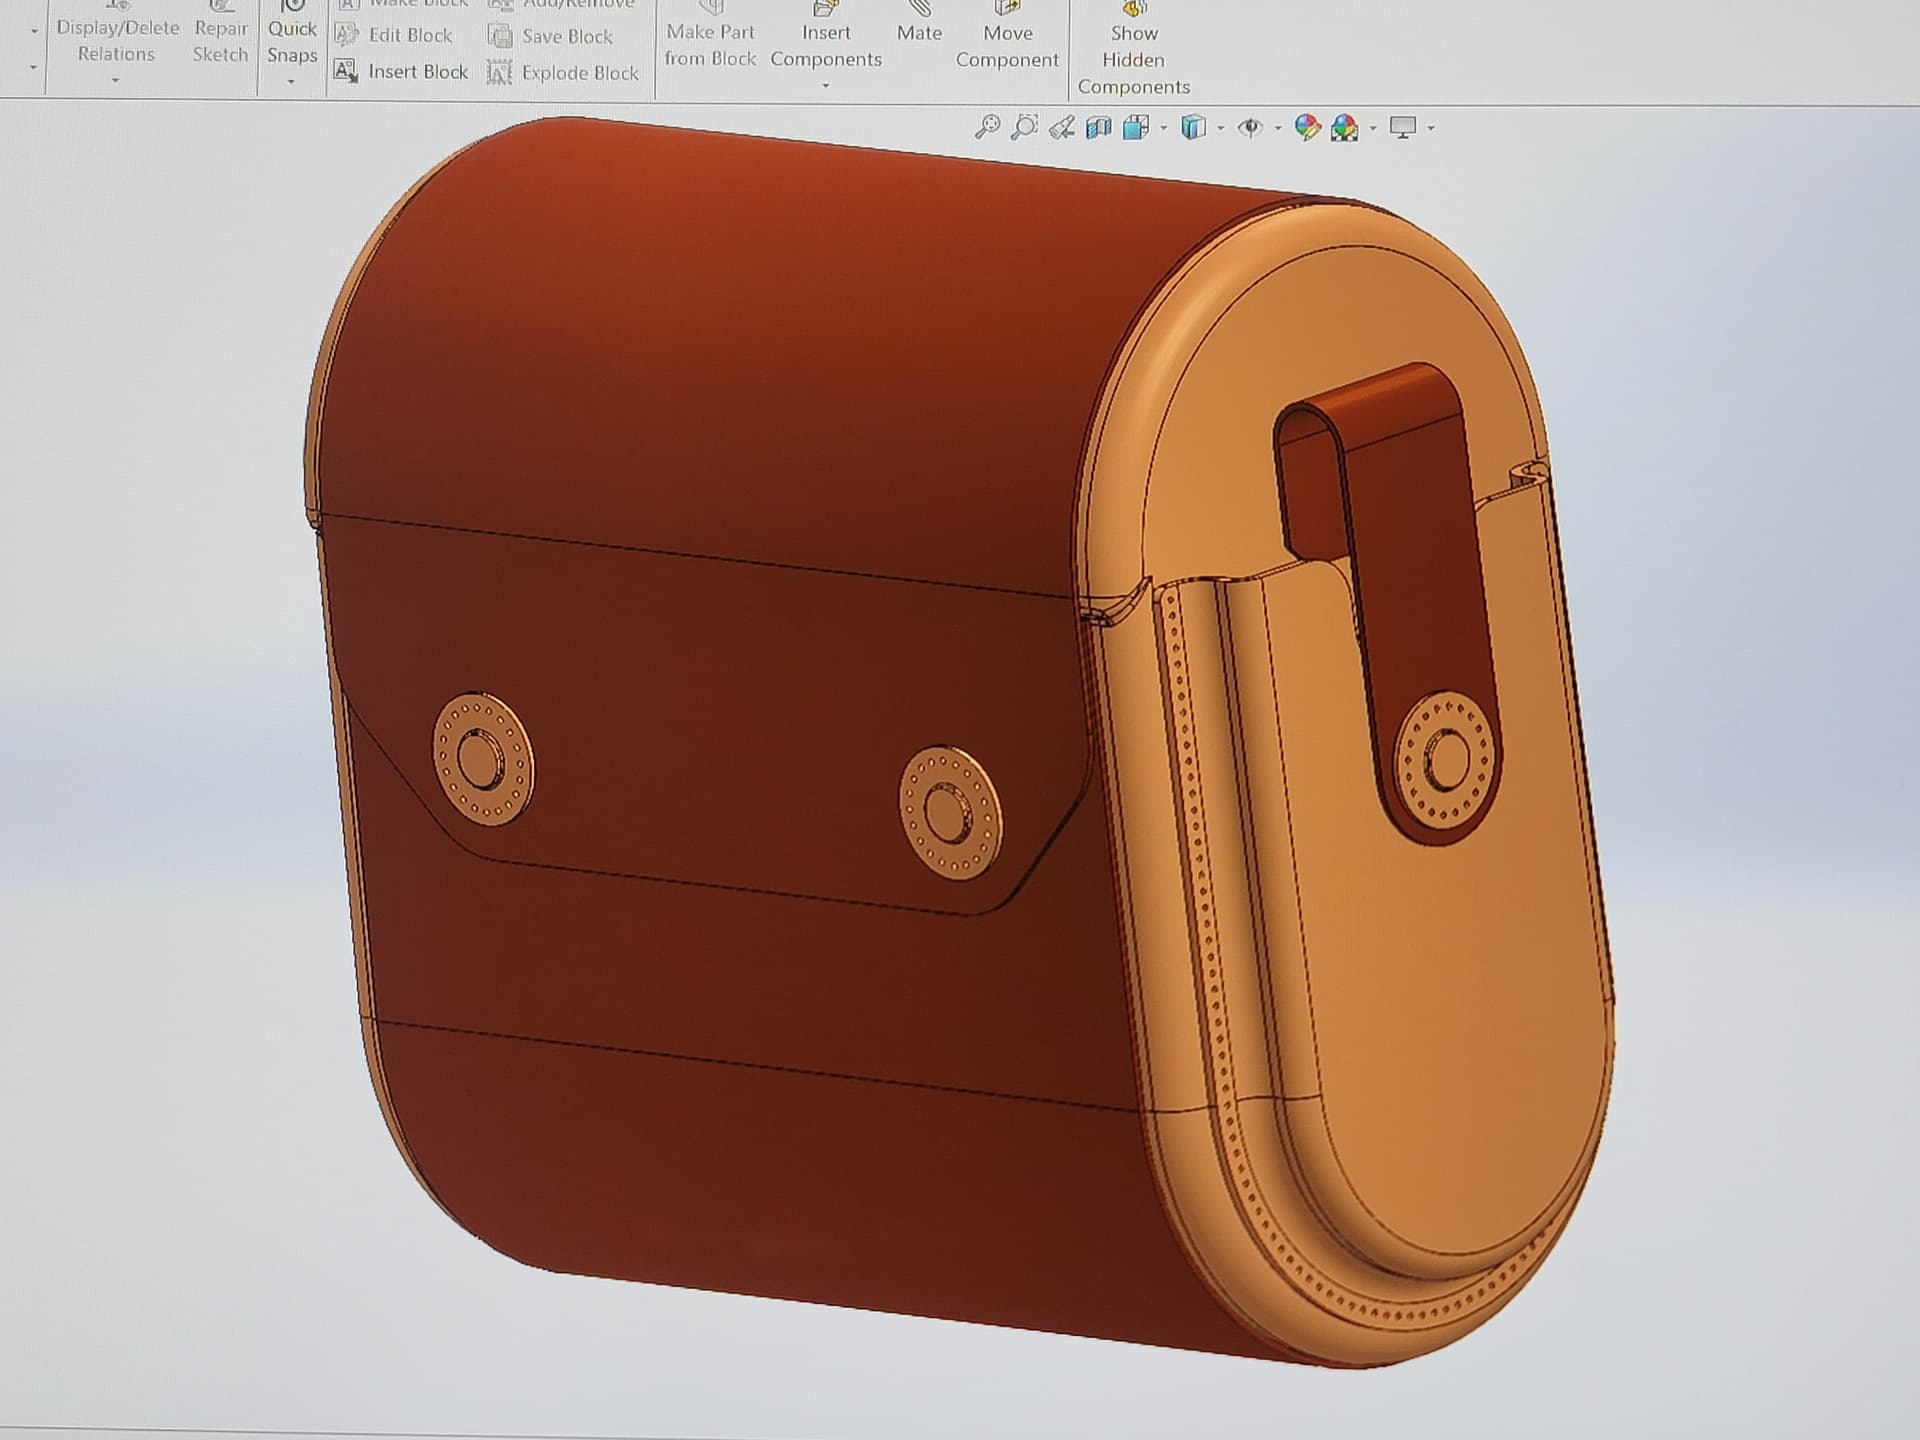
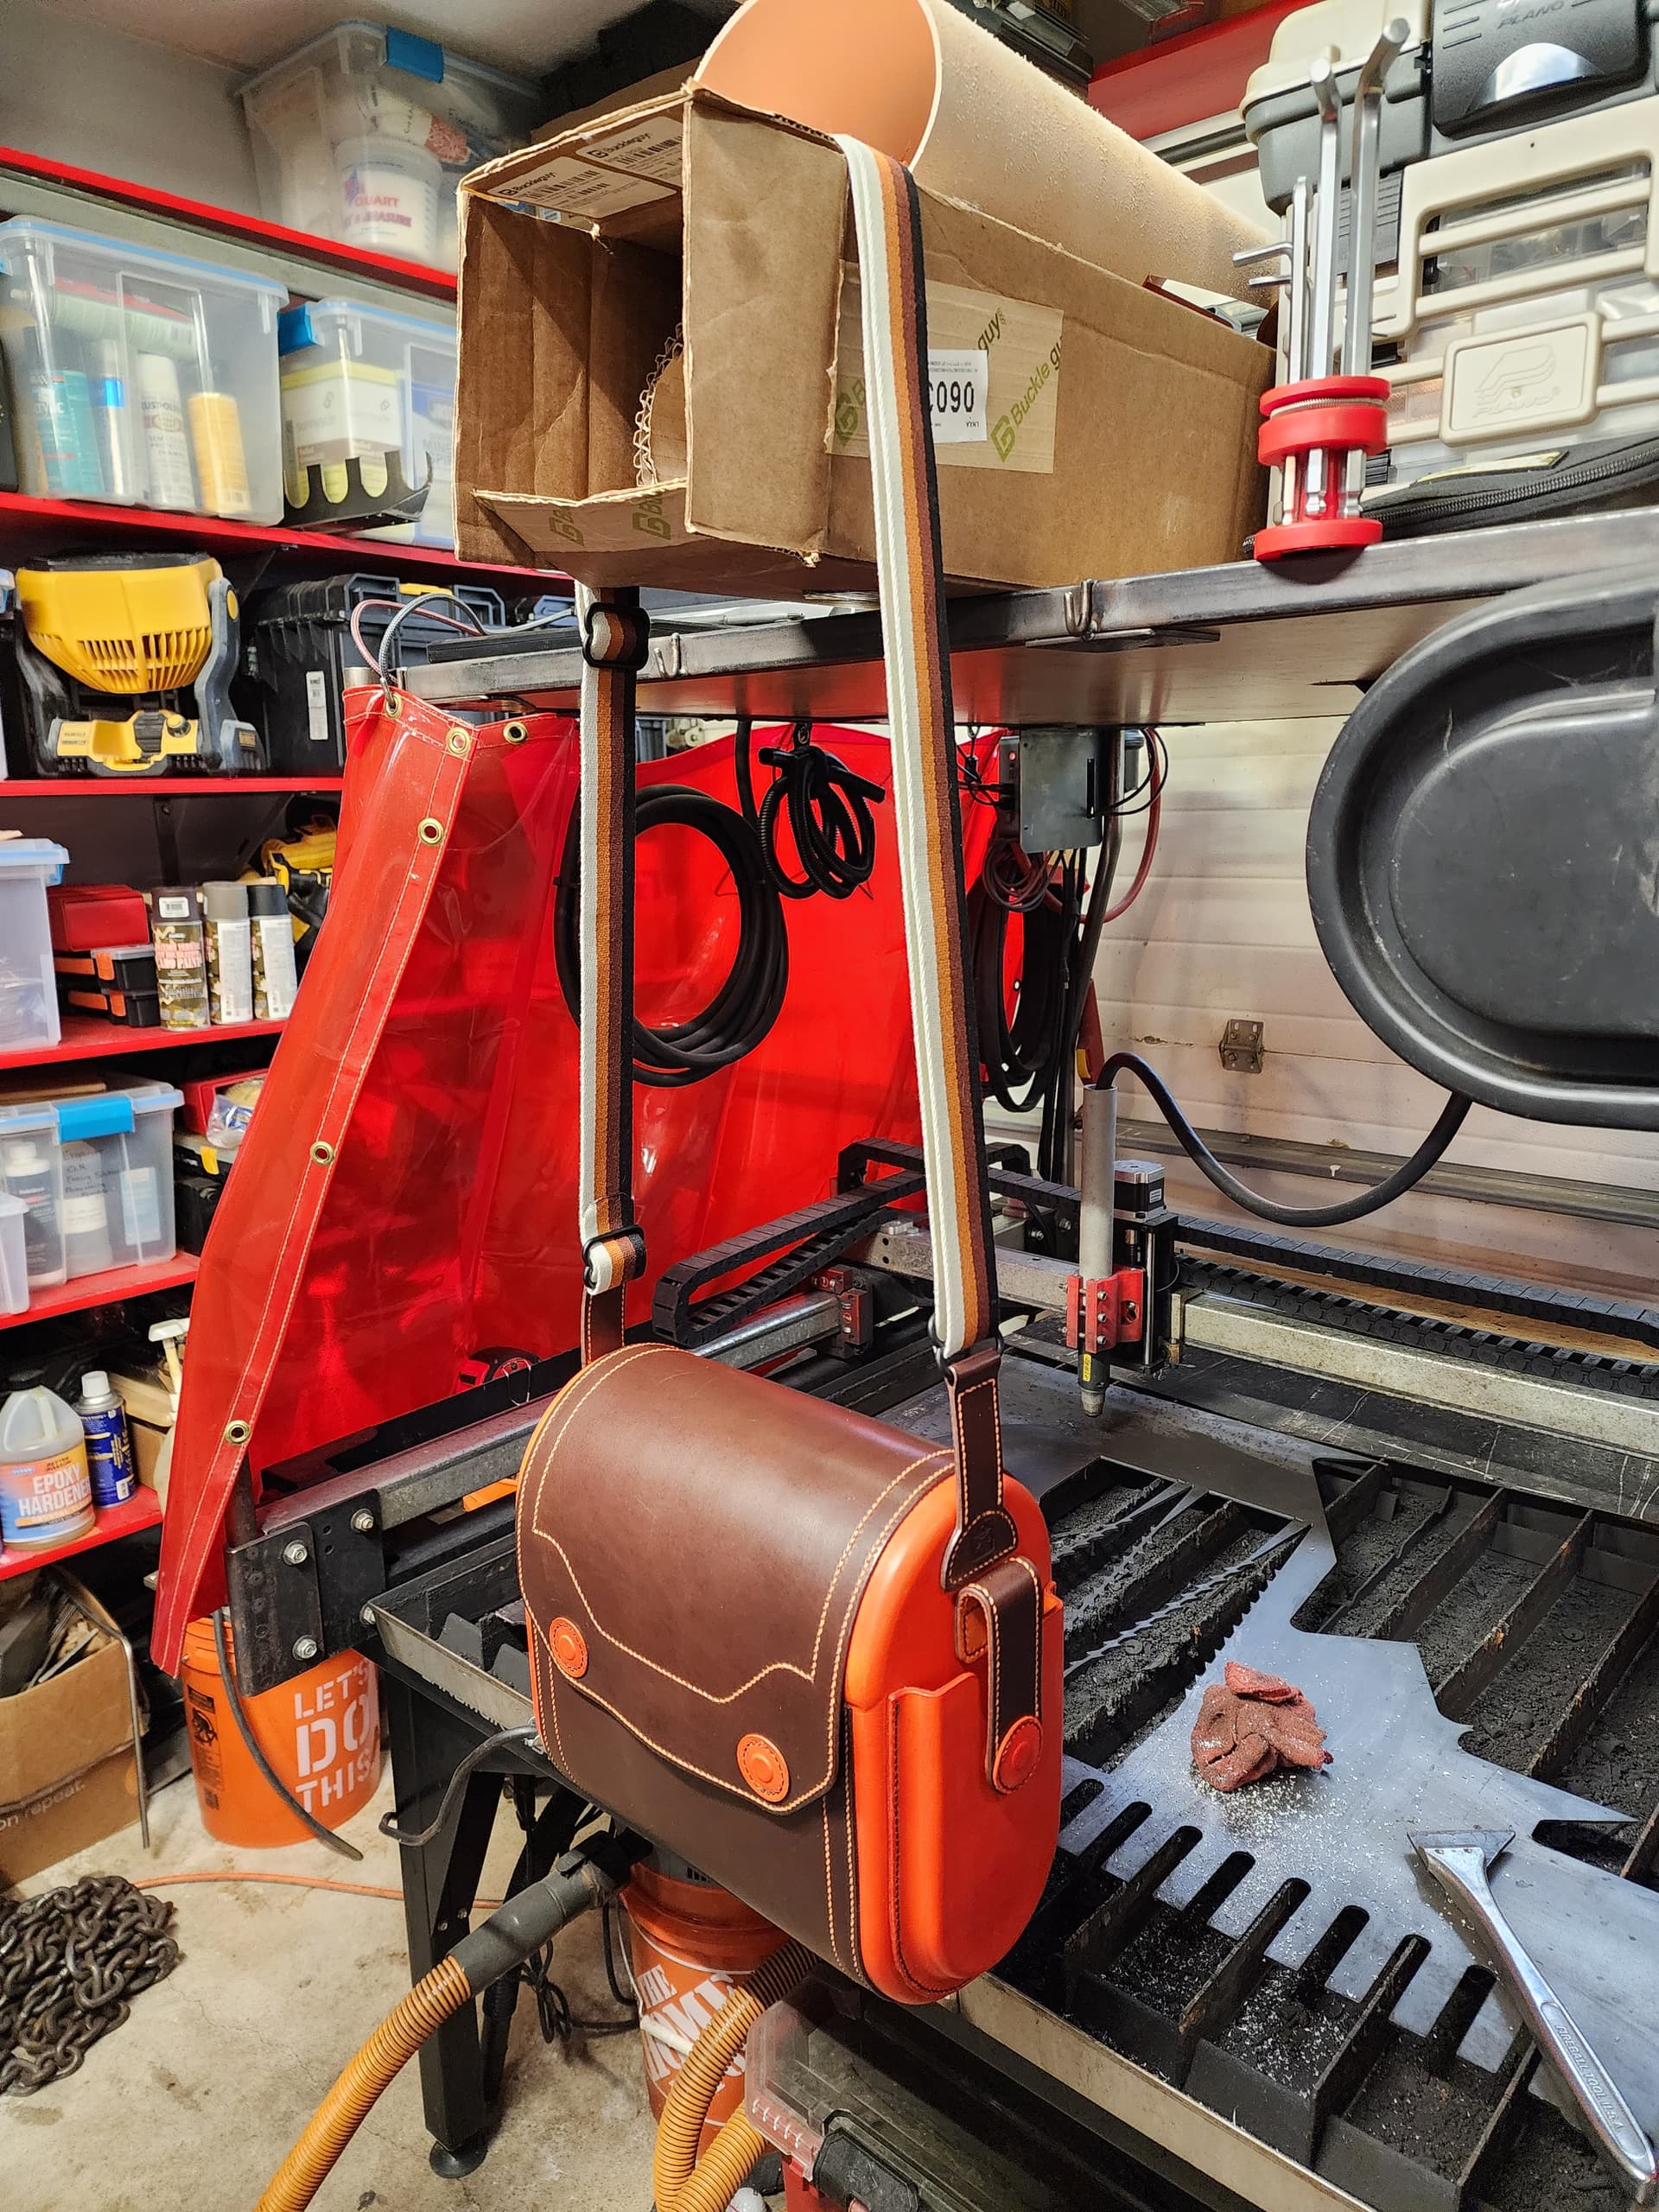
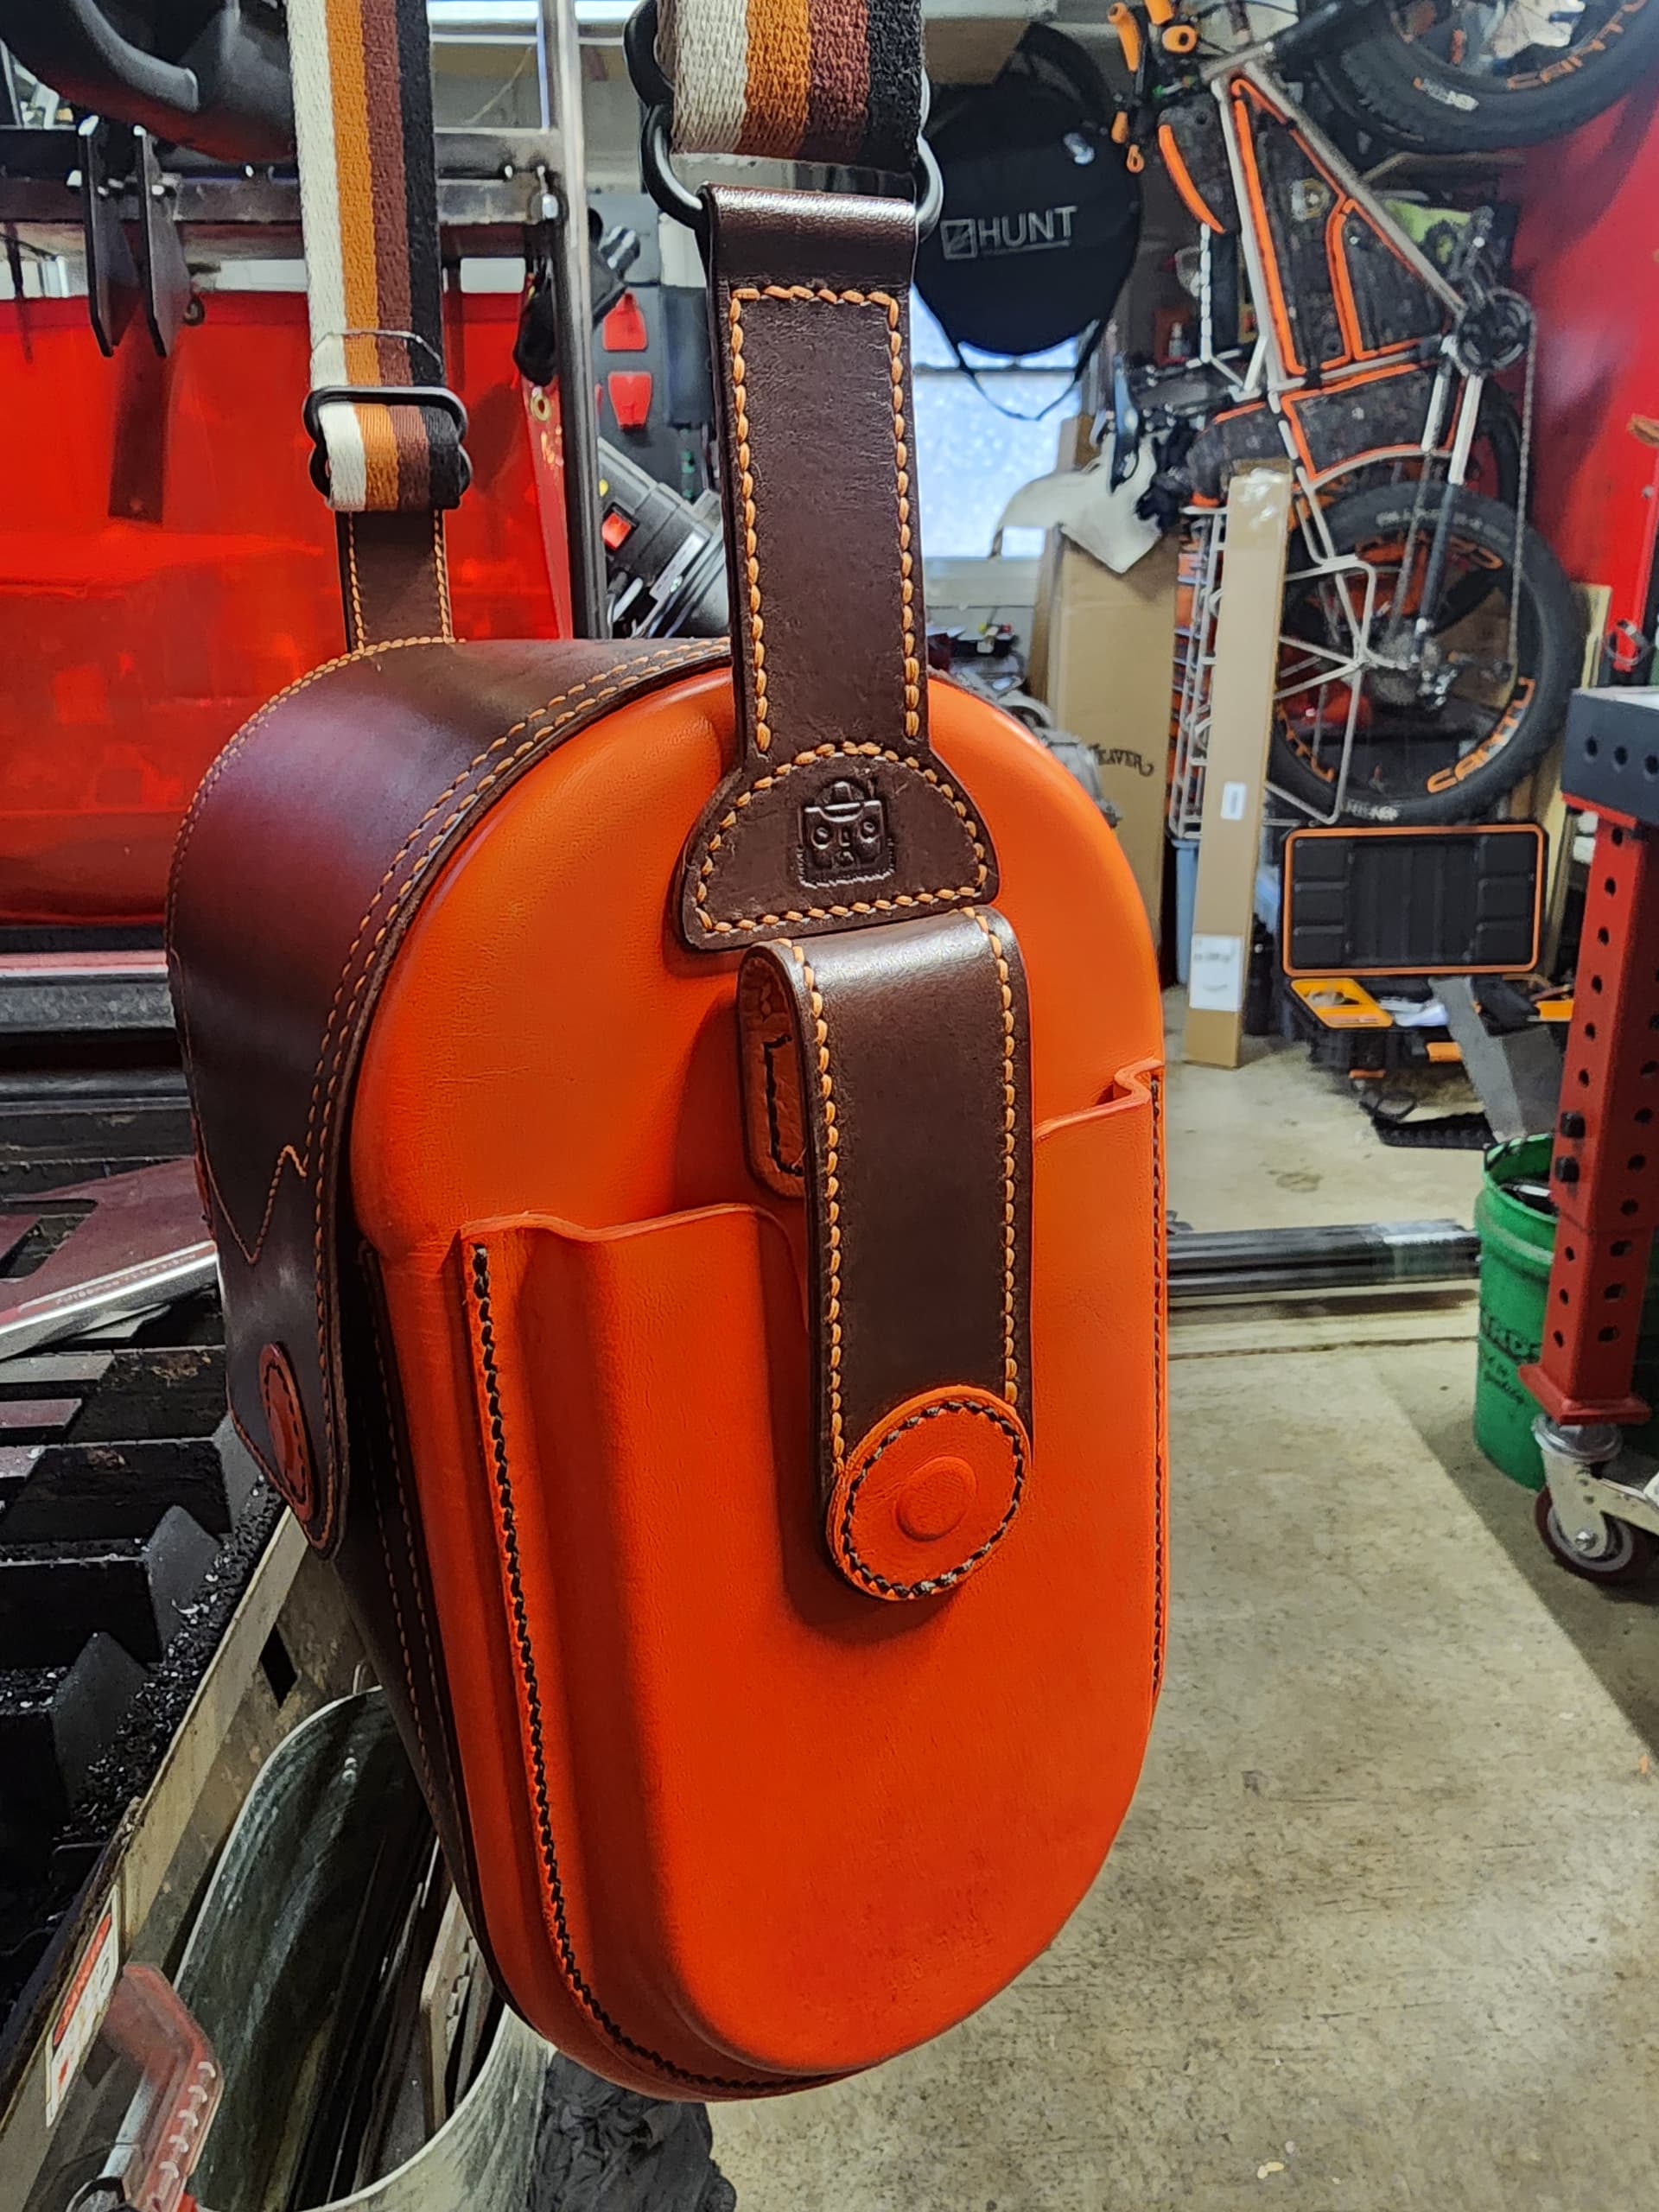
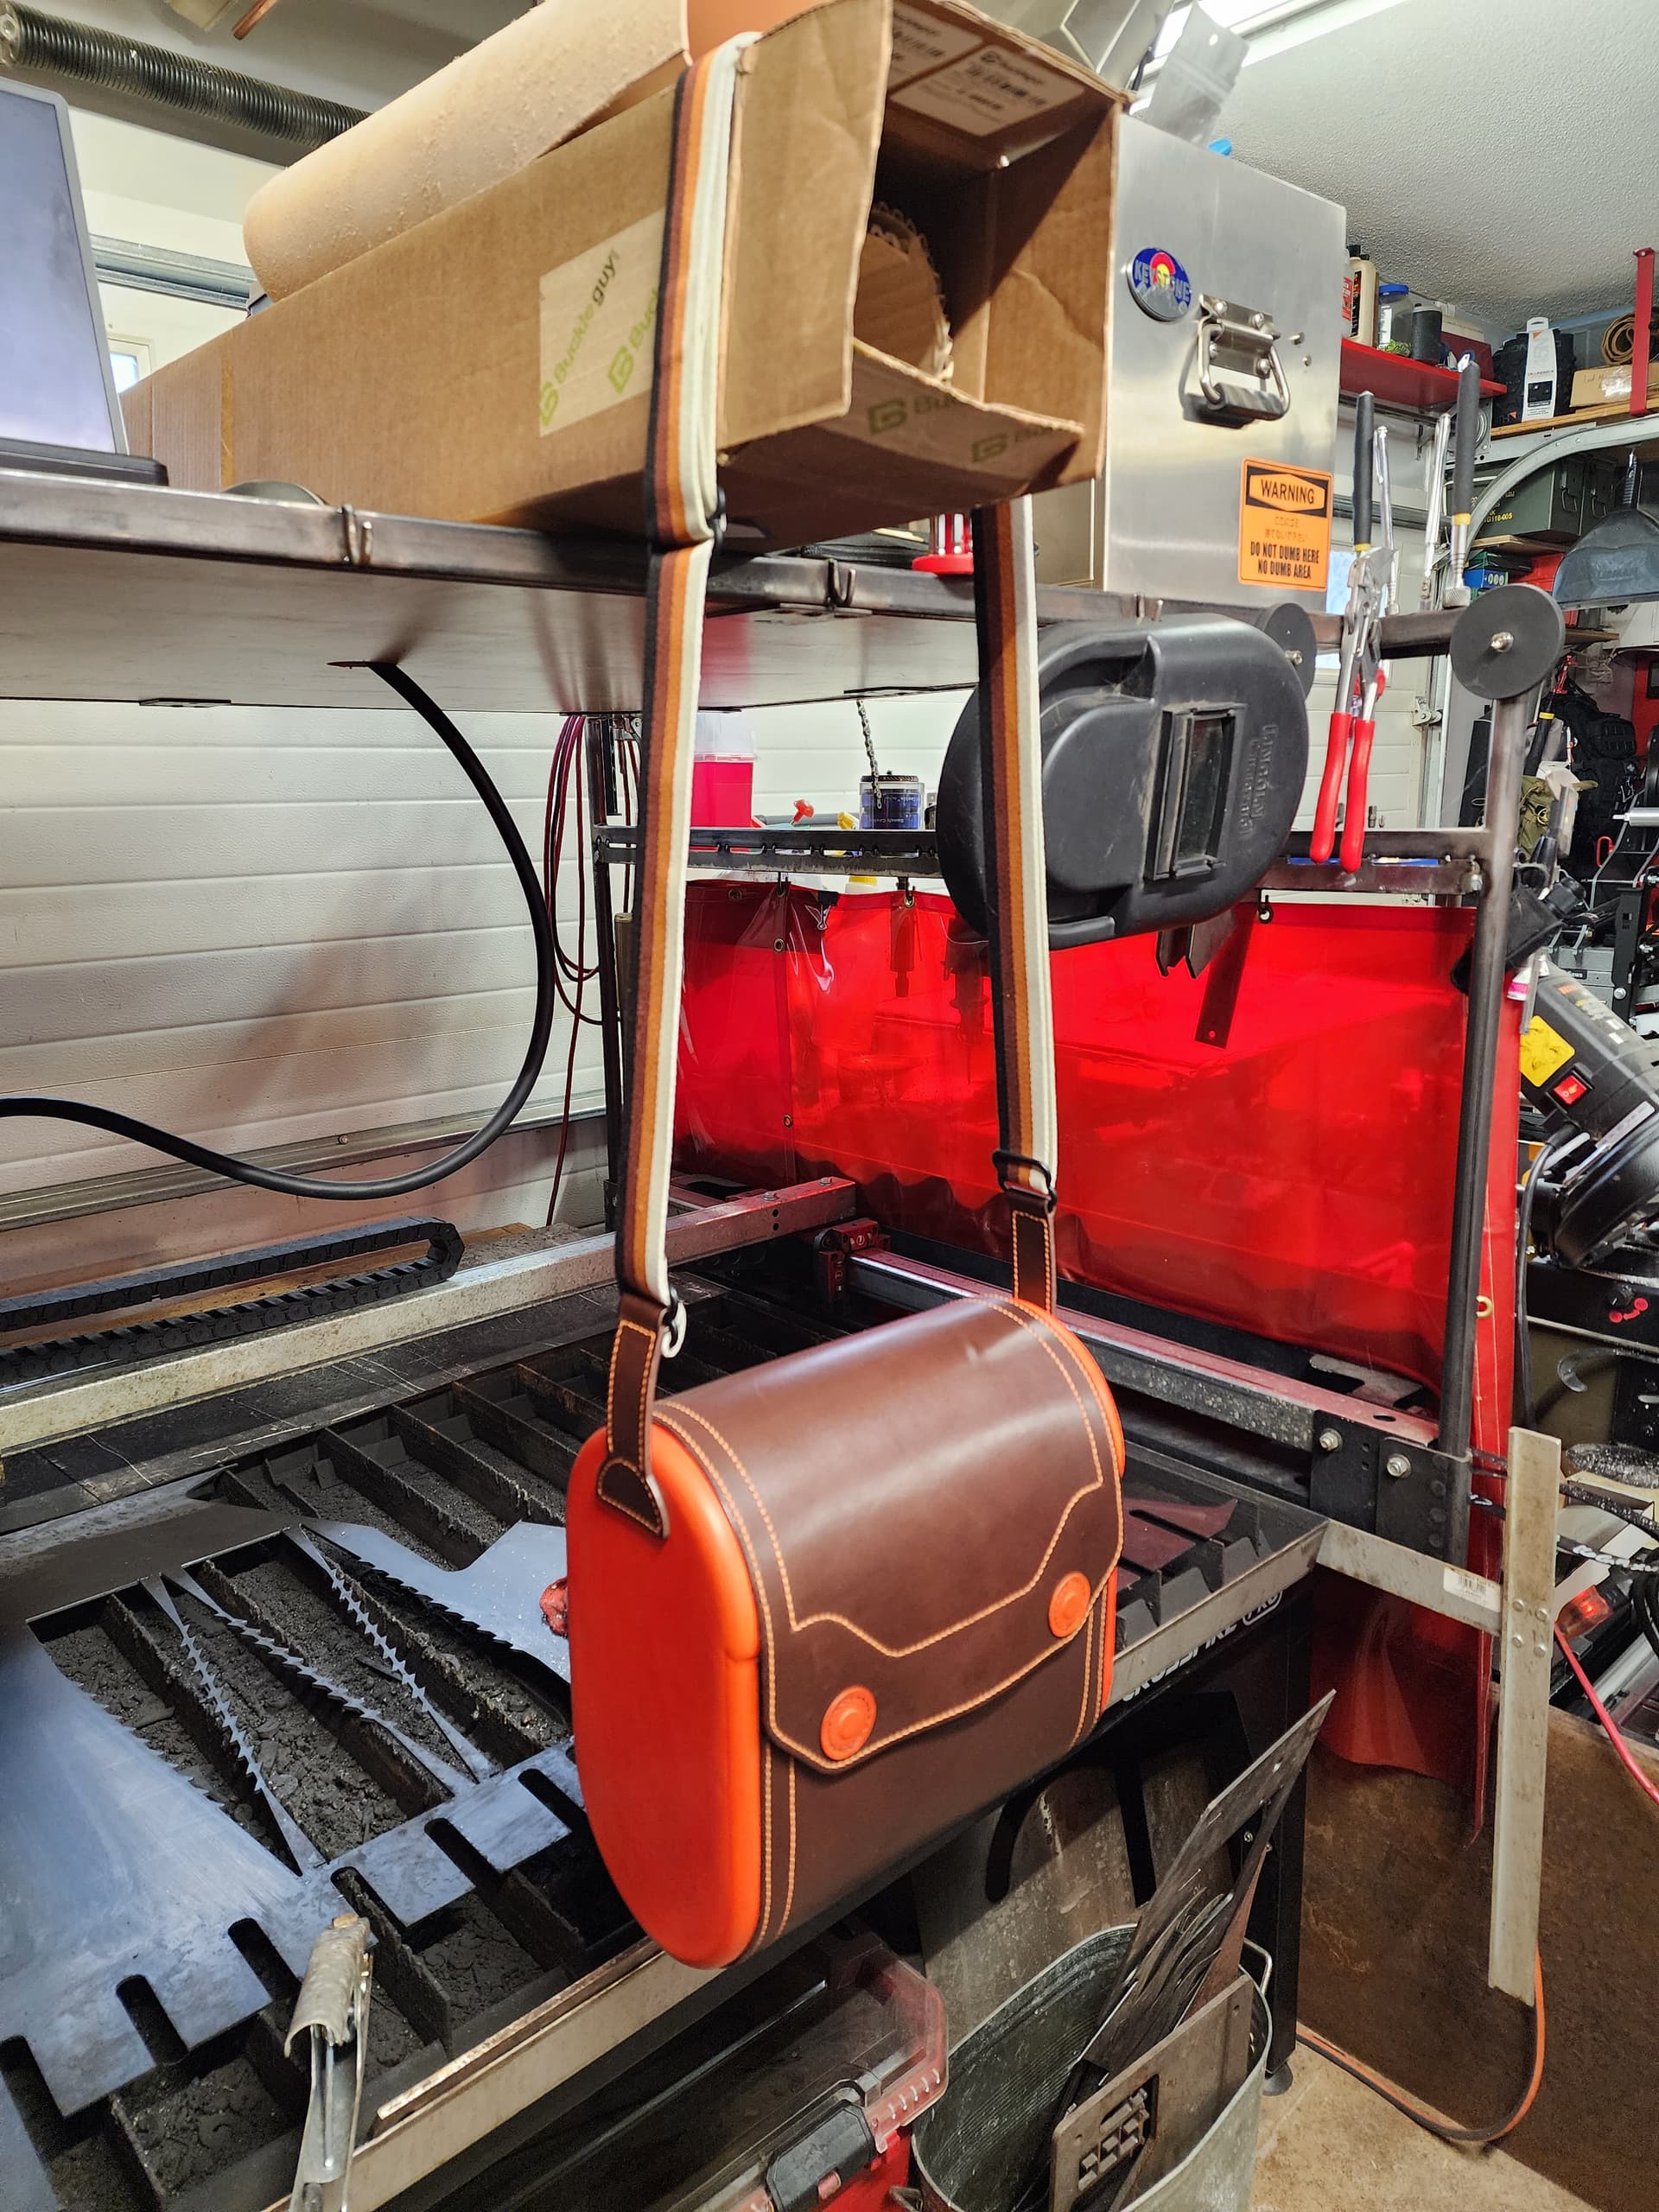
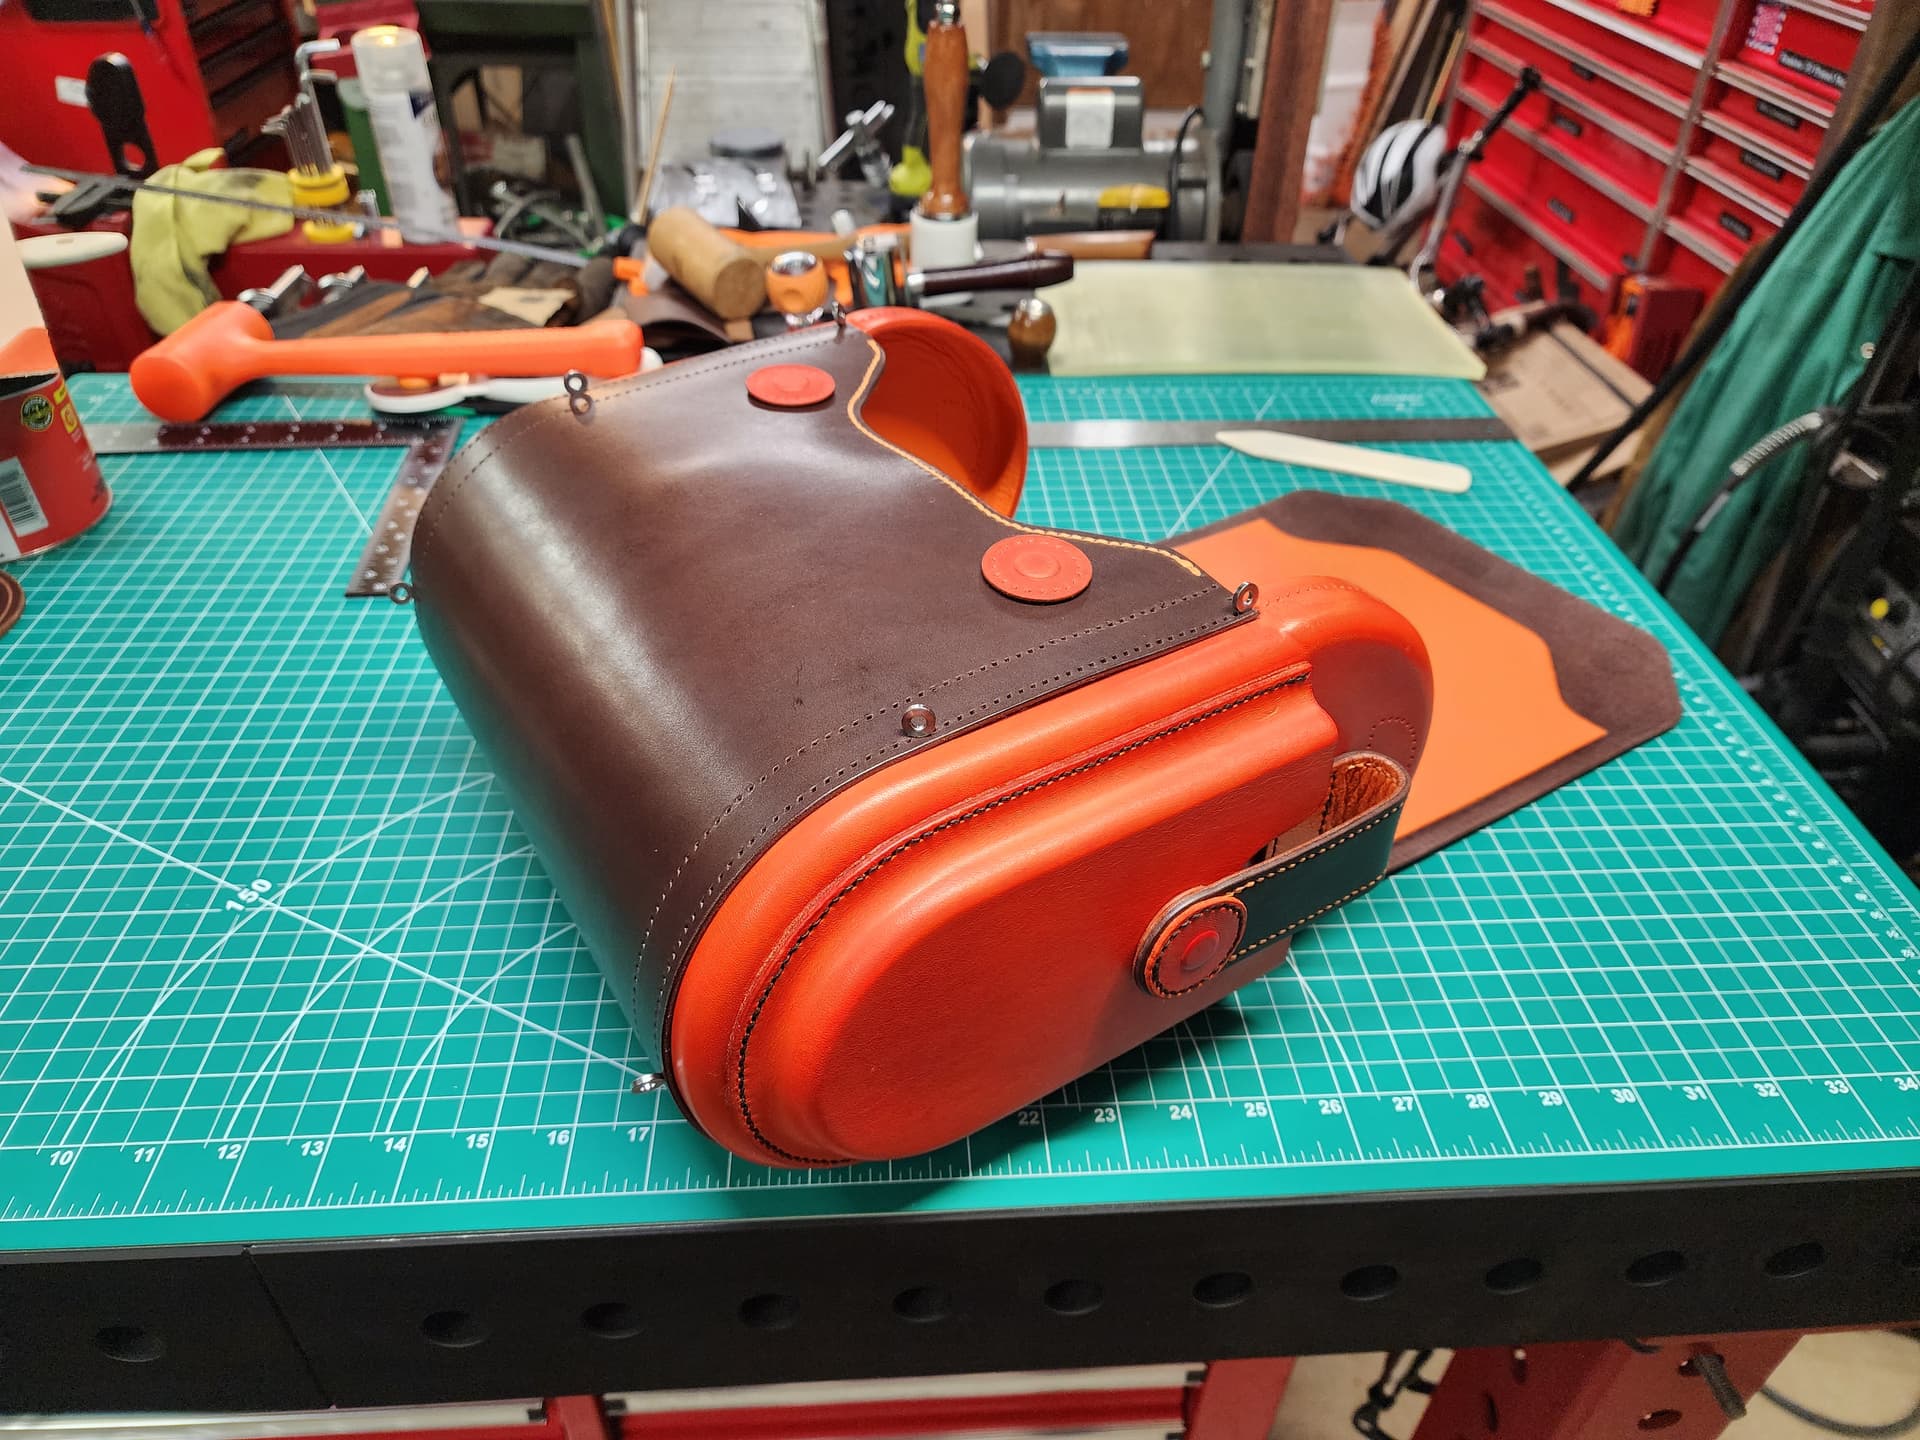
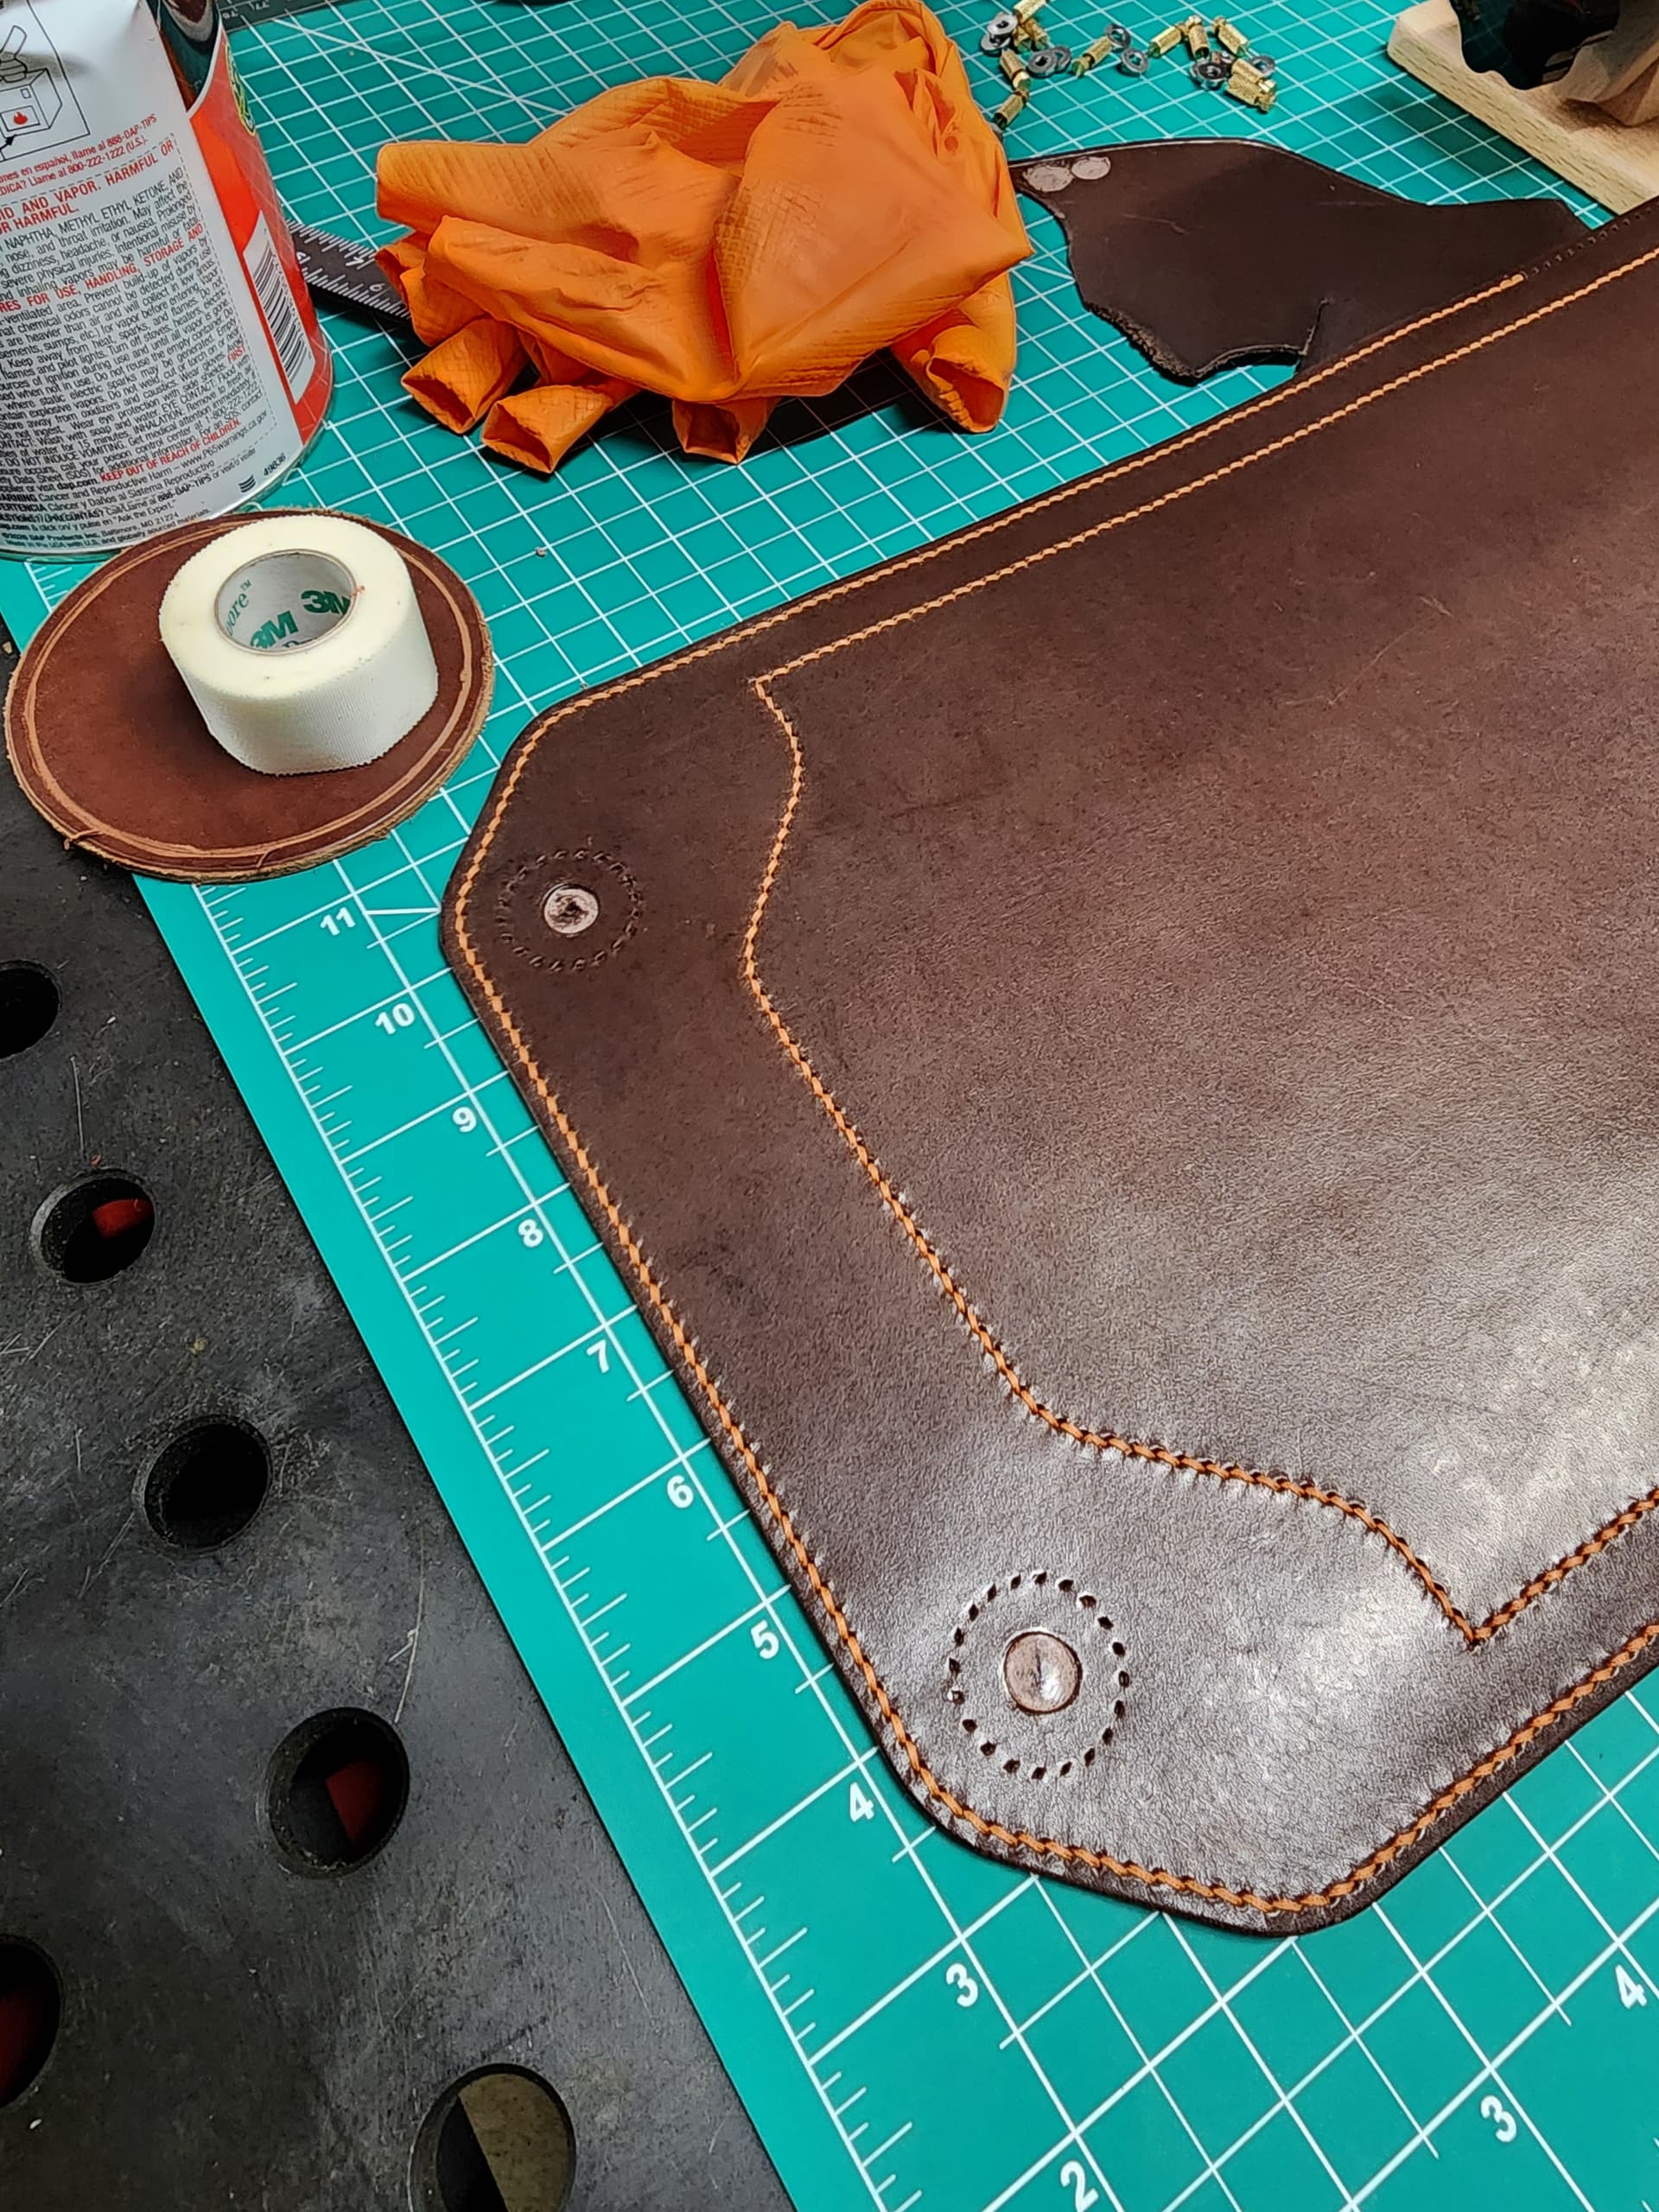
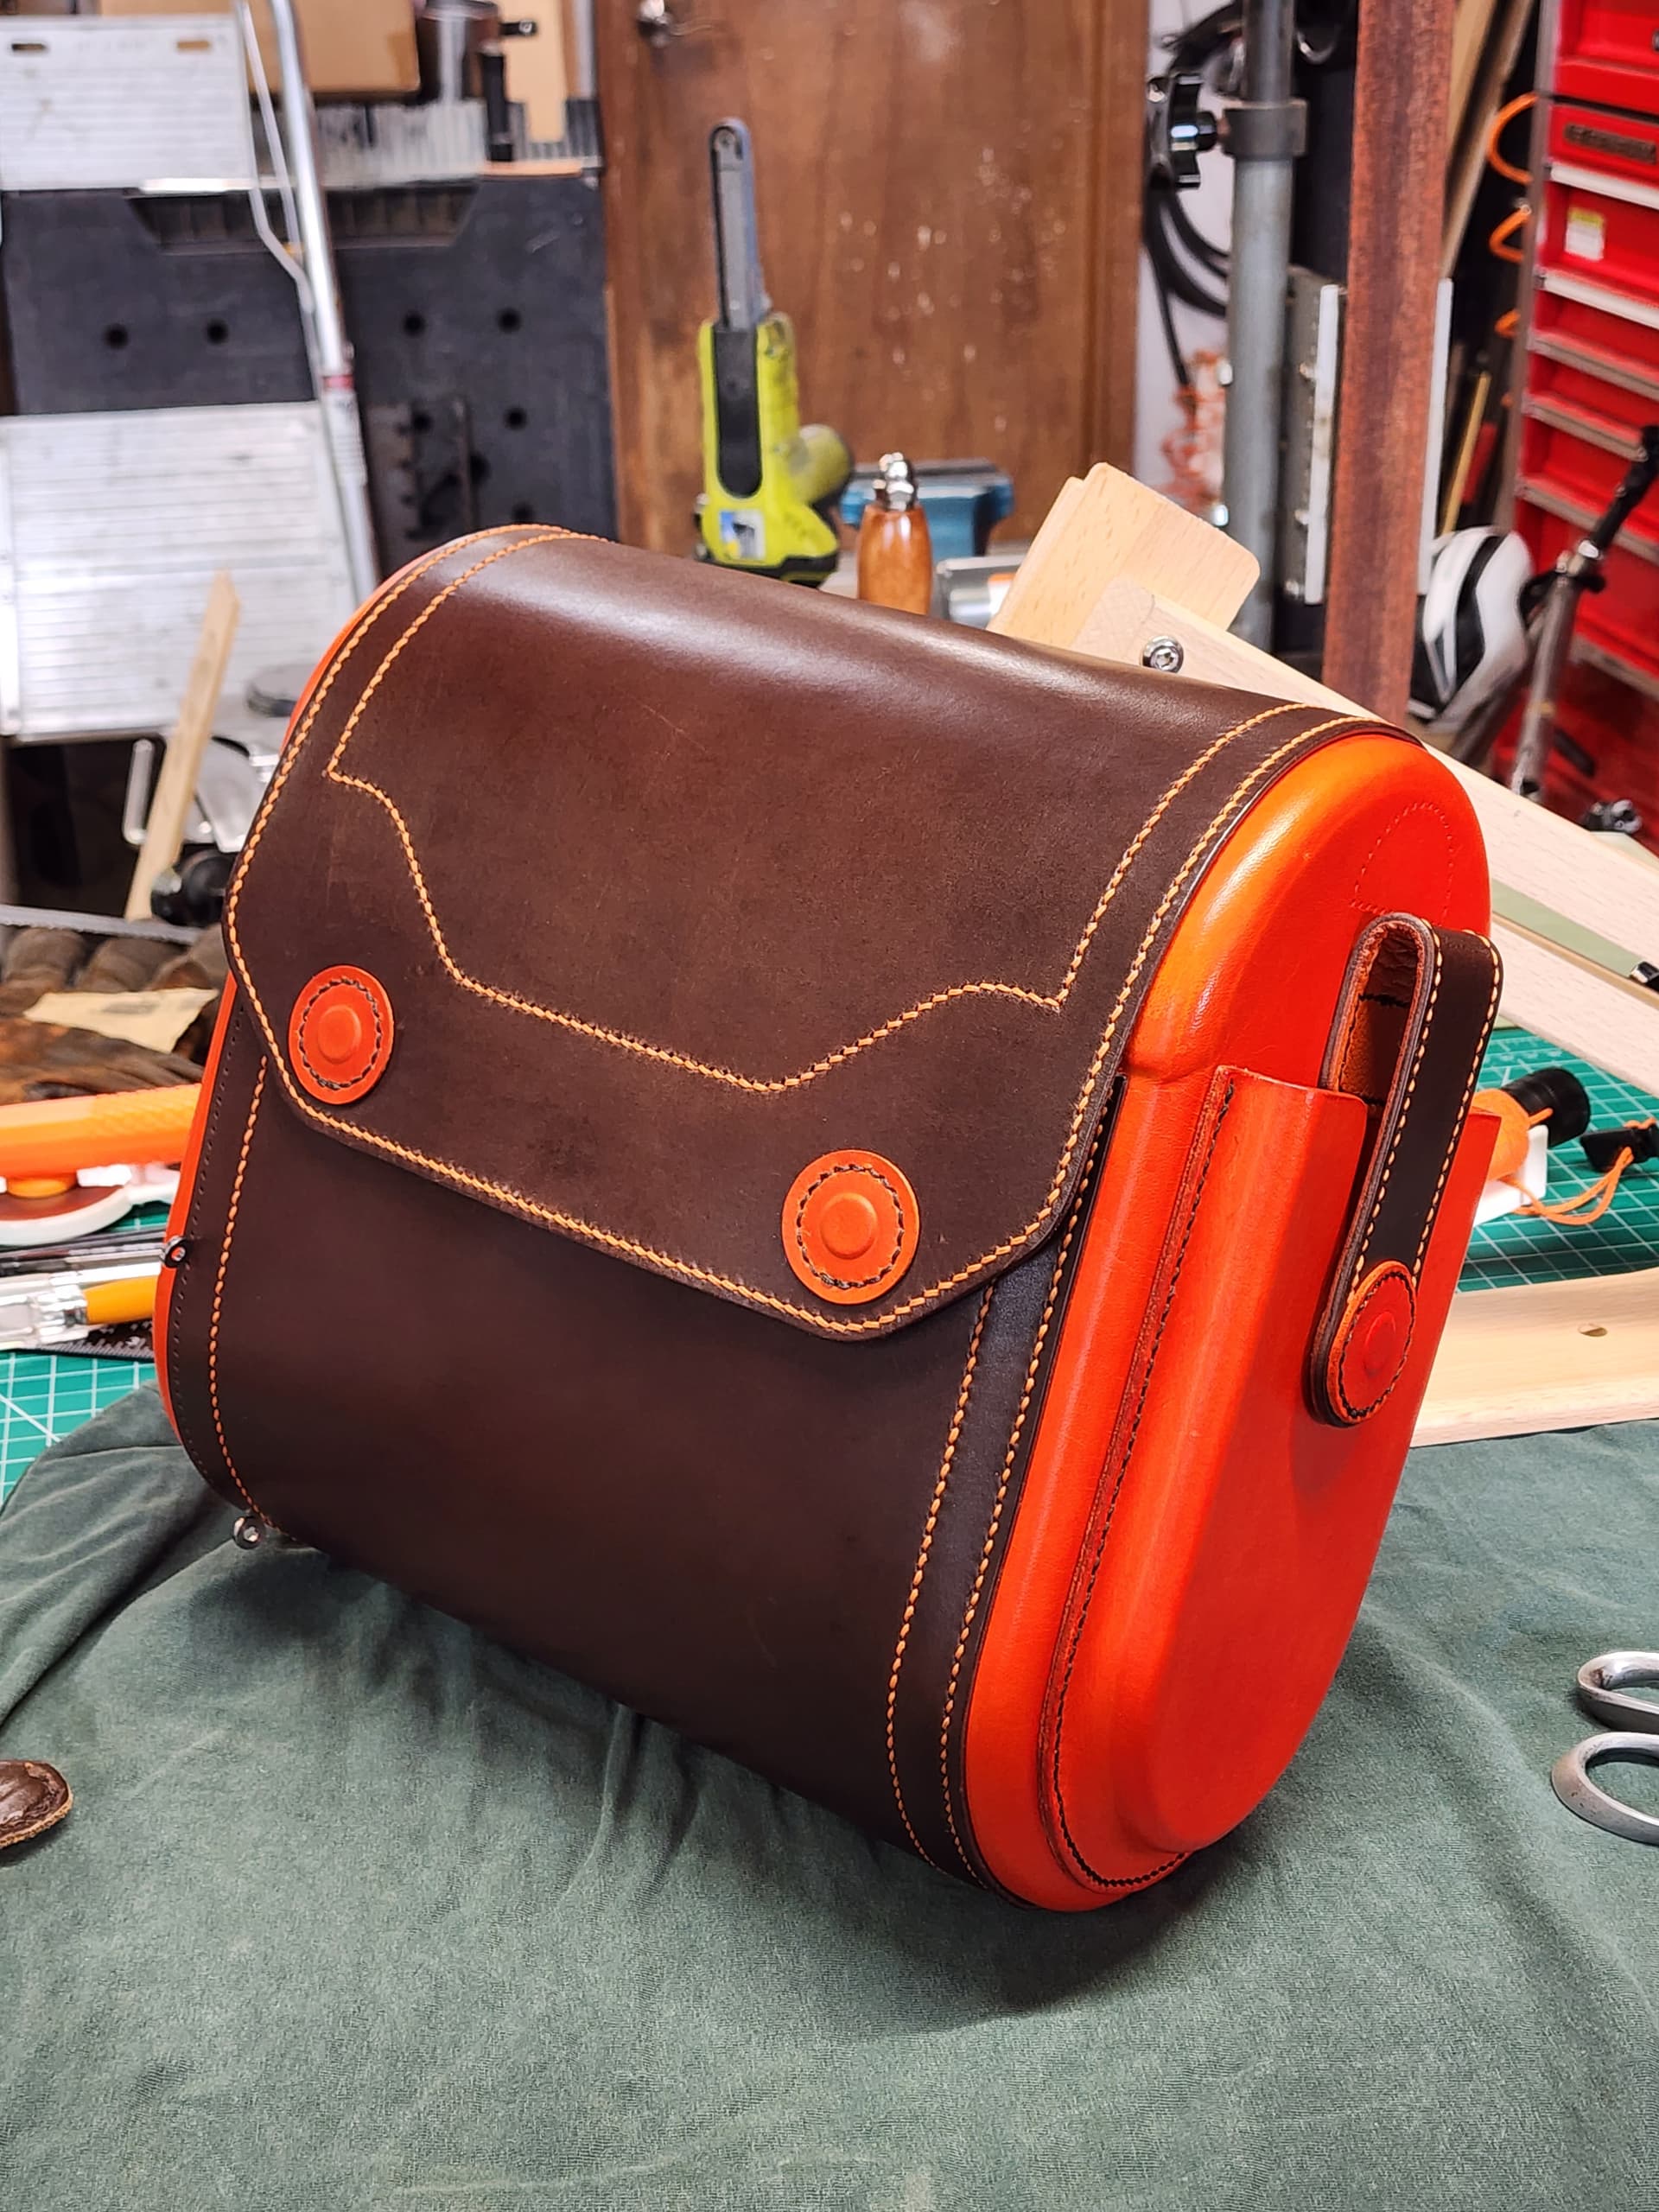
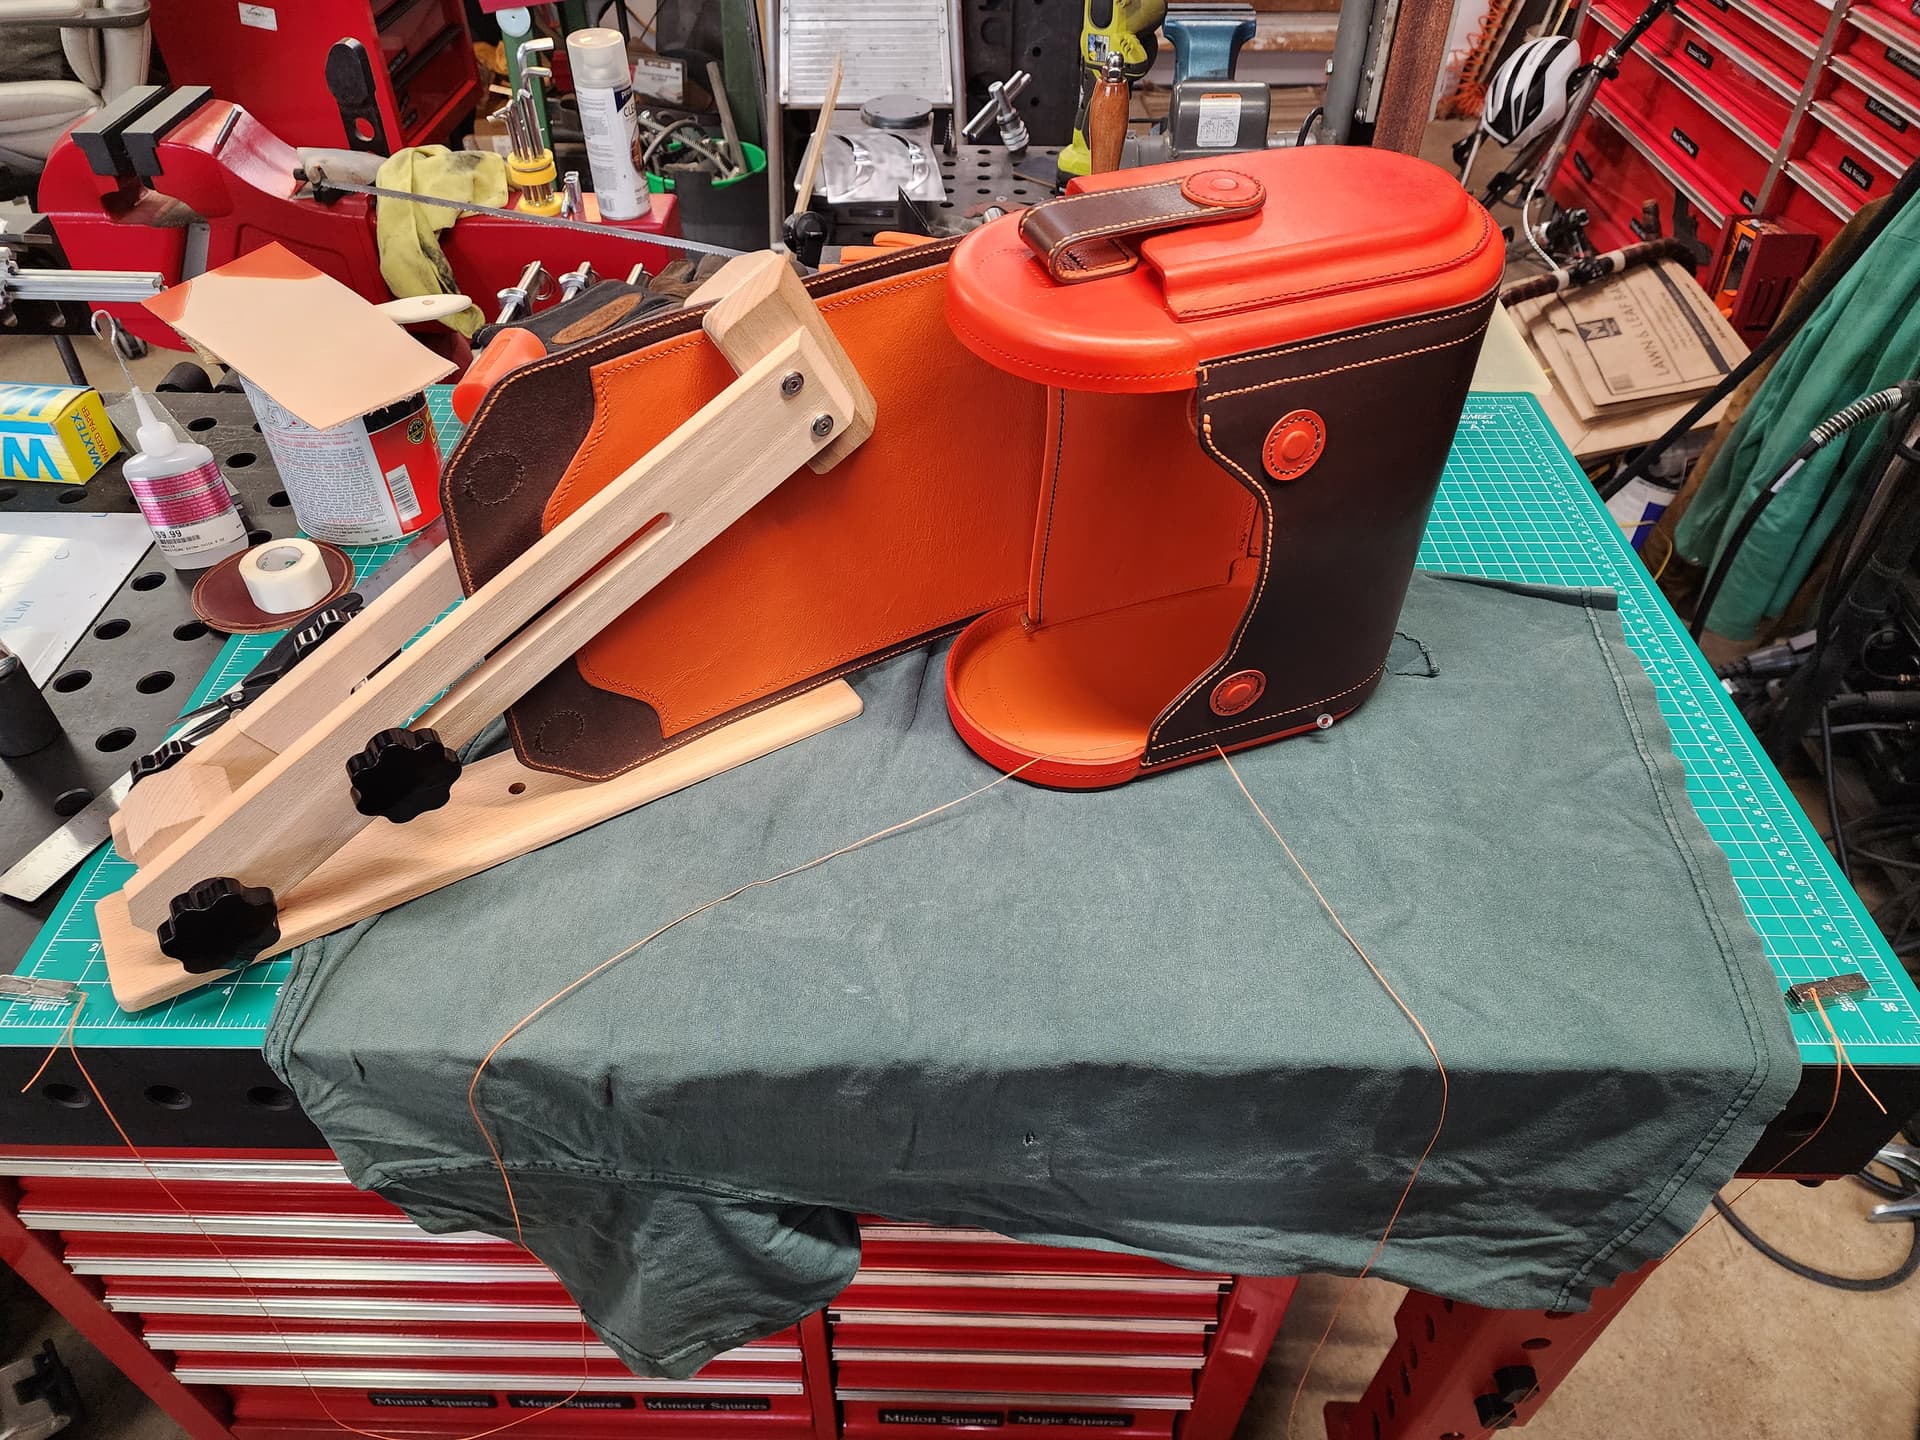
I’m jumping into the deep end right now. Working on a purse I designed for my wife for Christmas. It’s going to take a looooooot of hours. I’m 45ish into the project now and am only partway into the cutting and forming phase, and then will be the 20ish feet of hand stitching. I’d post more about it on the forum, but I didn’t figure it’d really the sort of thing most guys here would care about.
These pictures are from before I finalized the strap design.
Cutting and marking stitch holes with 3d printed templates and cementing the main body panel to the inner liner. Waxed paper works well, and is easier to work with than wooden dowels or sticks like I’ve seen most people use.
Besides pawing through her purses for ideas, I’ve been using her mom and my sister to bounce design ideas off of, both of whom have done a lot of purse shopping with my wife over the years. That combined with some innocuous questions like asking which color she likes best of a picture of leather swatches filled in some of the rest of the gaps.
I’ve learned to work on a large project that benefits only her every now and then. It’s an effective lubricant for the next time I’ve got a new piece of equipment I’m after.
It’s been a good year for new equipment, so I owe her something a little more exciting than something I could whip up in an afternoon.
The main part of the process that these couple of projects have helped me nail down for the embossing dies is the quickest way I’ve used so far to create the dies around the solid model that will update automatically when I make changes to the part, and don’t require additional external files that reference the part file.
For something like the purse, as simple as it is, I’m now up to around 20 parts, most of which are unique parts or mirrors of other parts. If each part has at least a cutting template, maybe a forming die set and possibly a trimming and marking punches and dies as well, having to manage all those files can be tedious, so having a method to create all the dies as elements I can suppress and unsuppress as needed that will update automatically is a big time saver when I need to make basic forming dies.
It takes some training to remember to keep the elements organized so nothing is dependent on a feature that will be suppressed in an alternate configuration.
Rounding in on the end of this project. I’m probably around 130hrs into it from the start of the design process to now. Probably around 3-4hrs to go depending on how using my mother-in-laws sewing machine to finish the strap goes.