Ok a few disclaimers before I start. I know the difference between “real scientific testing and what I am about to say”. This was a test just for my own personal knowledge and I am sharing it in the hopes it helps someone, but take it with a “grain of salt”
I got tired of listening to “the man” spout their BS today at work, so I decided it was a good day to take a "mental health’ day and do some testing.
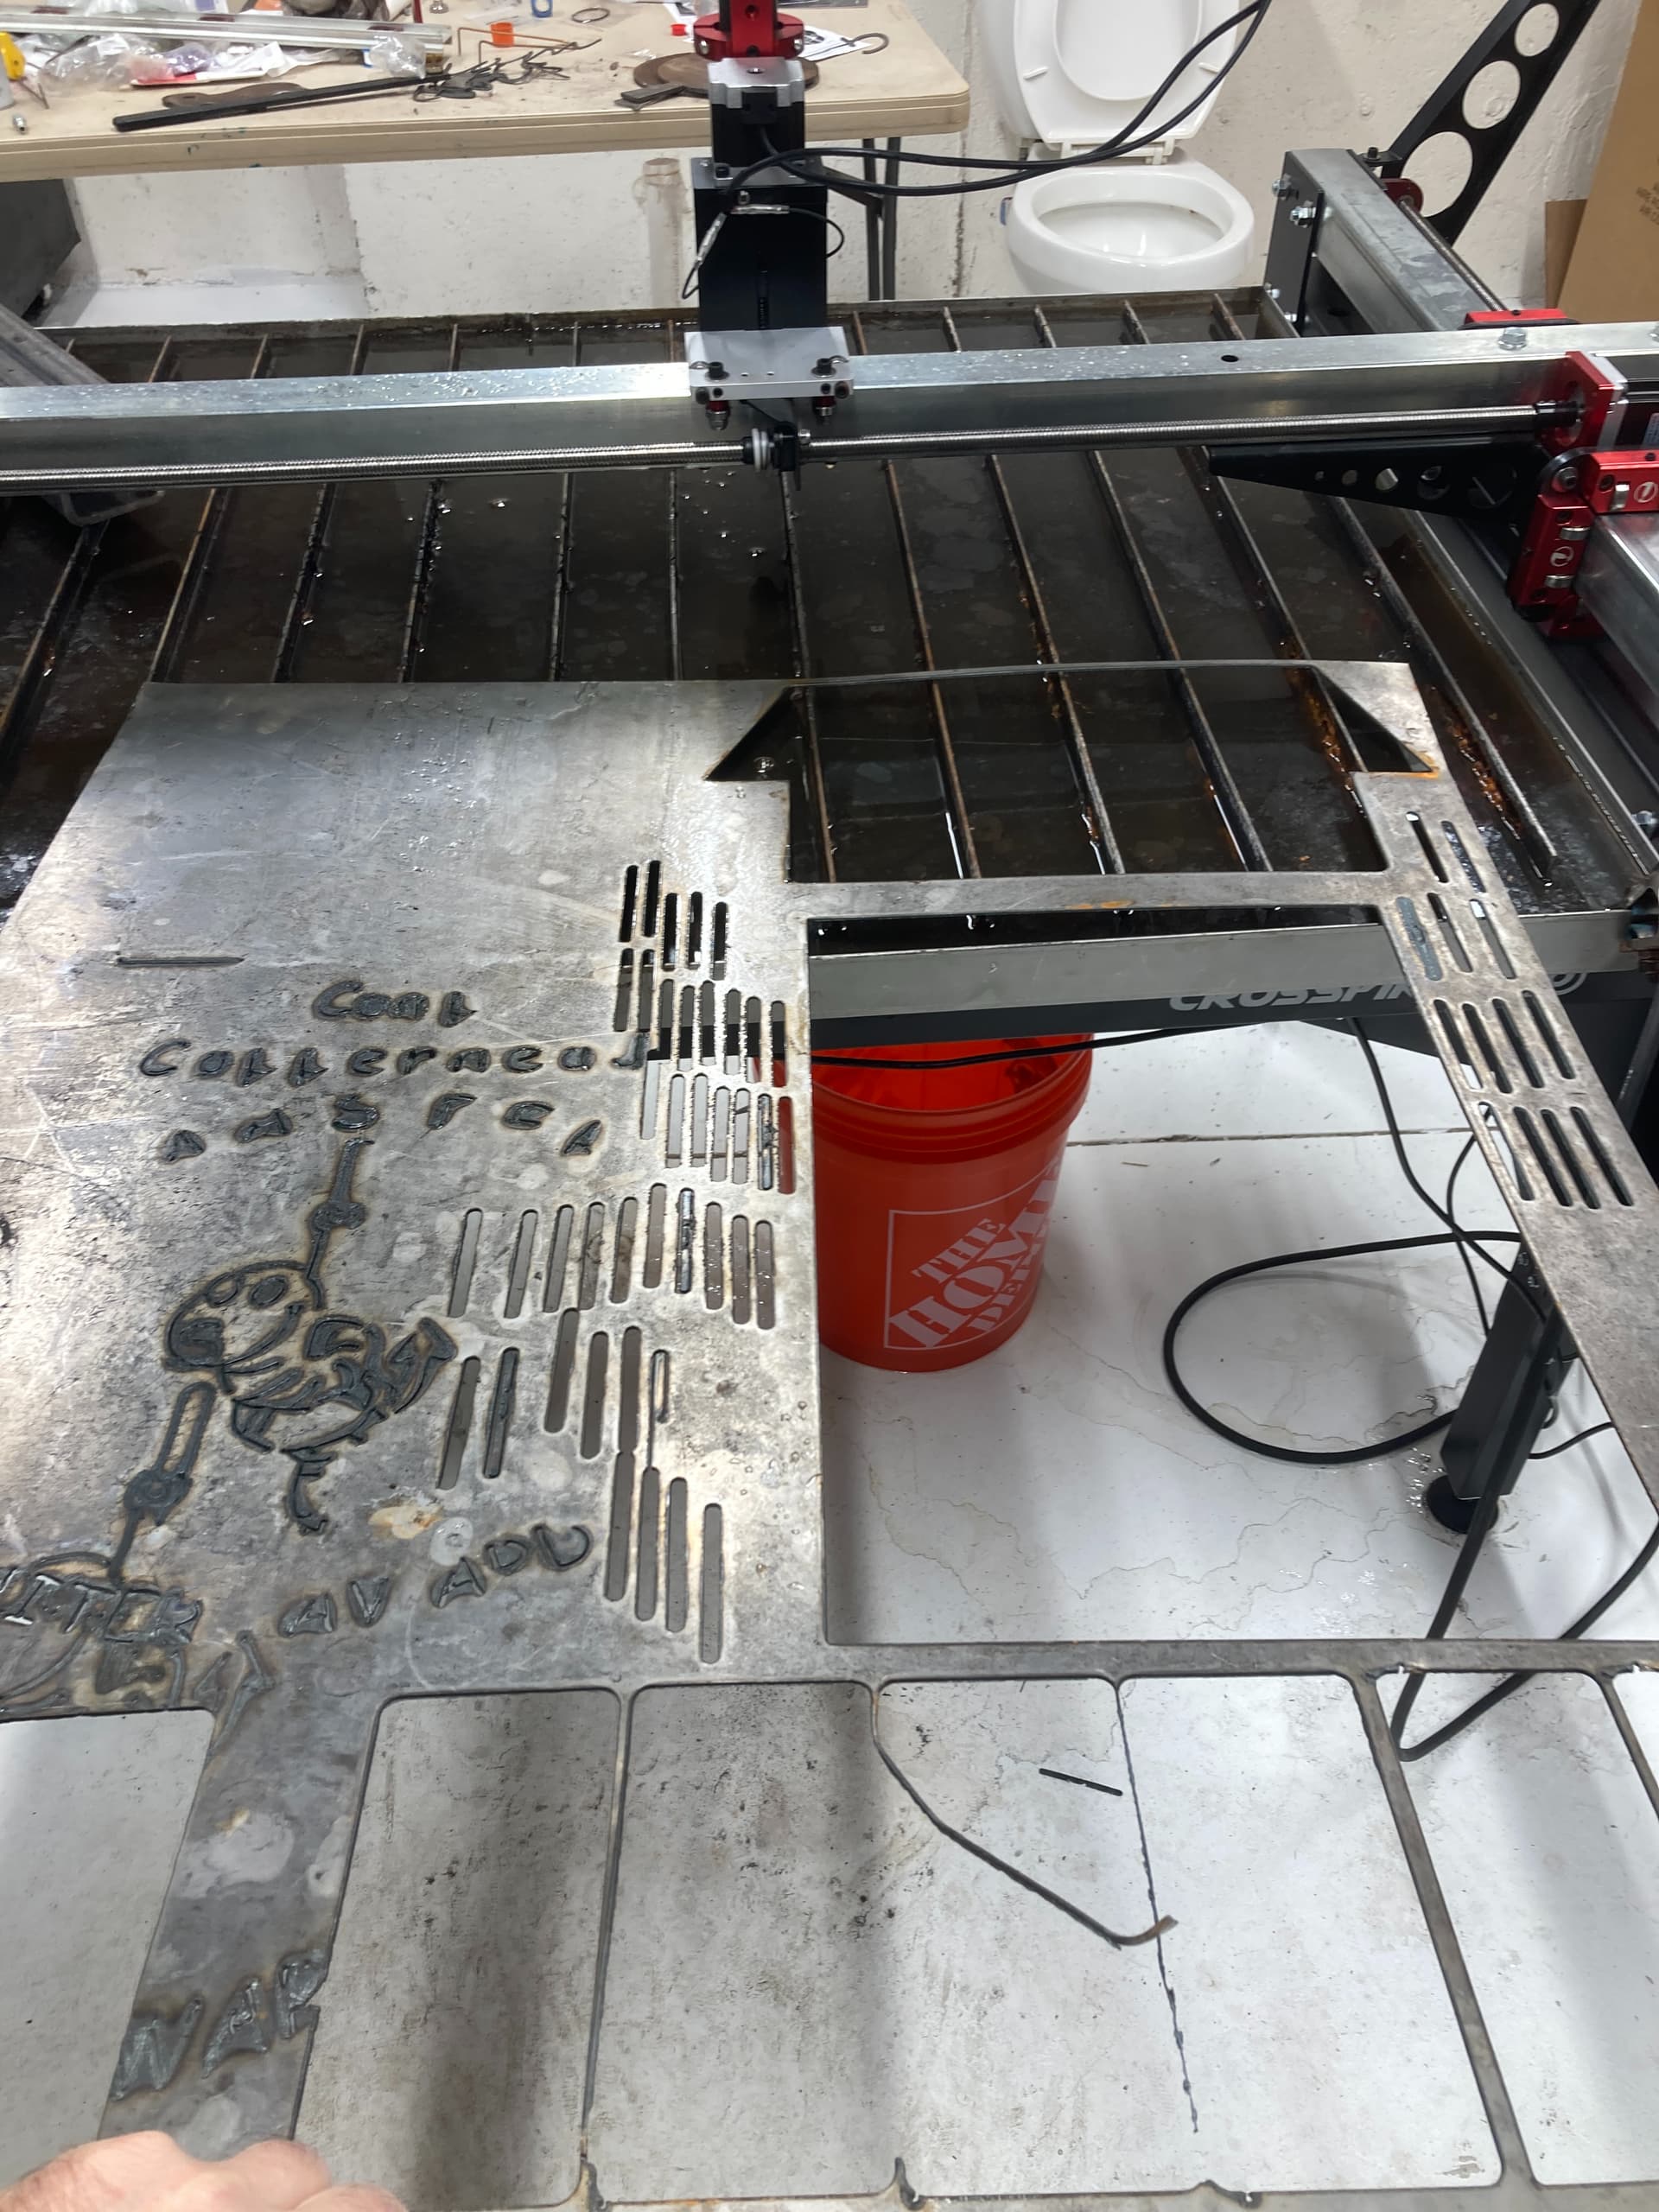
I made this “test cut” part to see if I could find my machines “sweet spot” for 16 gauge mild steel.
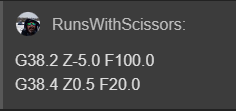
Here is a pic of the Sheetcam and the G-codes. I am pretty sure that the f100 means that I had the setting for this to run at 100 ipm.
Here is the G-code:
(v1.6-sc)
G90 G94
G17
G20 (Units: Inches)
H0
G0 X-0.0376 Y0.1386
G92 Z0.
G38.2 Z-5.0 F100.0
G38.4 Z0.5 F20.0
G92 Z0.0
G0 Z0.02 (IHS Backlash)
G92 Z0.0
G0 Z0.15 (Pierce Height)
M3
G4 P0.8
G1 Z0.06 F50.0 (Cut Height)
H1
G1 X-0.095 Y-0.0 F150.0
G1 Y-1.25
G3 X0.0 Y-1.345 I0.095 J0.0
G3 X0.095 Y-1.25 I-0.0 J0.095
G1 Y1.25
G3 X0.0 Y1.345 I-0.095 J0.0
G3 X-0.095 Y1.25 I-0.0 J-0.095
G1 Y-0.0
G1 Y-0.25
G1 X-0.0376 Y-0.3886
H0
M5
G0 Z1.0
M5 M30
(PS150)
So I adjusted the feed rate using the % up and % down buttons in Fire Control.
Well I still was getting what I thought was too much dross, so I decided to "play around and write down my results.
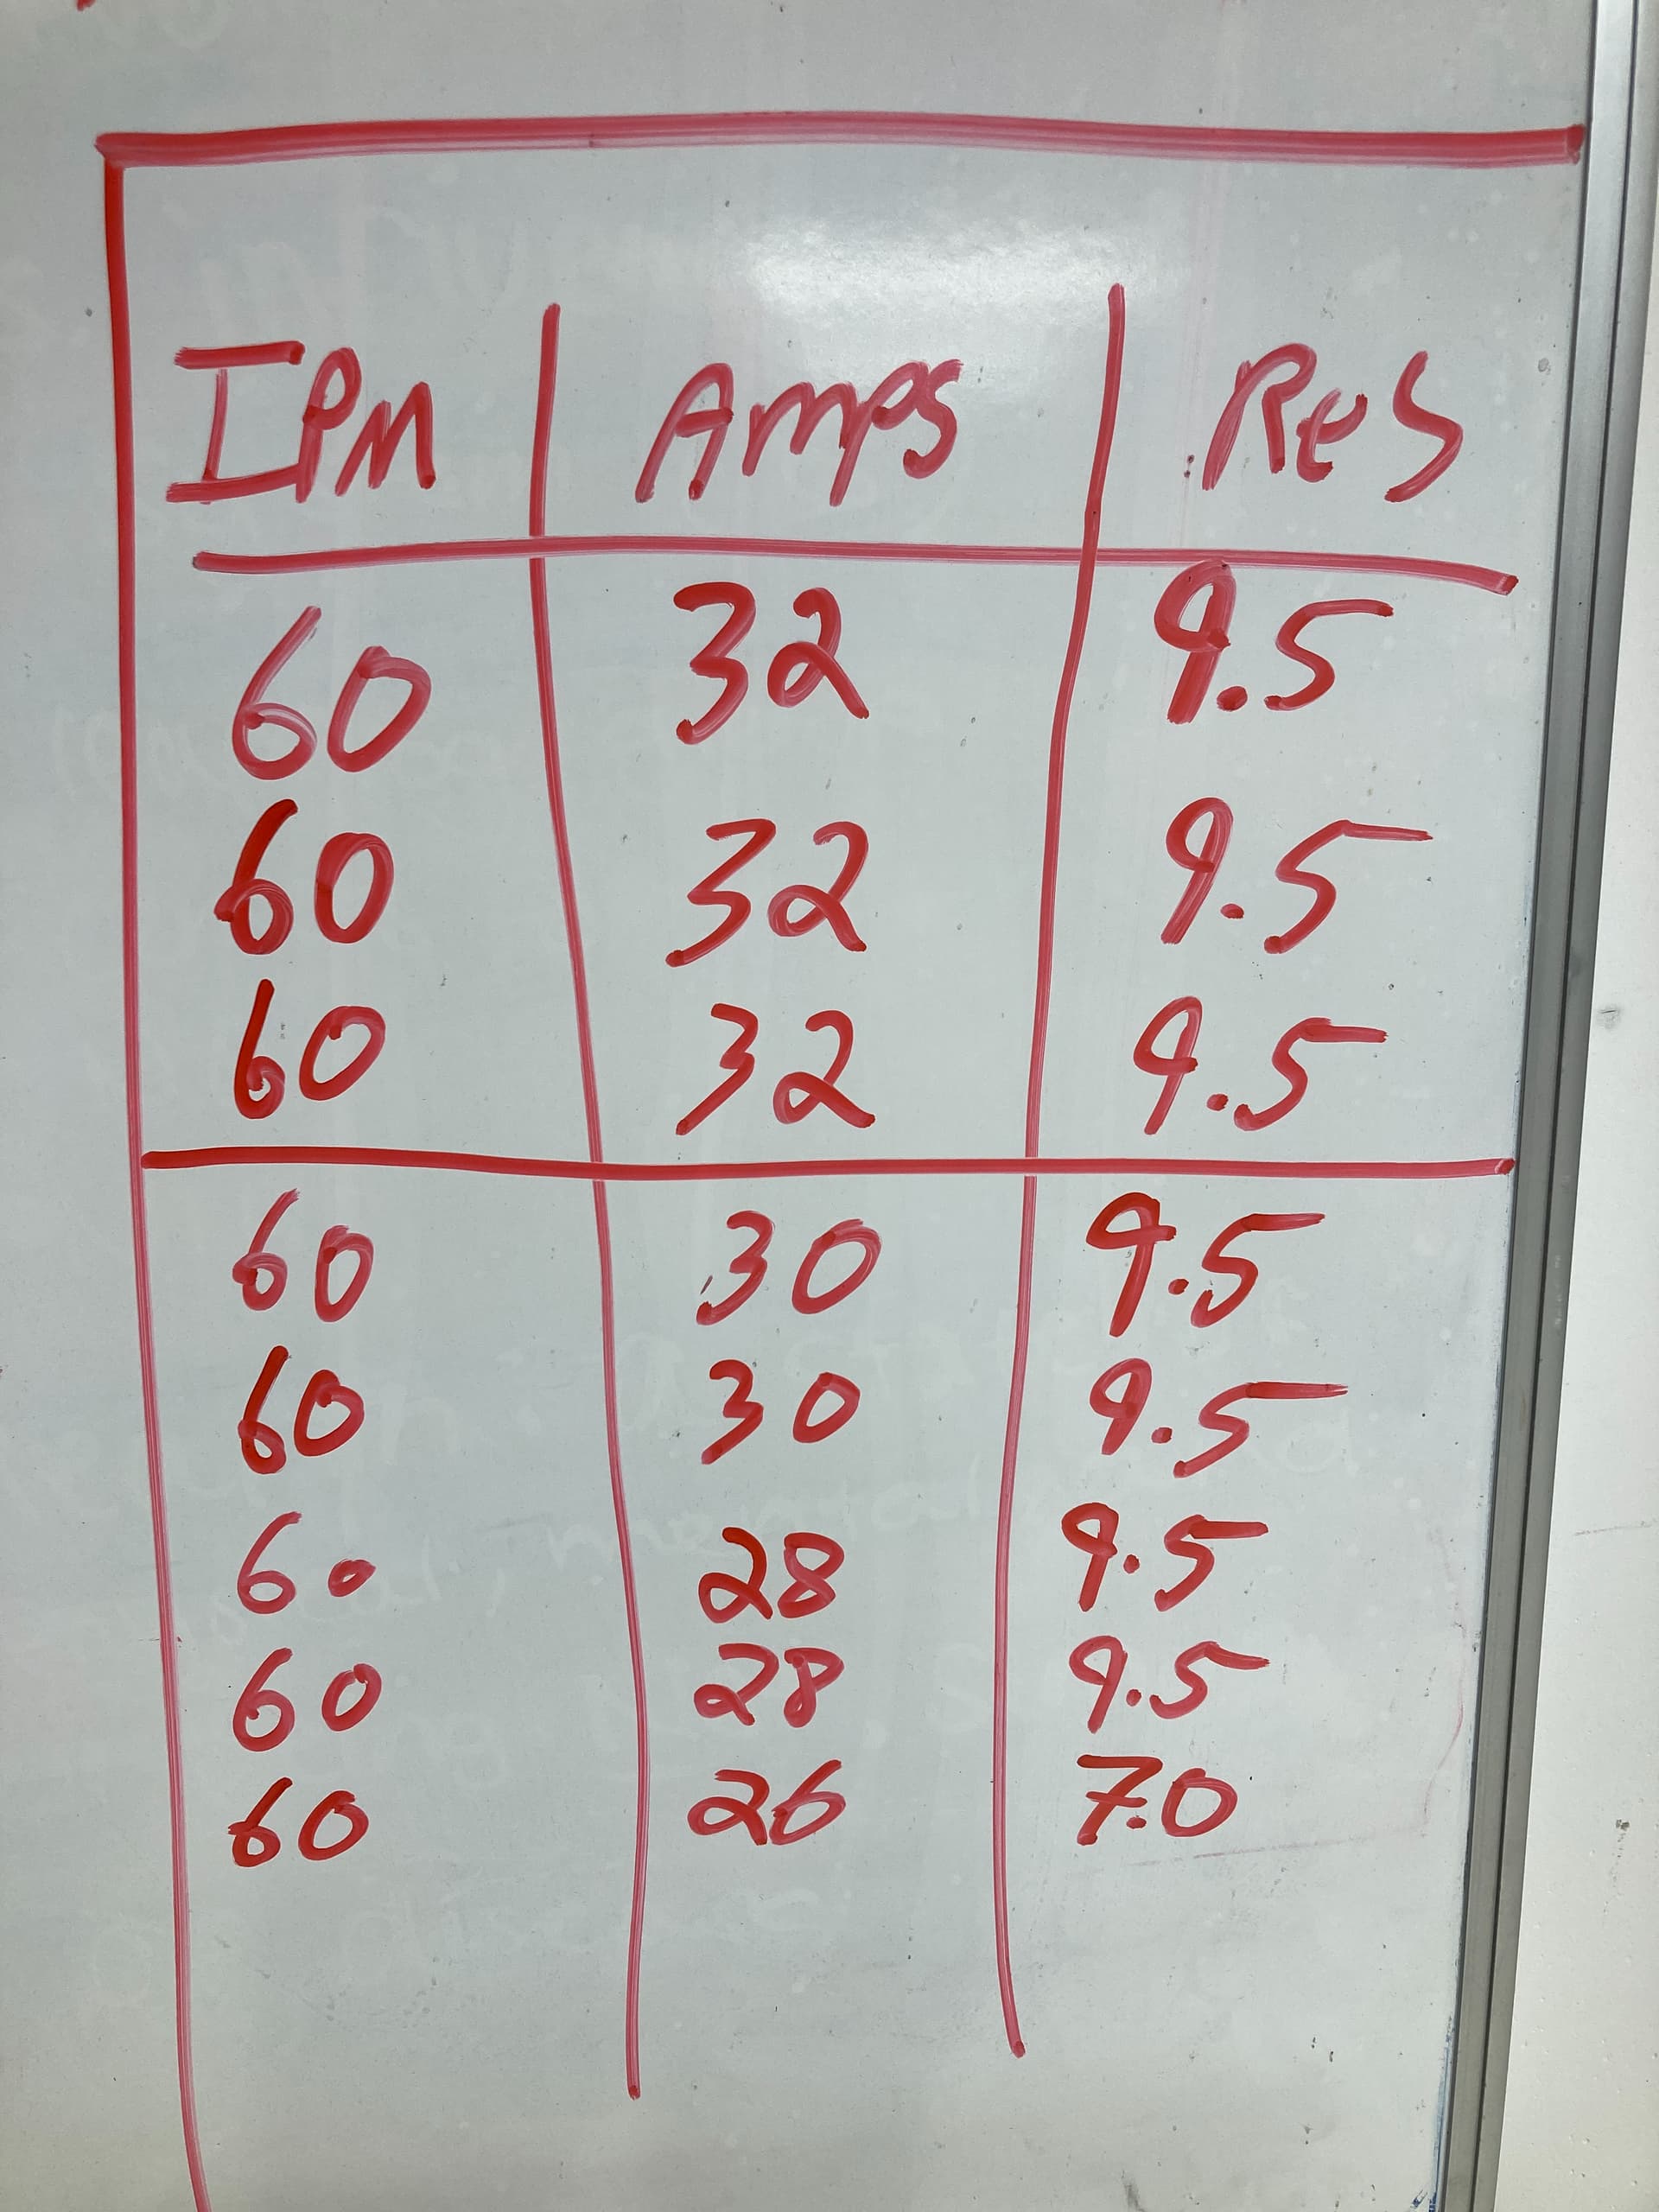
My “data tables” were labeled IPM (inchs per minute), amps, and results…
Now the “results” section is the “grey area”, 1 is really bad and did not cut at all, 10 is the best with “absolutely no dross at all”
Yes, I know it’s totally subjective, and not very scientific, but I found it to be interesting/helpful
I started off with the following specs.
419 pierces
and 40min 19 secs of run time on machine.
My setup is a Razorweld 45, Quincy 60 gallon compressor with a desiccant style dryer that goes into a Moto guard "toilet paper filter.
I started out at 100 IPM, 32 amps and got just ok results. So I decided to start trying some different settings to see what happens.
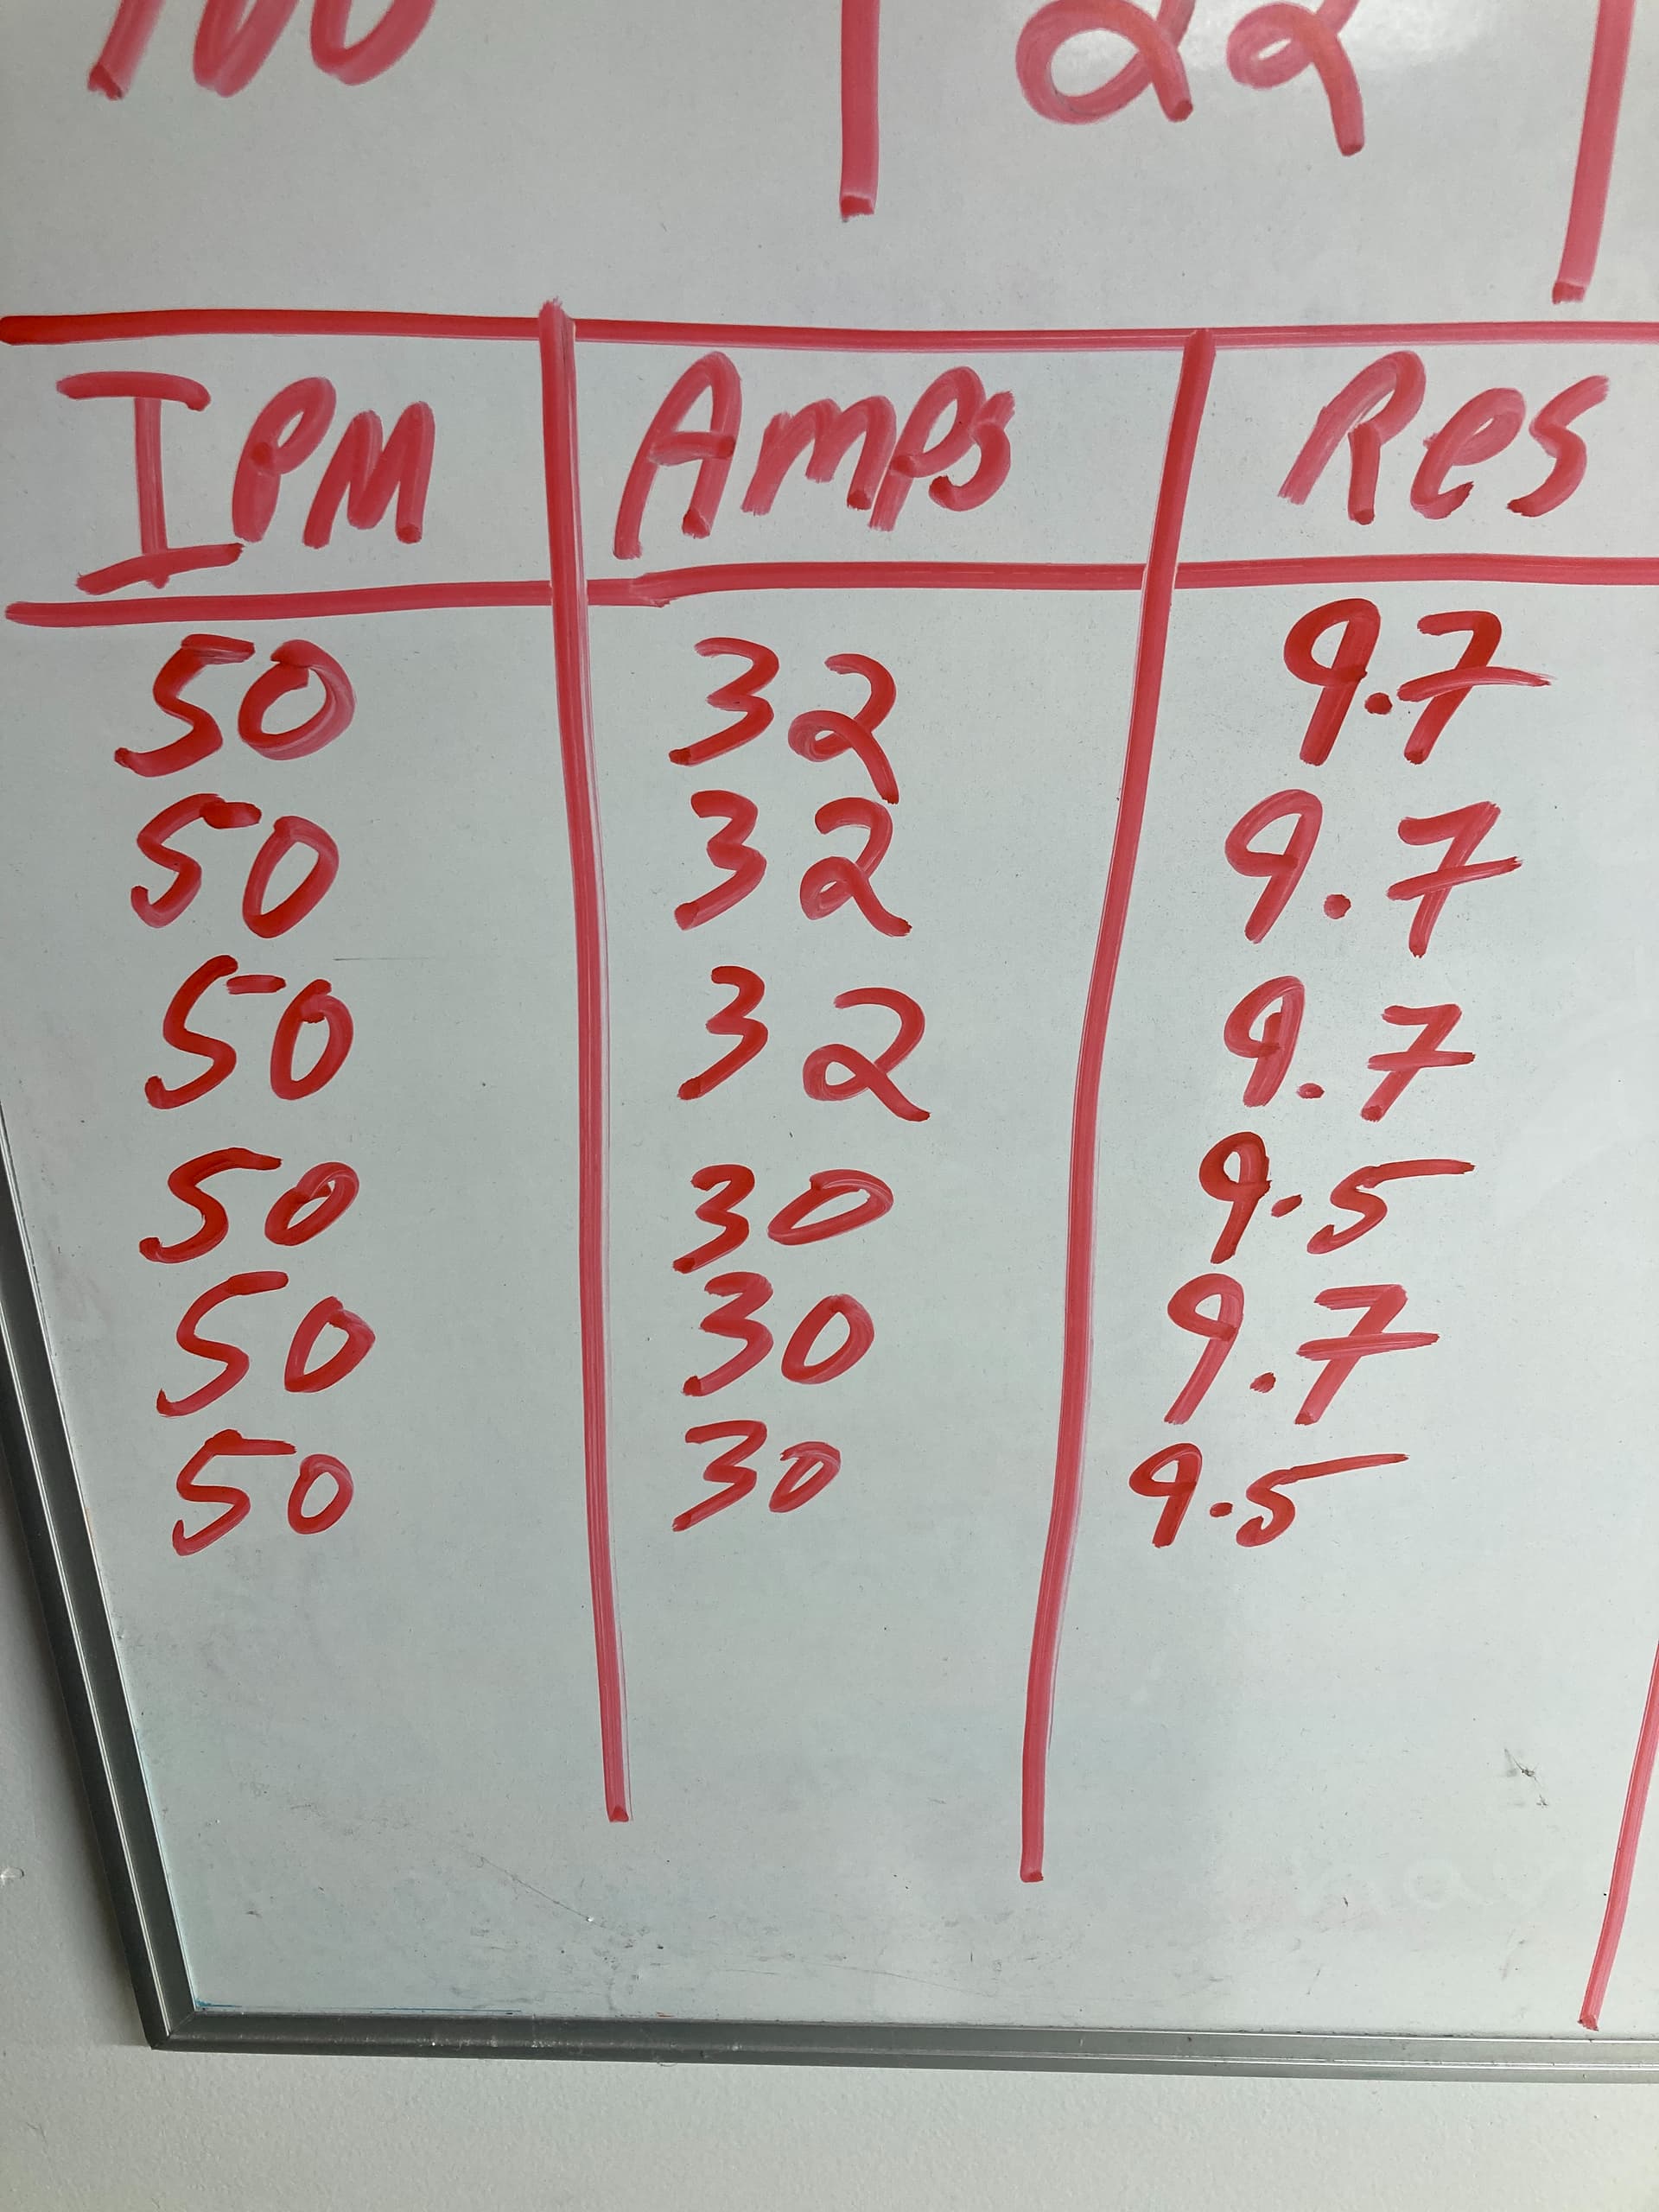
I was a little surprised…It turns out that my best cuts seemed to be at about the 50-60 IPM area and at about 30 -32 amps…My fingernail barely caught it.
The 50-60 IPM sounds pretty low to me, but???
Well here is a look at my white board in the shop with my results.
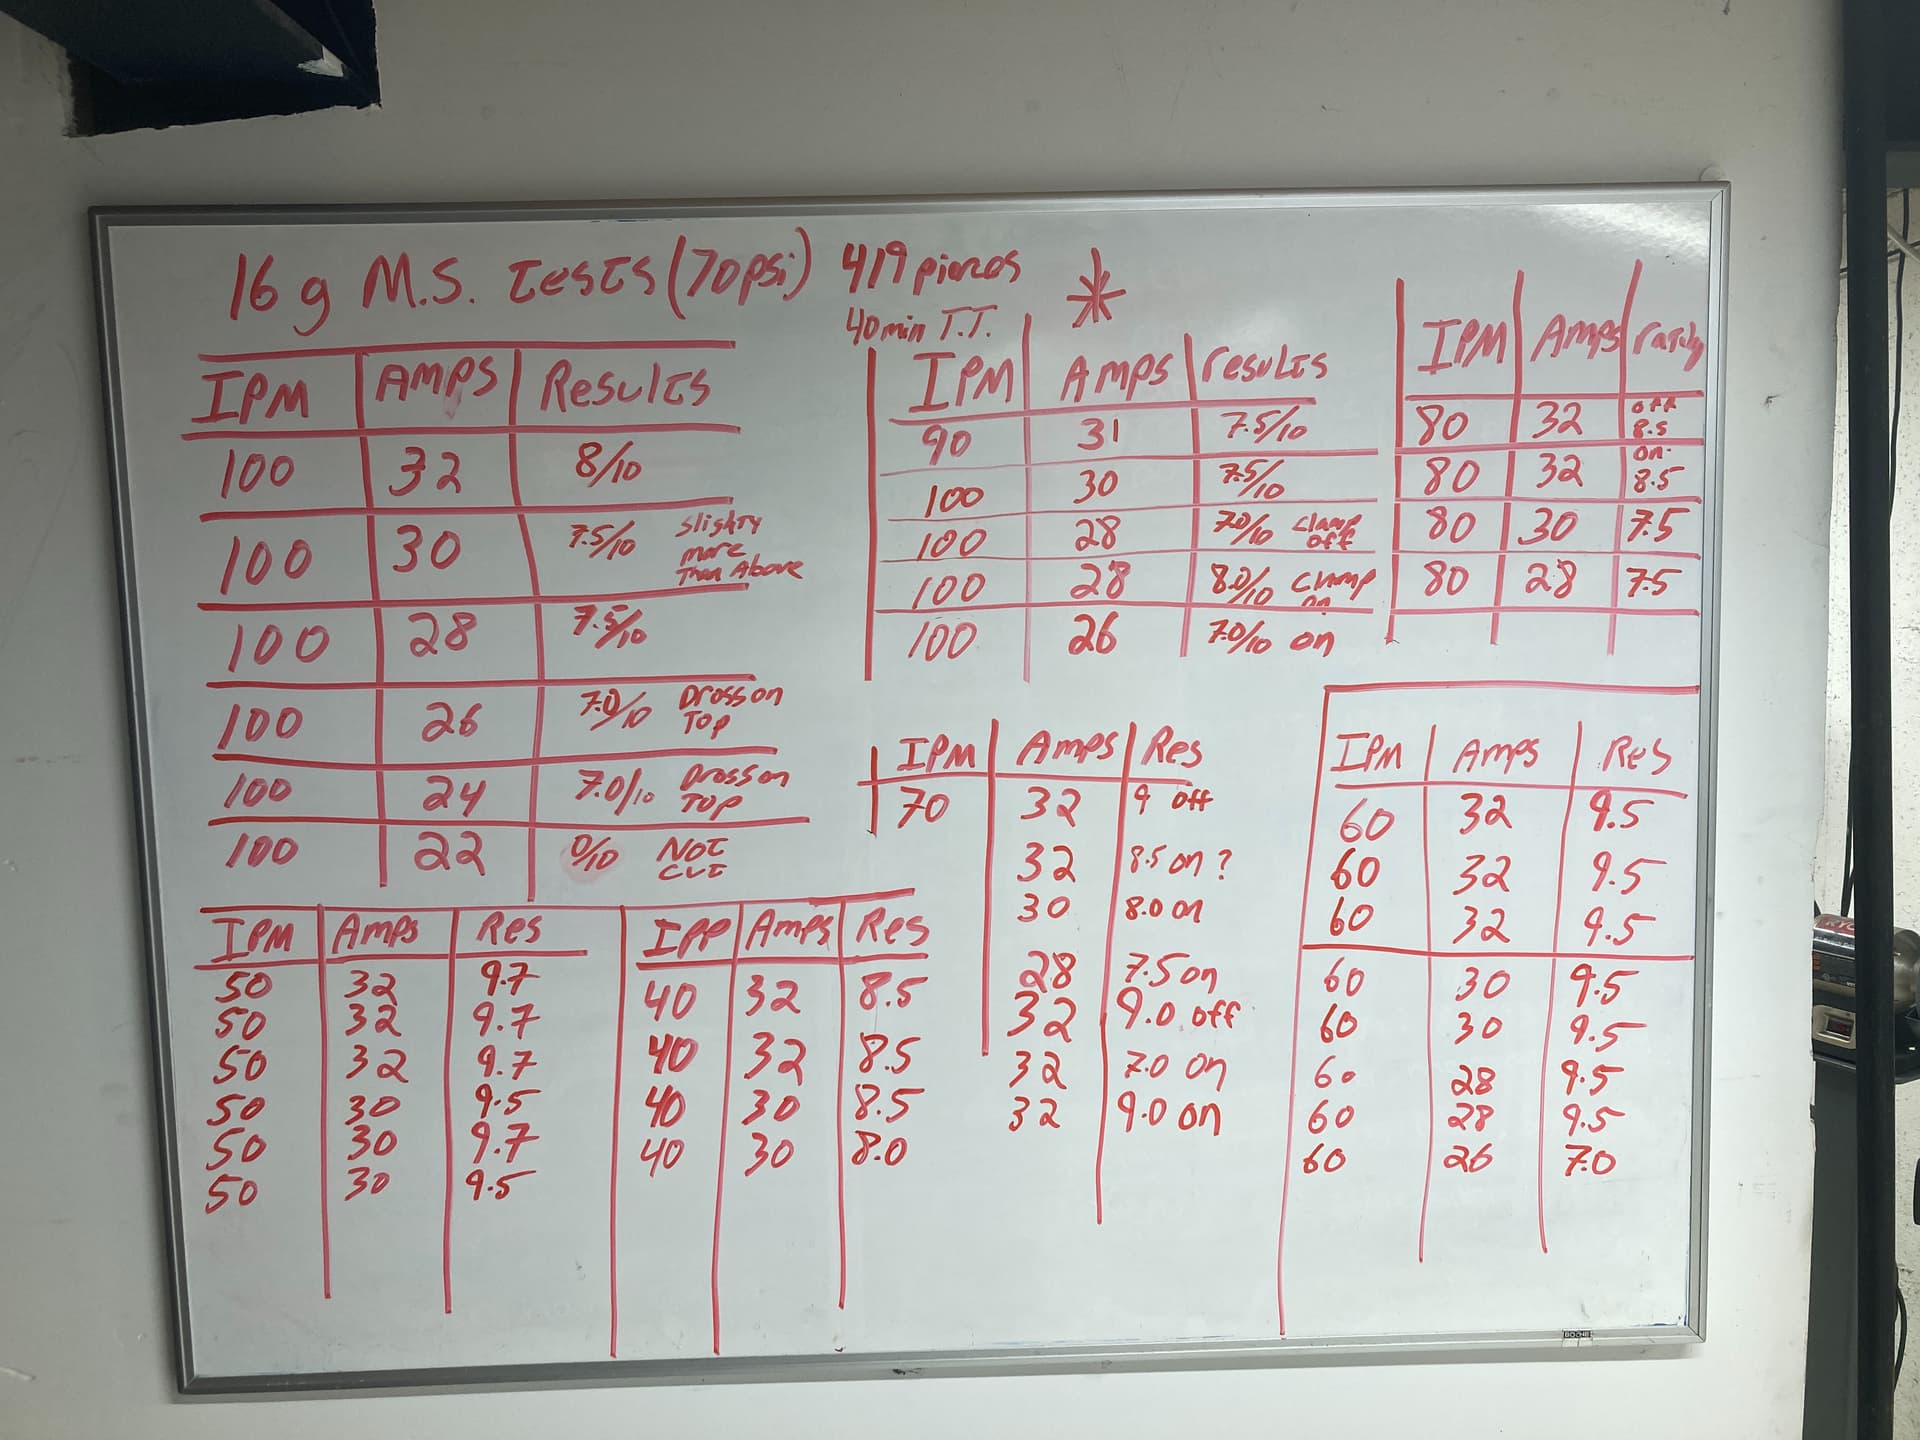
worst.
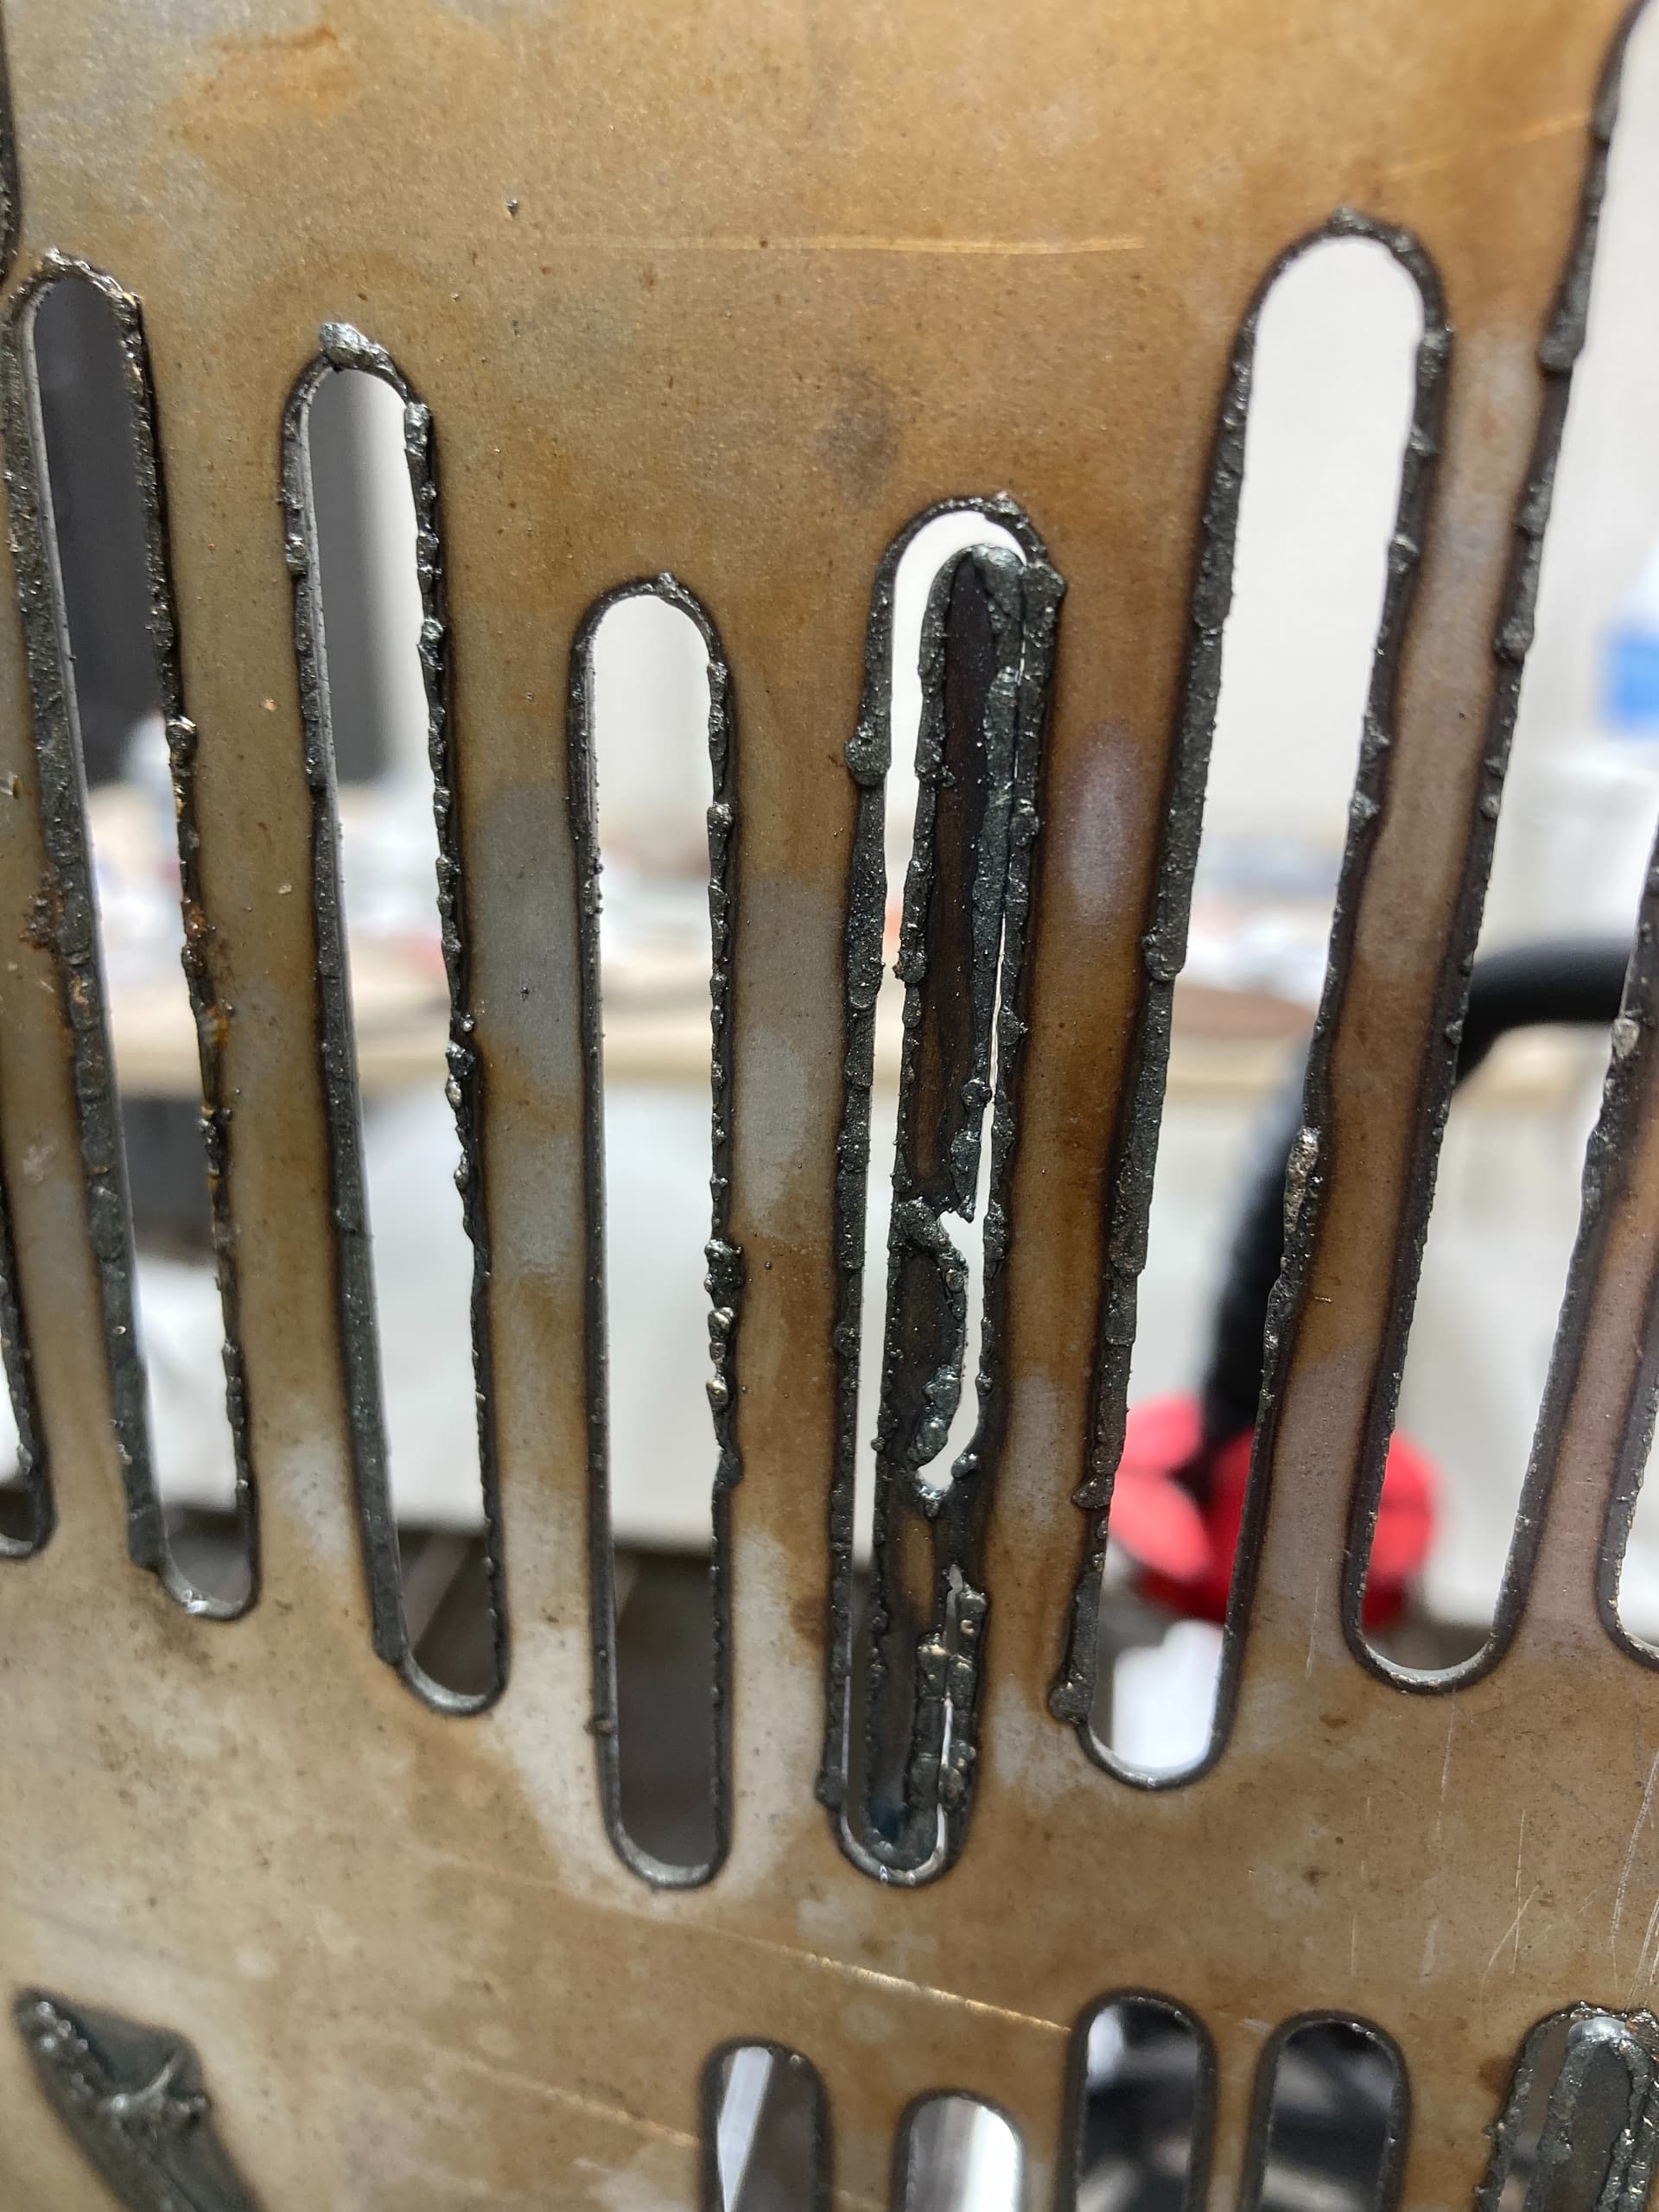
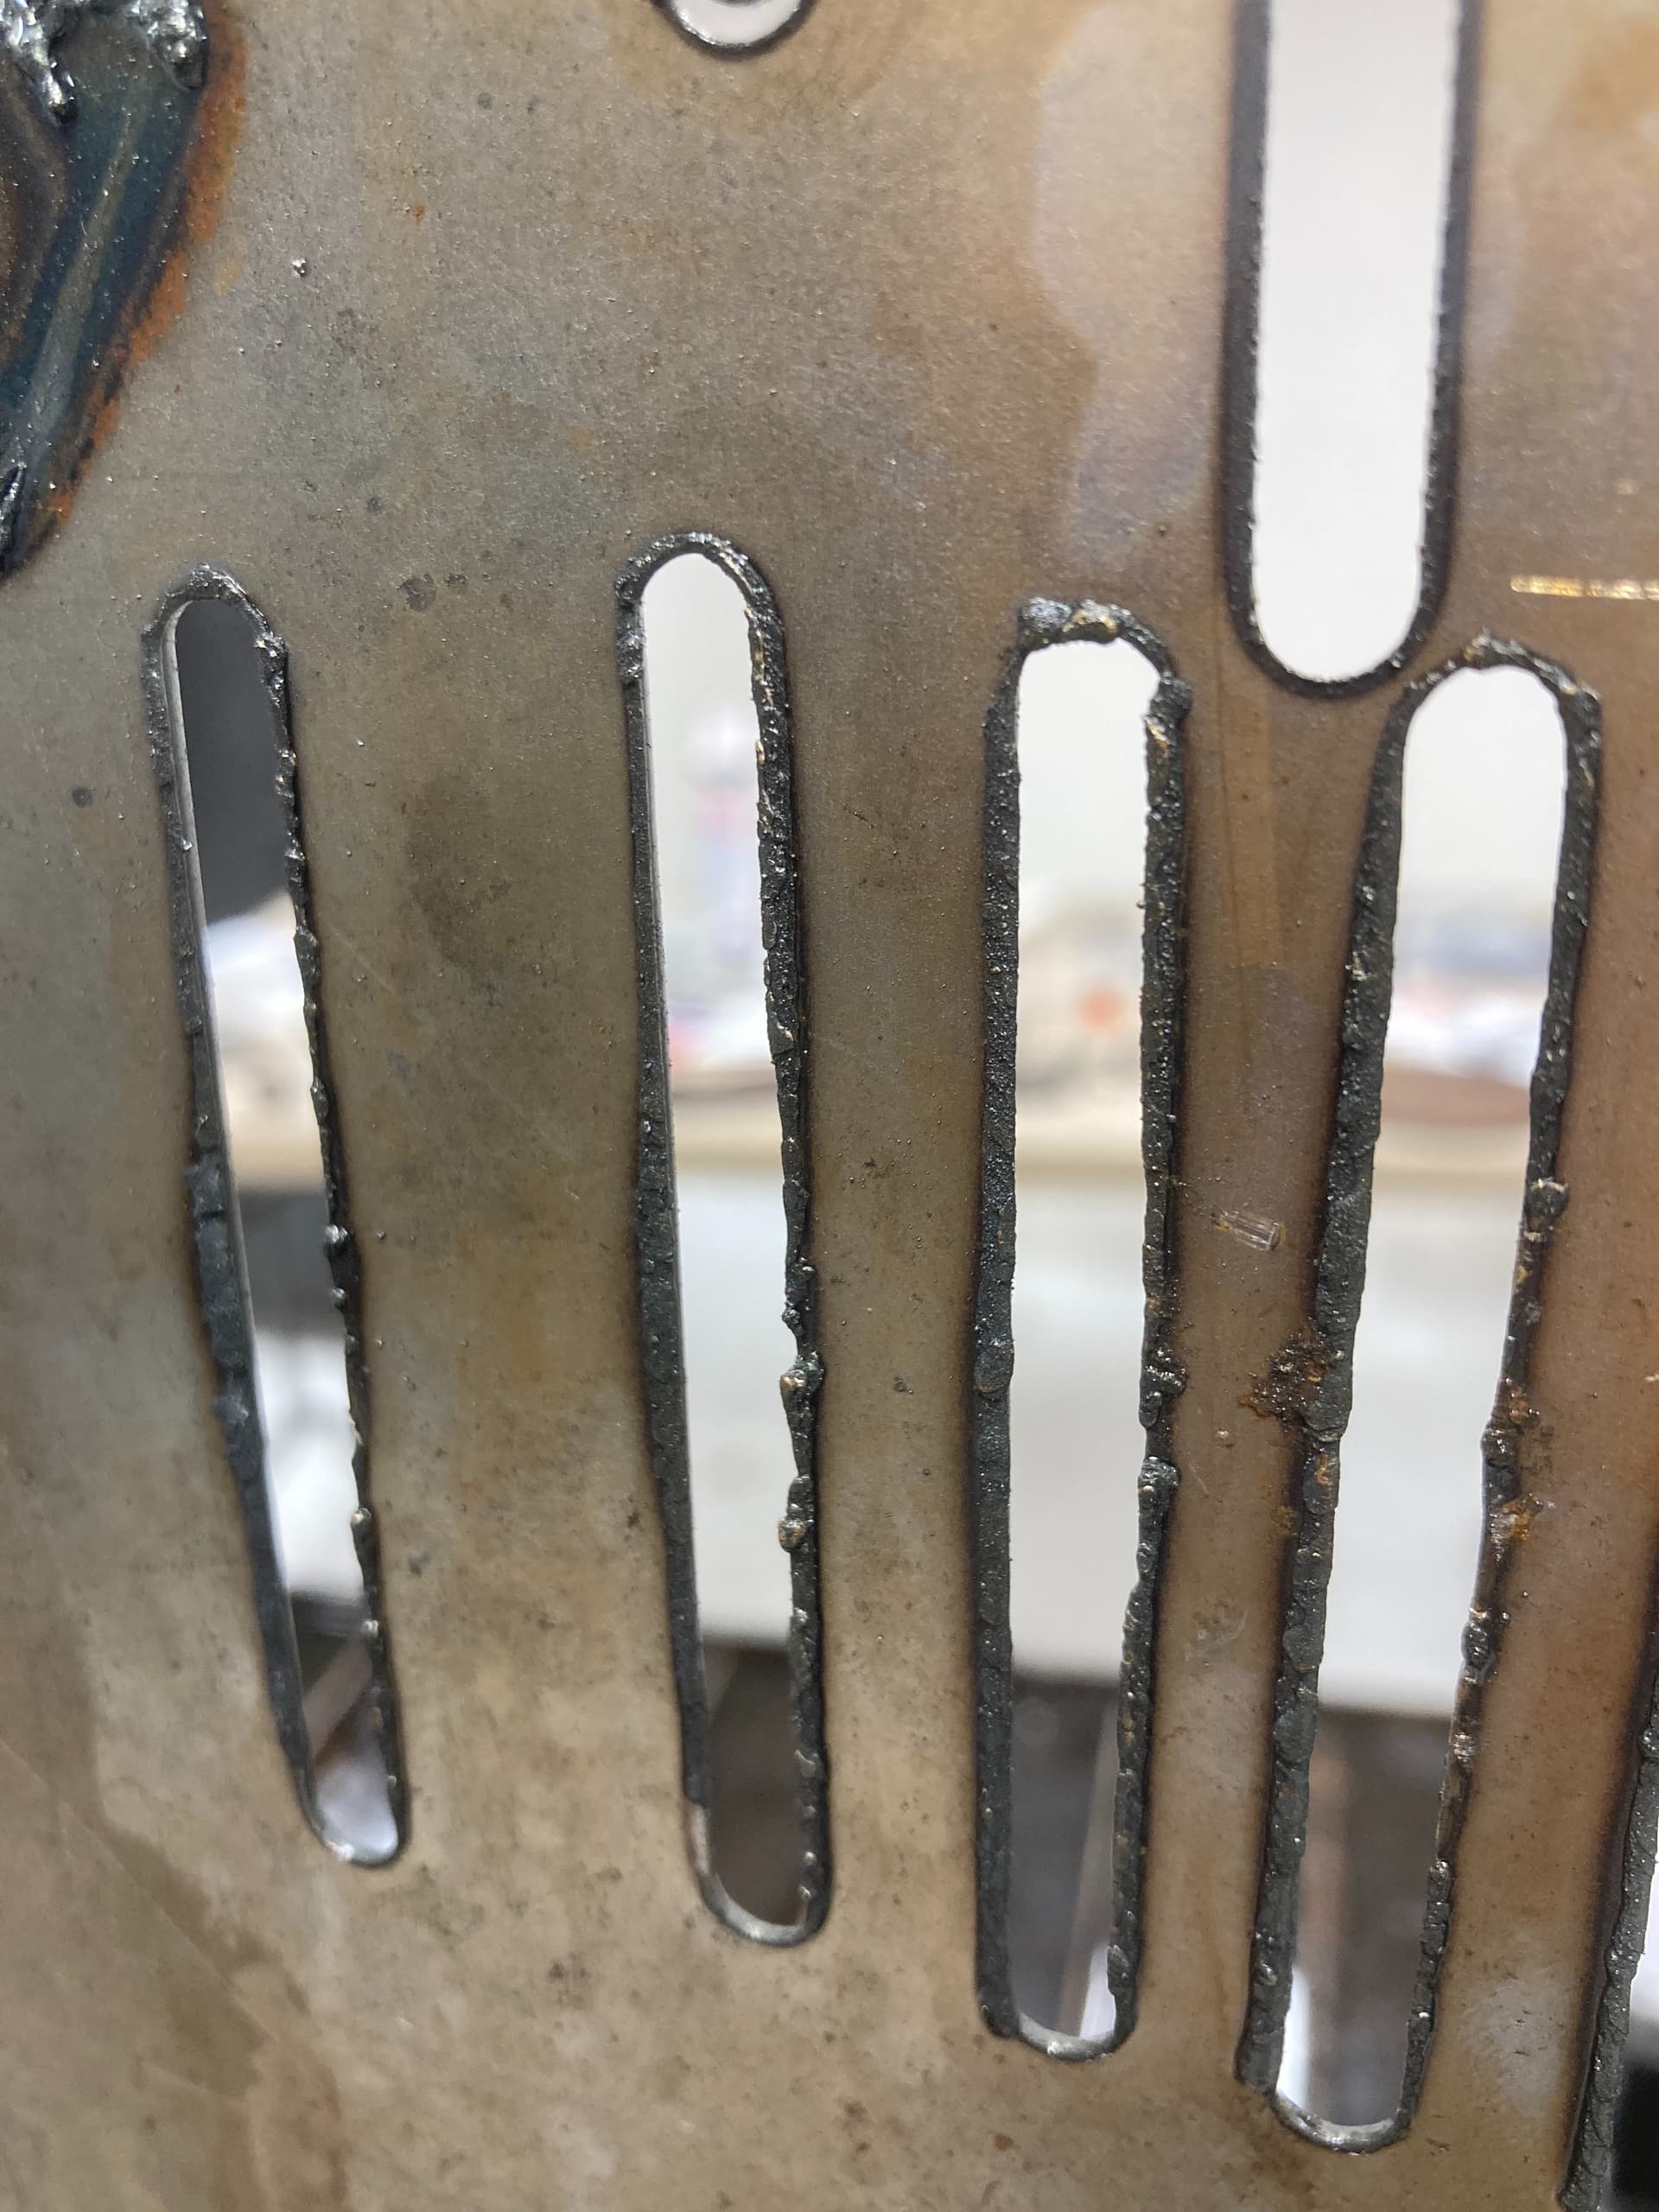
Best

Overall test sheet. Probably about 40 cuts total