Hey guys, first things first.
This is one of the BEST forums I have I ever joined. Along with a great company supporting it. I’ve referred to this forum for questions more then I can even count, and want to say thanks for all the help along the way!
BUT…somethings i cant figure out and its probably because of not fully understanding everything quite yet! I’ve searched in the forums about some of the Font issues I’ve been having but not finding my solution.
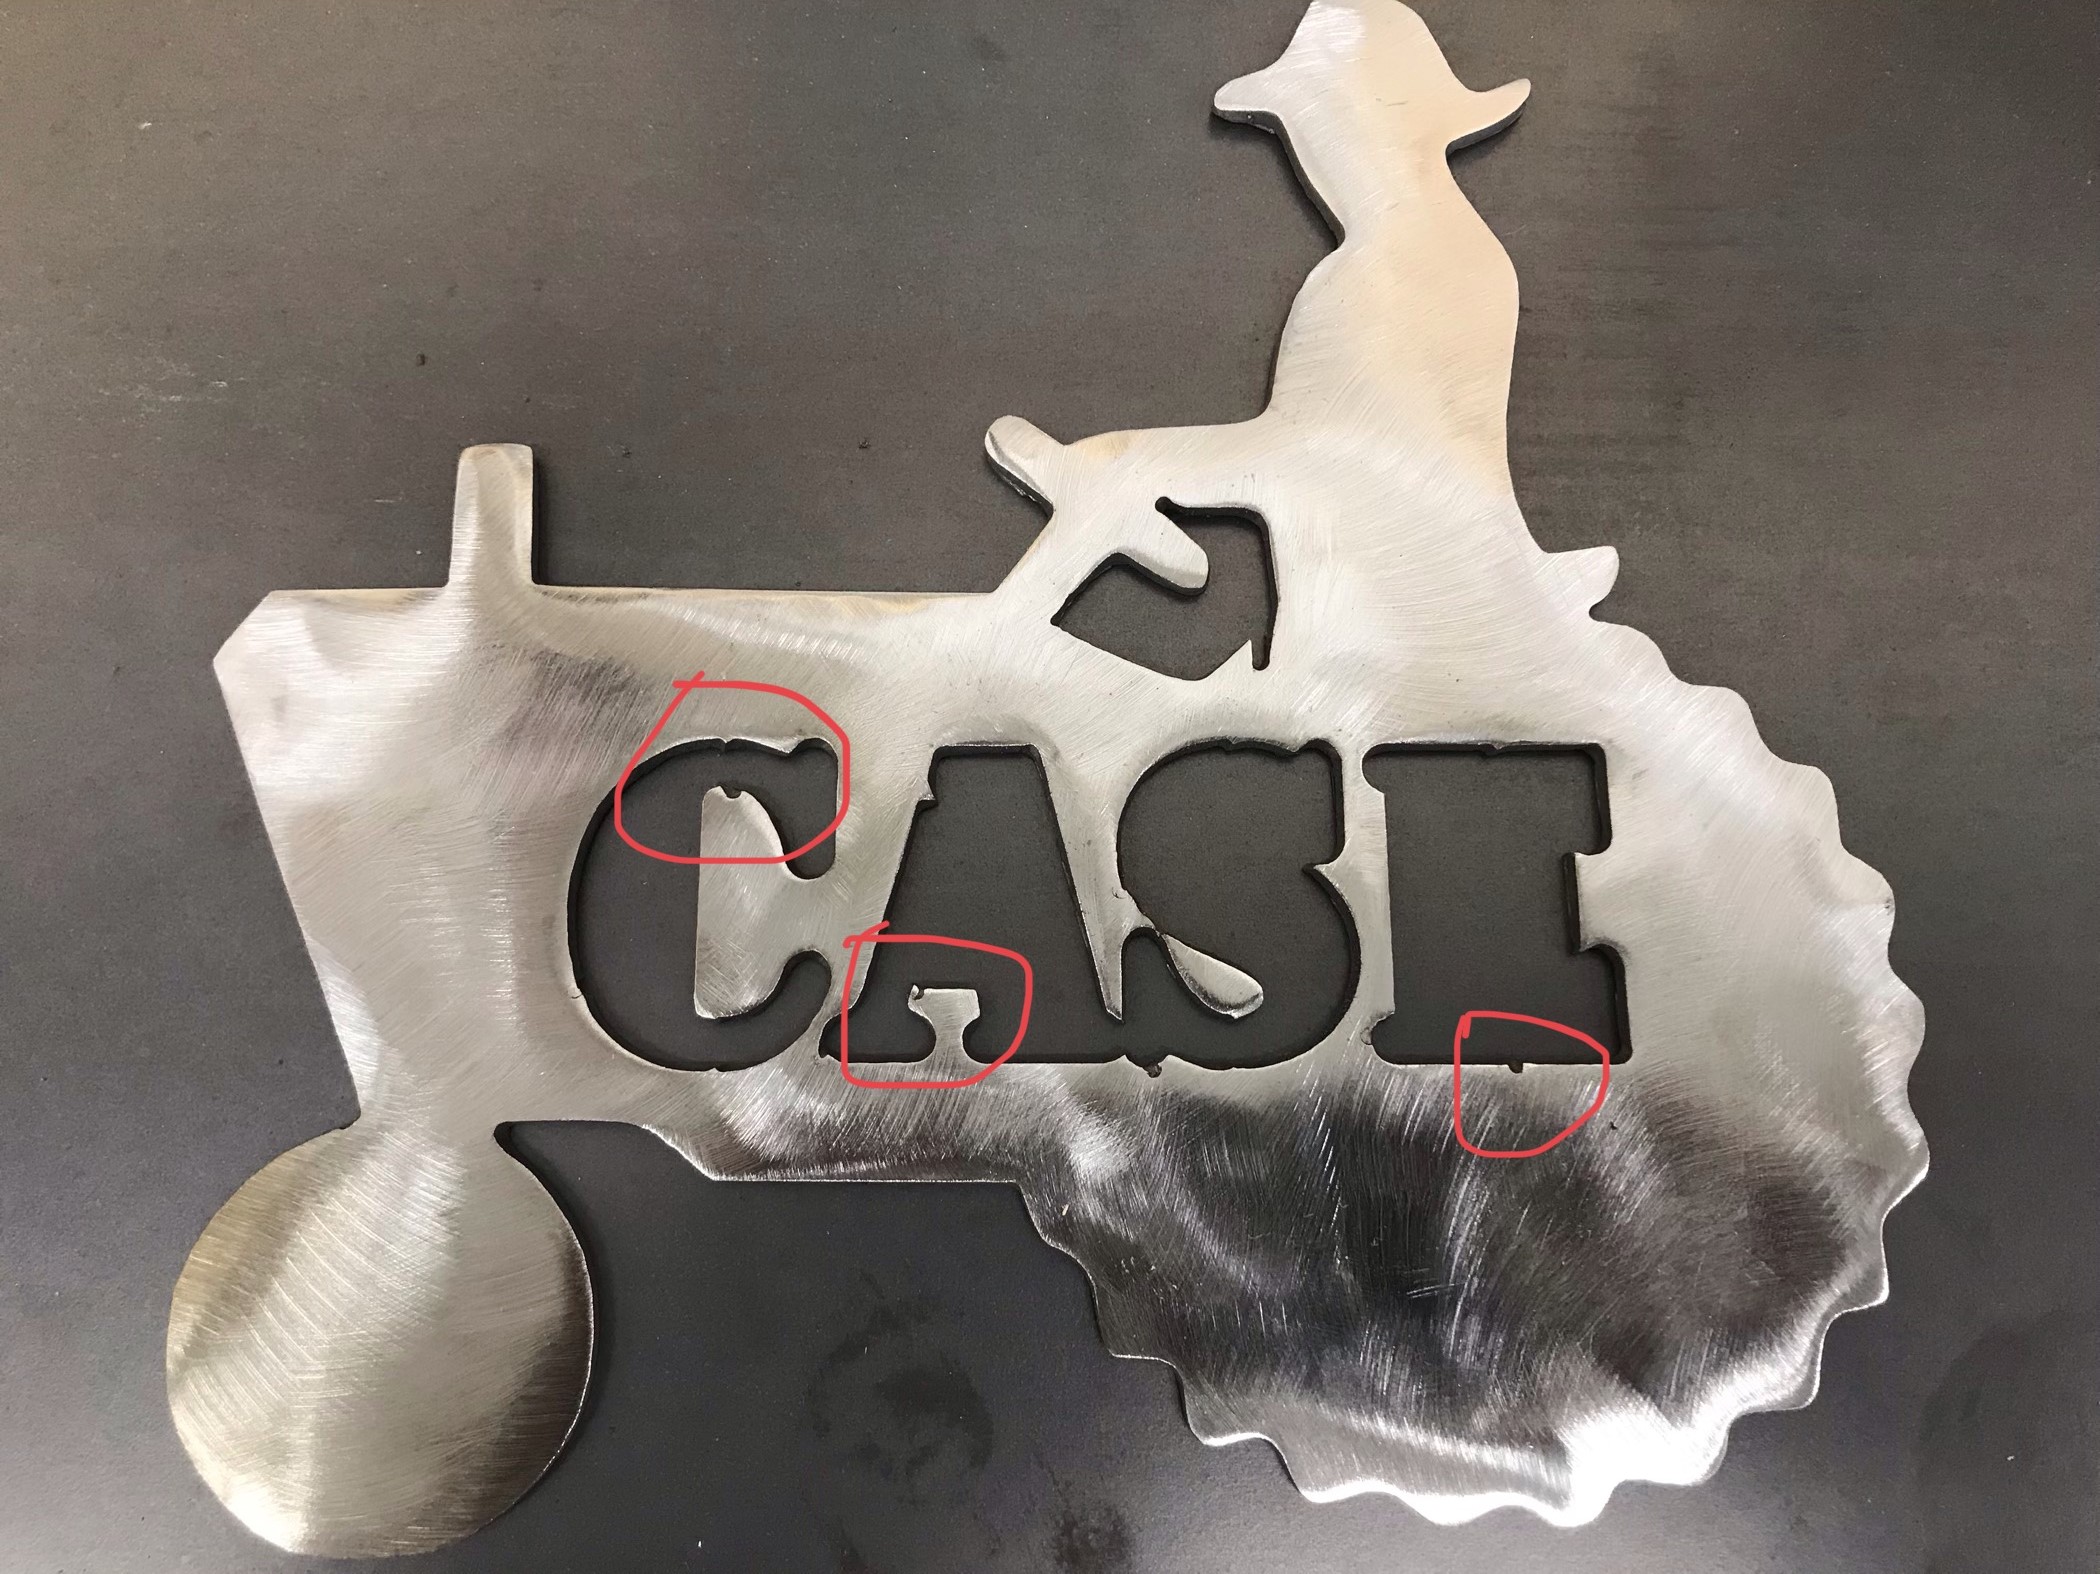
I keep getting small imperfections around my lettering and some corner cuts. And I cant get the stencil font to hold some of the “tabs” to the lettering. I have seen some guys getting some good results with smaller stencil fonts correctly, but i cant get mine to stay. I have attached the most recent cutout I have done to show my issues a little better.
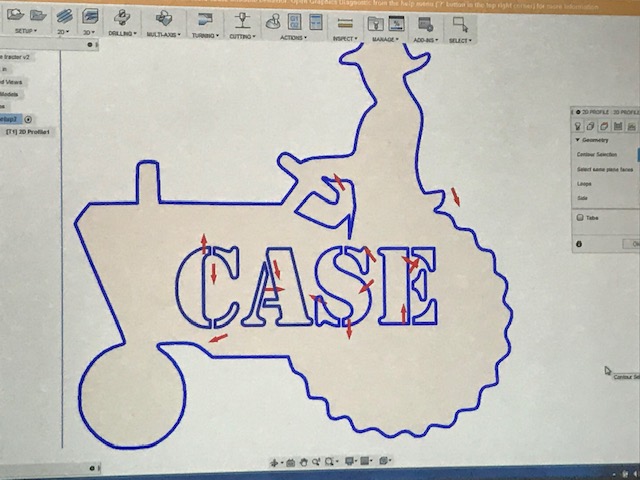
When exploding font in Fusion 360, why can I not scale the font any larger? am i doing something wrong? I have only been able to get it to work by typing the word/name, picking my size font, and then exploding it, or should i try inkscape for lettering?
Dont think you can resize after you explode in fusion.I use inckscape for fonts and most of the artwork stuff and fusion for brackets.I suggest seaching Youtube for trace bitmap and object to path to help you get a grasp on inckscape.I use group and union alot too when dealing with text.In inkscape text has no lines till you select it then use the object to path tool…then after you can highlight the text and the tractor and then use the group tool and save as a dxf or svg.Open that file in fusion.
Also watch your pierce delay too. All of it leads up to or better said, adds up to your settings. Pierce clearance. Material leave etc… I’d also increase your lead in angle more. . I haven’t cut 1/8” yet… thickest I’ve gotten to is close at .111”
what I did to dial it in before cutting my piece was test pieces!
It sucks you have to waste good material but there really is no other option.
I’ve got 16 & and 14 gauge dialed in doing this.
I made a test file of just squares and circles and large and small text fonts
RUn usually about 4-6 cuts / tests changing the settings to yield the least dross and front slag and also see what pierce delay. Leadin/out material clearance etc…
Leaves the least burnout on the pierce points etc…
It’s really the only way to go.
There is a chart for RAZORCUT 45 here on the FORUM. THAT us 45 users are building as we cut projects
Those divets/ burnouts do appear to be your pierce points most likely.
I’ve found to slow a cutting speed and the cutter making direction changes will do that also as the cutter slows a bit in the turns and not moving fast enough cause a burn out in the heat effected area on the turn. Yours are on some flat straight cuts so it’s most likely just your settings need to be tweaked